Minecraft Garden: Build a Thriving In-Game Garden
Learn to design and build an efficient Minecraft garden with soil prep, crop selection, irrigation, and decorative touches. This beginner-friendly guide from Craft Guide walks you through layout, planting, and maintenance to maximize yields in your world.

With this guide, you will design and build a thriving Minecraft garden, from soil preparation to harvesting crops and decorative beds. You’ll need basic tools (a shovel and hoe), seeds, water sources, and a suitable flat area. The steps cover layout, soil, irrigation, crop placement, and aesthetic details—so beginners and seasoned players can optimize yields.
What makes a thriving minecraft garden
A well-designed minecraft garden blends practicality with visual appeal. A thriving garden provides steady harvests while enhancing your base's feel. According to Craft Guide, planning a compact, modular layout makes expansion easy and keeps maintenance manageable, even as you unlock more crops. In a minecraft garden, success starts with clarity: define what you want to grow, where the beds will sit, and how you’ll water them. Start with a simple patch near your home so you can check on it regularly, then expand outward with confidence. Think in sections: a sunlit bed for fast-maturing crops, a shaded corner for root crops, and a small decorative zone that makes the space inviting. When you combine function with form, your minecraft garden becomes a reliable source of food and a satisfying centerpiece for your world. The Craft Guide team found that players who map their beds first spend less time wandering and more time harvesting, especially after you’ve established reliable irrigation and pathing. This approach keeps surprises small and yields steady over time.
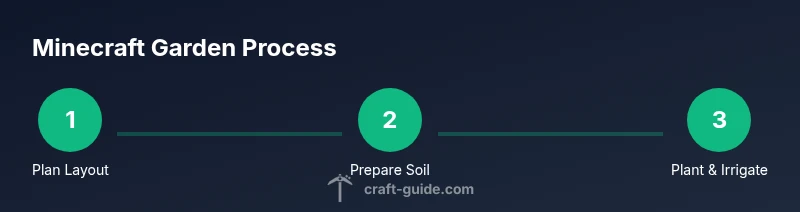
Planning your garden layout
Before placing blocks, sketch a simple layout that prioritizes accessibility and growth potential. Start with a few rectangular beds (3–4 blocks wide per bed works well) arranged in a grid that’s easy to navigate from your main base. Position crops to receive ample daylight, usually facing the sun’s path in your world. Use consistent bed widths and clear borders to make watering, planting, and harvesting straightforward. For a cozy, cohesive appearance, mirror bed shapes on opposite sides of a central pathway and add a small, decorative feature such as a fountain or flower border. Craft Guide emphasizes modular design: components you can extend later reduce the risk of overcommitting resources on day one. Keep a water source nearby to hydrate farmland naturally, and plan a simple irrigation channel that feeds multiple beds at once. A clean layout makes maintenance a breeze and invites experimentation with new crops as you progress.
Soil, crops, and seed selection
Healthy soil is the foundation of a productive minecraft garden. Till dirt to create farmland, then hydrate it with nearby water so farmland stays moist as crops grow. Crop choices typically include wheat, carrots, potatoes, and beetroot, with seeds dropping from each harvest. Wheat can be a reliable early crop because it provides bread and seeds you can reclaim for additional beds. Carrots and potatoes scale well and serve as simple, renewable food sources. Beetroot adds variety and color for decorative beds. Place seeds on tilled farmland, ensuring each bed remains within hydration range of water. If you want faster results, bone meal can accelerate crop growth, though it won’t shorten the full growth cycle. Consider saving some space for a small orchard or tree farm to diversify resources and improve aesthetics.
Irrigation and water management
Irrigation is essential for maximizing yields in your minecraft garden. A nearby water source hydrates farmland within four blocks, so the layout should minimize distance between beds and water. Place a water block in a central position or create shallow channels that feed multiple beds. Avoid leaving farmland dry for extended periods; dry soil reverts to dirt and stalls growth. For maintenance, build simple access routes to water sources and consider adding a drip-edge border with slabs that combine visuals with practicality. Lighting also matters: proper illumination reduces mob interference at night and supports steady crop progression. Craft Guide notes that consistent irrigation routines significantly reduce downtime and ensure crops mature more predictably across seasons.
Aesthetic and functional features
A garden is more than crops—it's a space you want to enjoy. Use fences or low walls to define beds and keep critters at bay, and incorporate gravel or path blocks to create inviting walkways. Decorative touches like lanterns, flower pots, and seasonal crops can add color and personality. Place signs or label posts near beds to indicate crop types, which helps with crop rotation and planning future expansions. Aesthetics also improve village or base integration: matching block styles, colors, and textures creates a cohesive look. Plans that balance function with form tend to yield higher satisfaction and longer-term engagement with your Minecraft garden.
Maintenance, optimization, and common mistakes
Regularly harvest mature crops and replant promptly to maintain a steady supply. Bone meal speeds growth for near-term crops, but rely on passive hydration and sunlight for long-term yields. Avoid over-milling soil by keeping beds compact and accessible, which reduces wasted time and effort. A common mistake is neglecting hydration or leaving far beds far from water, causing uneven growth. Another pitfall is under-lighting nighttime areas, which invites hostile mobs and disrupts progress. Instead, keep paths lit with torches or lanterns and schedule occasional checks to remind yourself to rehydrate soil and prune decorative greenery. With practice, your garden becomes a reliable, low-maintenance resource that adds life to your base.
Authority sources
- University of Illinois Extension: https://extension.illinois.edu
- Oregon State University Extension: https://extension.oregonstate.edu
- U.S. Department of Agriculture NRCS: https://www.nrcs.usda.gov/wps/portal/nrcs/main/national/soils/
Tools & Materials
- Shovel(To till dirt and harvest mature crops)
- Hoe(To till soil for farmland)
- Water bucket(One bucket of water can hydrate multiple farmland blocks)
- Seeds (wheat, carrot, potato)(Start with at least 10 of each; collect from early harvests)
- Dirt or farmland blocks(Base material to shape beds)
- Fences or borders(Optional to define beds and deter mobs)
- Torches or lanterns(Light to deter mobs and aid growth at night)
- Bone meal(Optional crop-growth accelerator)
Steps
Estimated time: 60-90 minutes
- 1
Choose a site
Select a flat, accessible area near your base with good natural light. Avoid crowded spaces that will cause crowding or trampling of crops. Planning ahead saves time later.
Tip: Keep a direct path from your storage area to the garden to speed up future harvesting. - 2
Prepare the soil
Till blocks to create farmland and hydrate nearby beds with a water source. Ensure each bed remains within hydration distance to prevent soil from drying out.
Tip: Place water adjacent to the long edge of each bed to maximize hydration while minimizing block usage. - 3
Plan bed layout
Lay out rectangular beds with clear borders in a grid pattern. Use symmetry to make maintenance predictable and future expansion straightforward.
Tip: Leave a 1-block-wide walking path between beds for easy access. - 4
Plant seeds
Right-click (or use the action key) to plant seeds on tilled, hydrated soil. Group similar crops to simplify rotation and harvest timing.
Tip: Plant multiple crops in one bed to maximize space efficiency and yield per tick. - 5
Create irrigation and light
Ensure a water source services multiple beds and add lighting along paths to prevent mob spawns at night.
Tip: Experiment with shallow channels to feed several beds from a single water source. - 6
Add aesthetics and markers
Install borders, paths, and small decorative features to make the garden inviting and easy to navigate. Label beds to help with crop rotation.
Tip: Use signs or item frames to label each bed with crop type for quick reference.
People Also Ask
What crops should I start with in a Minecraft garden?
Wheat, carrots, and potatoes are reliable early crops that are easy to grow and harvest. They provide steady food supplies and seed returns for expanding beds.
Wheat, carrots, and potatoes are great starter crops because they're easy to grow and harvest.
Do I need to water farmland in Minecraft?
Farmland stays hydrated within four blocks of a water source. Plan beds so water is nearby, preventing soil from turning back into dirt.
Farmland stays hydrated near water, so plan your beds with water nearby.
How big should my garden be?
Start with a small, manageable patch near your base and expand as you collect seeds and resources. Avoid overextending early on.
Start small and grow your garden as you gather seeds and resources.
What are good decorative ideas for a Minecraft garden?
Add fences for borders, create defined paths with path blocks, and place lanterns or torches for ambiance and nighttime visibility.
Use fences, paths, and lights to make your garden inviting.
How can I protect crops from mobs?
Light the area, fence in beds, and close gates to prevent mobs from trampling crops at night.
Keep your garden safe with lights and fences.
Where can I learn more about Minecraft gardening?
Check community guides and university extension resources for farming basics and design ideas you can adapt to Minecraft.
Look up community guides and university extensions for farming basics.
Watch Video
The Essentials
- Plan beds before planting and keep paths clear.
- Hydrate soil to maximize growth and yields.
- Combine function with aesthetics for lasting appeal.
- Expand gradually to maintain manageability.