Farming Sugarcane in Minecraft: Practical Beginner Guide
Learn how to farm sugarcane in Minecraft with practical layouts, water placement, and simple automation. This guide covers beginner-friendly steps for a sustainable sugar supply, plus tips for scalable versions and efficient harvesting.

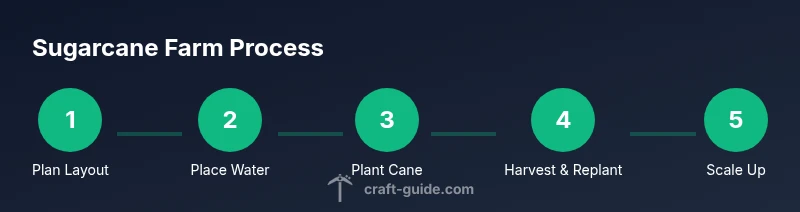
Learn how to farm sugarcane in Minecraft efficiently. You'll arrange water sources, choose the right planting surfaces, and implement a simple harvest system that scales with your farm. This guide covers practical layouts, growth timing, and beginner-friendly automation to boost your sugar production while keeping your build compact and safe.
What sugarcane does in Minecraft and why it matters
In the world of farming sugarcane minecraft, this crop stands out for reliability and versatility. Sugarcane can be grown almost anywhere so long as water is nearby, making it an excellent candidate for scalable farms near your base. The primary products are sugar and paper, both of which unlock key crafting options—sugar for baking and potions, paper for maps, books, and enchantment tools. A small, well-placed sugarcane plot can produce a steady stream of resources as you expand your operations. According to Craft Guide, sustainable sugarcane farming grows from a compact starter plot into a scalable system that evolves with your needs. The crop’s growth is relatively simple: as long as water is present, the cane will progress upward over time, allowing you to harvest and replant without complicated mechanics. This makes farming sugarcane minecraft an accessible, highly valuable skill for players at any level.
Growth mechanics and water adjacency
Sugarcane requires water within one block horizontally to grow and is placed on dirt, sand, or grass blocks. It can reach a height of up to three blocks, but it does not require farmland, which makes it easy to lay out on a flat patch near a river or a crafted water channel. Growth occurs through random ticks, independent of day-night cycles, so consistency comes from ensuring water proximity and a continuous planting surface. Light helps with visibility and growth timing, but it’s not a gating factor for sugarcane the way it is for some crops. By maintaining a steady water source next to every row of cane, you ensure reliable growth across your entire field. This block outlines how to plan your layout to maximize space while keeping maintenance simple.
Layouts that maximize space and yield
To maximize yield without overcomplicating your build, consider simple, scalable layouts. A classic starter design uses a shallow water canal running alongside a straight row of blocks (dirt, sand, or grass) where sugarcane is planted. Each block of sugarcane should be adjacent to water on at least one side. For larger farms, create multiple 1-block-wide planting lines running parallel to a central water canal, or use a checkerboard pattern with embedded water sources to keep every cane within one block of water. Keep paths between rows wide enough to walk and harvest, and plan for expansion by leaving extra space at the ends. The goal is a layout that’s easy to extend as you accumulate more sugarcane blocks and you unlock better storage options. Craft Guide’s analysis shows that modular layouts are simplest to replicate across your base, making maintenance and expansion straightforward.
Building a starter layout: manual farming in a few straightforward steps
A practical starter farm can be built quickly with a water source and a row of planting blocks. Start with a 5-block-long strip: place water in the center or at one end, then plant cane directly along the other side. Repeat to create multiple lanes, ensuring every cane has water within one block. Clear surrounding grass and tall vegetation to minimize ticks and distractions, and keep your area well-lit for visibility. The emphasis is on reliability and simplicity rather than advanced automation—perfect for beginners who want steady progress before tackling complex redstone systems.
Maintenance, harvesting, and how to scale over time
Harvest cane by breaking the top blocks, allowing lower sections to continue growing. Replant immediately after harvesting to maintain continuity. As your patch grows, consider adding more lanes or expanding into a grid. When you’re ready for automation, you can explore redstone-based harvesters or water-powered collection to reduce manual work. The most important habit is consistent replanting and connecting new sections to your existing water sources for uninterrupted growth. This approach keeps your sugarcane farm productive as you advance in the game.
Tools & Materials
- water bucket(Use to create or refill water sources adjacent to cane plots)
- blocks for planting (dirt/sand/grass)(Provide a continuous strip for sugarcane to grow on; dirt, sand, or grass all work)
- sugarcane(Bring enough to start your patch; you’ll replant after harvesting)
- shovel(Clear vegetation and prepare the ground as needed)
- hopper (optional for automation)(Can be used later for item collection if you automate harvesting)
- torches or lanterns(Provide good lighting to deter mobs and improve visibility during harvest)
Steps
Estimated time: 15-25 minutes
- 1
Gather supplies and choose a site
Collect water, sugarcane, planting blocks, and a shovel. Pick a site near existing structures or a water source to minimize travel time and maximize harvest efficiency.
Tip: Plan for expansion now—leave extra space on each side for future lanes. - 2
Clear the area and mark lanes
Remove tall grass and debris. Mark a straight line for your initial cane rows, leaving room to add more lanes later.
Tip: Use a consistent distance between lanes (one block) to keep maintenance simple. - 3
Create water sources along the patch
Place water sources so every cane block is within one block of water. You can run a single canal adjacent to your planting strip or place individual water blocks at the ends.
Tip: Avoid placing water directly under cane; keep the surface dry so cane can grow on the block above. - 4
Plant the sugarcane
Plant cane directly on the dirt/sand/grass blocks that border your water source. Space isn’t needed between canes, but ensure each plant has access to water.
Tip: Place cane in straight lines for easier harvesting and future automation. - 5
Harvest and replant the first batch
When canes reach a height you’re comfortable with, break the top block to harvest and immediately replant at the base to continue production.
Tip: Harvest in a consistent pattern to keep rows organized and easy to manage. - 6
Expand or automate as you grow
Add more lanes to scale up production, and consider simple automation like a hopper or observer-based system when you’re ready for technical steps.
Tip: Start small with a single automated section before expanding across the entire farm.
People Also Ask
What is the best block to plant sugarcane on?
Sugarcane must be placed on dirt, sand, or grass blocks and needs water within one block to grow. Any of these blocks work; choose based on your landscape.
Plant sugarcane on dirt, sand, or grass with water nearby for best growth.
Does sugarcane need light to grow?
Sugarcane grows with adequate light, but growth is driven by block ticks near water rather than light levels. You don’t need intense lighting for it to grow.
Sugarcane grows with light, but growth mainly depends on ticking near water, not brightness.
Can I automate sugarcane farming with redstone?
Yes, you can automate harvesting using observers and pistons or alternative redstone mechanisms, but it’s more advanced. Start with a manual farm and add automation as you gain comfort with redstone.
Automation is possible, but it’s a step up from basic farming. Start small.
How tall can sugarcane grow?
Sugarcane can grow up to three blocks tall under typical conditions.
Sugarcane grows up to three blocks tall.
What’s a simple starter layout for a beginner?
A straightforward starter layout is a single water channel with several rows of planting blocks on the side. Expand by adding adjacent lanes as you gather more materials.
Start with a single water channel and a few planting rows, then expand later.
Watch Video
The Essentials
- Place sugarcane next to water for growth
- Keep layouts simple and scalable
- Replant immediately after harvesting
- Expand gradually and consider automation when ready