How to Build an Auto Farm in Minecraft
Learn to design and implement a sugar cane auto farm in Minecraft that harvests and collects automatically. This comprehensive guide covers layout, redstone wiring, testing, scaling, and optimization for survival worlds with clear, actionable steps.

In this guide you will learn how to build a sugar cane auto farm in Minecraft that harvests and collects automatically. You'll need sand, water, sugar cane, pistons, observers, redstone, and collection chests. We'll cover layout, wiring, testing, and scaling for survival worlds. This approach is beginner-friendly yet scalable for larger bases, aligning with Craft Guide's practical, easy-to-follow style.
What is an auto farm in Minecraft and why use one
In Minecraft, an auto farm is a redstone-powered structure that automatically harvests and/or collects crops, mobs, or other resources, reducing manual clicks and time. For many players, auto farms translate to a steady resource flow, allowing them to focus on building, exploration, or complex redstone projects. Craft Guide's approach blends practical layouts with scalable strategies, making automation approachable for beginners while offering room to optimize for performance. According to Craft Guide, auto farming saves farming time in survival worlds and helps players keep up with large builds that require constant supplies. This makes it easier to sustain farms during long building sessions or exploration trips, especially when you’re setting up a compact base near a central storage area.
Sugar cane auto farm: a practical starter design
Sugar cane is an ideal entry point for automatic farming because it grows predictably next to water and doesn’t require farmland. A compact auto cane farm uses a row of sand or dirt adjacent to water, plus a simple collection system for harvested cane. The core idea is to detect when the cane grows and to trigger a mechanism that breaks the top block, allowing the drop to flow into a water stream and into a hopper or chest. This design is forgiving for newcomers and scales well as you add more rows. The Craft Guide team recommends starting with a single strip and a modest collection system to confirm the behavior before expanding to multi-row layouts. With careful spacing and reliable wiring, you can build a compact farm that runs in the background while you build other projects.
Core components and redstone basics
A sugar cane auto farm hinges on three main categories: growth detection, actuation, and collection. Growth detection is typically achieved with an observer block that senses cane growth. Actuation uses a piston to break the mature cane, allowing it to drop as item drops. The collection path usually relies on a water channel that pushes drops toward a hopper and chest. Redstone dust ties the system together, carrying the signal from the observer to the piston. Building blocks provide the tower structure and support for wiring. Understanding these components helps you optimize for reliability and space efficiency, and it makes it easier to troubleshoot if something malfunctions. In short, a solid grasp of the basic redstone loop is the key to a dependable auto farm.
Step-by-step overview of a sugar cane auto farm (high-level)
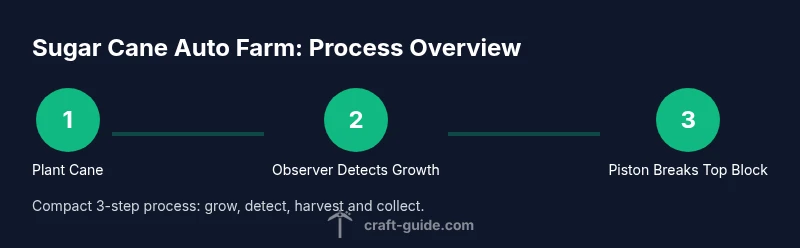
A typical sugar cane auto farm follows a simple flow: cane grows along sand blocks, an observer detects growth to a certain height, the signal activates a piston to harvest, and harvested cane drops are carried by water into a collection system. The system is designed to be modular, so you can add more rows or height without reworking the entire wiring. This approach minimizes lag and makes future expansions straightforward. For beginners, starting with a single module helps you learn the timing, spacing, and placement without becoming overwhelmed. Craft Guide emphasizes keeping the layout compact to reduce redstone complexity while preserving reliability.
Scaling up and optimizing for compact builds
Once the basic design works, you can scale by adding more cane strips, stacking sections, or linking several farms to a single collection line. The most important optimization is consistent spacing: keep rows separated by at least one block to prevent pistons from interfering with adjacent lines. Use glass or blocks as a non-mob-friendly boundary to avoid accidental crowding. If you’re playing in multiplayer or on a large world, consider chunk loading: place farms within loaded chunks to maintain consistent harvest rates. A well-planned expansion maintains performance while increasing output.
Common pitfalls and troubleshooting
Common issues include misaligned observers, pistons that don’t reach the correct cane height, or collection channels that clog. Ensure the observer faces the correct block and that the piston can physically reach the mature cane. Double-check redstone connections for continuity and verify that water is flowing toward the collection path. If cane stops growing, re-check soil surface and lighting; while cane doesn’t require full lighting, poor light can slow growth in some bed setups in certain versions. Craft Guide recommends testing one module at a time before full-scale deployment.
Performance and world considerations
Auto farms can impact performance if overbuilt or poorly wired. Start with a compact design to minimize ticking updates and lag. Scale gradually, verify chunk loading, and avoid excessive redstone dust in a small area. When integrating multiple farms, distribute them across separate chunks if possible to prevent cascading updates. By planning around these constraints, you keep your world responsive while delivering steady cane output.
Next steps: expanding to multiple crops or hybrid farms
After you’re comfortable with a sugar cane auto farm, consider adding carrots or potatoes with a similar detection-and-harvest concept, though replanting may require villagers or alternative mechanisms. Some players integrate a multi-crop system by sharing a single collection line and splitting outputs into dedicated storage. If you want to push the design further, you can pair it with a compact mob grinder or create a modular farm network that uses centralized storage. Craft Guide’s approach is to keep the core logic consistent while allowing you to adapt the layout to your world’s constraints.
Quick design choices for different playstyles
For a beginner-friendly, low-resource build, use a single strip of cane with a straightforward observer-piston cycle and a simple hopper, keeping the design small and easy to manage. For more ambitious players, stack several rows and add a dedicated chest room with labeled storage. If you’re playing on a server, consider a shared farm with private blocks and permissions to prevent griefing, while maintaining a clean aesthetic that fits your base style.
Tools & Materials
- Sugar Cane(Start with at least 6-12 blocks to allow growth in multiple sections)
- Sand Blocks(Place sugar cane on sand or dirt next to water)
- Water Bucket(Create a water source to hydrate, push drops toward collection)
- Pistons(Face the cane to break the top block at maturity)
- Observers(Detect growth to trigger pistons)
- Redstone Dust(Wiring between observers and pistons)
- Building Blocks(Support towers, walls, and wire runs)
- Hopper(Pull harvested cane drops toward storage)
- Chest(Store collected cane for easy access)
- Glass/Slabs(Optional rails or visibility panels)
- Ladders/Stairs(Access wiring areas)
- Torches/Lanterns(Provide light as needed and deter mobs)
Steps
Estimated time: 20-40 minutes
- 1
Plan the layout
Choose a flat area and decide how many cane rows you will run in parallel. Map out water channels and the collection line. A simple 1x3 strip is a good starter layout to verify mechanics before expanding.
Tip: Draw a quick ground plan or use map markers to keep rows aligned. - 2
Gather materials
Collect all required components: sand, water, sugar cane, pistons, observers, redstone, hoppers, chests, and supporting blocks. Having everything on hand prevents mid-build trips back to storage.
Tip: Organize items by type in nearby chests to speed up building. - 3
Create water edge and sand strip
Place a water source along the edge of your cane strip and line the top with sand blocks. The water keeps the cane hydrated and provides a path for drops to slide toward collection. Ensure the strip is directly adjacent to the water so cane can grow properly.
Tip: Keep the water source stable to avoid unexpected flows that disrupt growth. - 4
Plant sugar cane
Place sugar cane blocks on sand, touching the water edge. Space rows to allow for observer platforms and piston placement without interference.
Tip: Start with 2-3 rows before expanding to test growth dynamics. - 5
Install observation towers
Build small towers at regular intervals and place an observer on each to detect cane growth. Position so the observer faces the cane as it reaches the desired height.
Tip: Test a single tower before adding more to confirm timing works. - 6
Place pistons and connect wiring
Position pistons to strike the top block of mature cane, and wire each piston to its corresponding observer with redstone dust. Keep wiring tidy to minimize cross-talk between rows.
Tip: Use blocks to support the wiring to prevent accidental breaks during play. - 7
Set up the collection channel
Create a water channel that channels harvested cane into a hopper line and chest. Ensure the flow captures drops efficiently and avoids backflow.
Tip: Test water flow by dropping a block into the canal and tracing where it ends up. - 8
Protect the farm
Place barriers or lighting to deter hostile mobs. Consider lecturing a perimeter fence to keep players and mobs out of the farm area.
Tip: Mobs can accumulate and interfere with automated blocks; keep the area secure. - 9
Test the mechanism
Wait for cane to grow to the trigger height and observe pistons firing and drops flowing into the hopper. Verify every row operates in sync and that collections are steady.
Tip: If a row fails, recheck observer orientation and piston alignment. - 10
Iterate and expand
Once the basic design works, add more rows, extend the collection line, and adjust spacing for your world constraints. Keep the design modular to simplify future expansion.
Tip: Incrementally add rows to manage redstone complexity and reduce lag.
People Also Ask
What is an auto farm in Minecraft?
An auto farm is a redstone-powered setup that automatically harvests or collects resources, reducing manual work. It uses growth detection, automation, and a collection path to keep supply flowing in survival worlds.
An auto farm automatically harvests and collects resources, cutting down manual labor. It uses redstone and sensors to keep supplies flowing.
What materials do I need for a sugar cane auto farm?
Key components include sugar cane, sand or dirt, water, pistons, observers, redstone dust, building blocks, a hopper, and a chest for storage. Optional rails or glass can help with visibility and organization.
You need sugar cane, sand or dirt, water, pistons, observers, redstone dust, blocks, a hopper, and a chest.
How does the observer-piston mechanism work in this design?
Observers detect cane growth and emit a pulse that activates nearby pistons. The pistons break the matured cane, causing drops to fall into the collection stream. This cycle repeats as cane continues to grow.
Observers sense growth and trigger pistons to harvest, sending cane to the collection line.
Can auto farms work in survival without villagers?
Yes. Sugar cane auto farms can operate purely with redstone mechanics. Villagers are not required for the basic harvest-and-collect setup.
No villagers are needed for a simple automatic sugar cane farm.
How can I scale an auto farm without performance issues?
Expand in modular chunks, keep rows compact, and limit the number of active pistons per area. Distribute farms across loaded chunks where possible to maintain smooth performance.
Add farms in modules and keep them compact to avoid lag.
Are auto farms version-dependent?
Basic redstone-driven auto farms work across many versions, but growth mechanics and item drops can shift with updates. Always verify behavior after a major game patch.
They can change with game updates; test after patches.
Watch Video
The Essentials
- Auto farms reduce manual harvesting time
- Sugar cane is ideal for simple auto farms
- Observers detect growth and trigger pistons
- Efficient collection keeps drops organized
- Scale by modular expansion and careful spacing