Creeper Farm Minecraft: Step-by-Step Guide
Learn to build a creeper farm minecraft that reliably yields gunpowder. This step-by-step guide covers design options, spawn mechanics, materials, safety, and troubleshooting for vanilla Minecraft.

Goal: learn how to build a creeper farm minecraft that reliably yields gunpowder with minimal risk and maintenance. This guide covers spawn mechanics, design options, essential materials, and a step-by-step build plan, plus optimization tips for different play styles and server environments. By the end, you’ll have a scalable creeper farm you can adapt from starter bases to end-game bases.
Core concepts and why creeper farms matter in minecraft
According to Craft Guide, creeper farms exploit spawn mechanics to convert ambient mobs into reliable gunpowder. For many players, a well-designed creeper farm minecraft becomes a core XP source and an efficient source of gunpowder that scales with your base. The Craft Guide team highlights careful planning around space, light levels, and safe access. As of 2026, vanilla farms remain effective when designed to minimize player risk while maximizing output. Understanding the basic blocks of a creeper farm helps you iterate toward a design that fits your world and playstyle.
Design options for creeper farms
There isn't a single perfect layout for a creeper farm minecraft; the best choice depends on your world, available space, and faction of play (vanilla survival, creative testing, or a realm). Common options include compact vertical towers, multi-layer horizontal designs, and hybrid systems that combine fall damage with automated drops. Each design uses a controlled spawning area, protective containment, and a kill chamber that yields gunpowder. When selecting a plan, balance footprint against expected output, consider transport paths for drops, and plan for future expansion. You can start with a small two-layer design and scale up as you gain resources and confidence.
Spawn mechanics and safe operation
Spawn mechanics determine how creepers appear on your farm. Creepers spawn on solid blocks within dark, enclosed spaces and then move to a kill chamber. Efficient farms minimize stray spawns and ensure creepers stay within the intended pathway. A well-designed containment ensures creepers can't wander back into your base and that you stay out of harm's way during collection. Lighting, air gaps, and carefully placed barriers shape the flow of creepers. Always prioritize safety: build protective barriers and never stand directly over the kill zone during testing or operation. The design should allow quick access for maintenance without interrupting spawns elsewhere.
Performance and optimization strategies
Maximizing gunpowder output from a creeper farm minecraft depends on consistent spawn rates and reliable drops. The most effective designs optimize space for spawnable surface area while reducing unintended spawns elsewhere in your world. Lighting and block choice influence spawn density, so plan transitions between spawn floors with care. The Craft Guide analysis shows that player-tested designs with modular sections tend to adapt better to different biomes and server settings. Use a simple data log to track output changes when you tweak timing, pathing, or kill methods, and remember that AFK time can impact results in predictable ways.
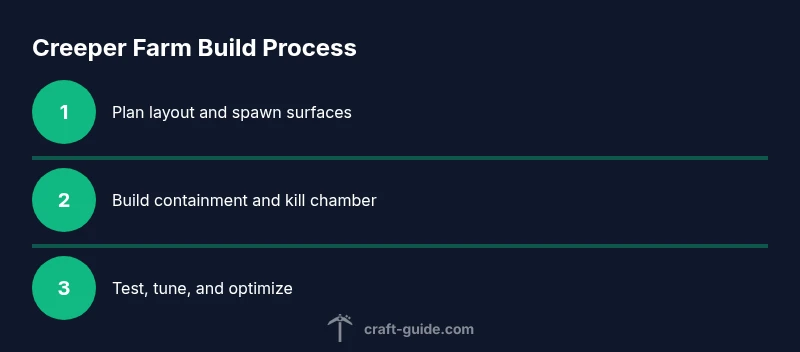
Step-by-step build overview
This section provides a high-level mental map so you can visualize the process before you place a single block. Start by outlining the spawn surfaces and ensuring clear pathways to the kill chamber. Plan escape routes for maintenance and add a guard rail or ceiling to prevent accidental drops. Ensure the storage area is connected to your main base so gunpowder and items flow smoothly into chests. Finally, consider optional automation components that reduce manual handling while keeping you safe. Visual references, diagrams, and step-by-step plans are provided in the build notes.
Maintenance, safety and upgrades
Ongoing maintenance matters as the farm scales. Regularly inspect the kill area for blockages, verify that light levels stay appropriate for creeper spawns, and confirm that transport channels remain clear of debris. Upgrade opportunities include additional layers, improved drop mechanisms, or more efficient storage slides. Keeping the build modular simplifies future expansions and makes it easier to maintain safe access. As your world evolves, revisit farm tuning to align with changes in world generation and server rules.
Common mistakes and troubleshooting
Common mistakes include overcrowding spawn areas, placing blocks that inadvertently allow creepers to escape, and overlooking safe access during maintenance. If output drops unexpectedly, inspect potential light leaks, test the kill mechanism without players nearby, and verify that nearby slime blocks or water flows aren’t diverting mobs away from the intended path. A systematic, step-wise check helps pinpoint issues quickly and minimizes frustration.
Tools & Materials
- Building blocks (stone, cobblestone, or concrete)(Used for frame, walls, and containment)
- Slabs and stairs(Controls spawn surfaces and safe movement)
- Glass panes/blocks(Observation platforms and light management)
- Water buckets(Redirection of mobs and item collection)
- Redstone components (repeaters, comparators, dust)(Timing and gating for automation)
- Iron bars or tinted glass(Containment without blocking airflow)
- Armor stand or weapons(Safety during maintenance)
- Lighting (lanterns/glowstone)(Manage ambient light to optimize spawns)
- Scaffolding or ladders(Access for building and repairs)
- Storage chests and labeling(Organize gunpowder and related drops)
Steps
Estimated time: 2-4 hours (excluding long-term optimization)
- 1
Plan the layout
Choose a compact, scalable layout and map spawn surfaces. Decide on vertical or horizontal design based on space and future expansion. Include a safe route to the kill area.
Tip: Draw a quick blueprint, labeling spawn zones, kill chamber, and storage route. - 2
Gather essential materials
Collect blocks, slabs, glass, and any automation components. Ensure you have enough space for your chosen design and a path to the kill chamber.
Tip: Create a checklist to avoid back-and-forth trips. - 3
Build the containment system
Erect the enclosure around the spawning platform with appropriate height and a floor design that funnels creepers to the kill point.
Tip: Use slabs to prevent unwanted floor spawns. - 4
Install transport and kill mechanisms
Set up water flows or pistons to guide creepers toward a safe kill chamber. Ensure the mechanism doesn't harm you during operation.
Tip: Test on a small scale first to fine-tune timing. - 5
Create the collection and storage flow
Establish a reliable drop or trident-based system to harvest gunpowder with a tidy storage loop.
Tip: Label chests and routes to minimize confusion during farming. - 6
Test and optimize
Run the farm, monitor spawn rates and drops, and adjust lighting, pathing, and timing to maximize output while staying safe.
Tip: Keep a build log of tweaks for reproducible results.
People Also Ask
What is a creeper farm in Minecraft?
A creeper farm is a design that spawns creepers in a controlled area and harvests their drops, mainly gunpowder, to boost supply and XP. It relies on spawn mechanics, containment, and a safe kill method.
A creeper farm spawns creepers in a controlled area and harvests gunpowder to boost your supplies.
Can I build a creeper farm in any world?
Most creeper farms work in standard survival worlds with proper design adjustments for spawn surfaces, lighting, and transport. They’re not tied to a single biome, but efficiency varies with location and server rules.
Most farms work in survival worlds if you design them well and follow safe practices.
What maintenance is required after building?
Regular checks of the kill chamber, transport channels, and surrounding spawn areas help prevent blockages and misdirected spawns. Periodic lighting adjustments may be needed as you expand.
Keep an eye on the kill area and transport paths; adjust lighting as you grow.
Will a creeper farm affect server performance?
Any mob farm can impact performance if not tuned, especially on crowded servers. Use chunk loading controls and mob caps to keep performance steady.
If the server is tight on resources, tune spawns and chunk loading to avoid lag.
What is the safest way to test a new design?
Test in a controlled area away from your main builds. Wear protection and avoid standing over kill zones during tests to prevent accidental harm.
Test away from your main base and keep safe distance during tests.
Watch Video
The Essentials
- Plan a scalable creeper farm minecraft layout
- Use safe kill methods to maximize gunpowder yield
- Test in a controlled environment before full build
- Document changes for reproducible results
- The Craft Guide team recommends starting simple and iterating to optimize output