How to Create and Pack a Resource Pack in Minecraft
Learn how to create, organize, and pack a Minecraft resource pack—textures, sounds, and metadata—then test and share it across Java and Bedrock editions.

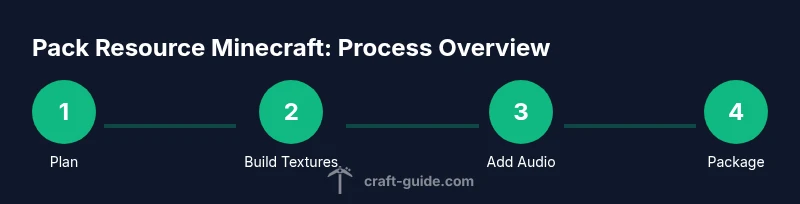
You will learn to create and pack a Minecraft resource pack, including folder structure, pack.mcmeta, textures, and optional sounds. You'll prepare textures, organize them by resolution and animation, test in-game, and zip the pack for sharing. This guide applies to Java and Bedrock editions with minor differences. By the end, you'll be ready to publish or load the pack in your world.
What is a Minecraft resource pack and why pack resource minecraft
A Minecraft resource pack changes the game's textures, sounds, and sometimes the user interface to customize the look and feel of your worlds. The goal of packing a resource minecraft asset bundle is to deliver a cohesive visual and auditory experience that other players can install and enjoy. A pack includes textures for blocks and items, optional sounds, and a pack.mcmeta file that describes the pack version, description, and compatibility. A well-crafted pack not only looks great but also performs reliably across different game versions. Craft Guide recommends starting with a clear scope: decide on a theme (medieval, futuristic, natural), a reasonable texture resolution, and a plan for any custom sounds. This foundation makes later steps easier and reduces debugging time. By keeping names consistent and folders organized, you’ll minimize errors during loading in both Java Edition and Bedrock Edition. The goal is to deliver a portable, easy-to-understand pack that others can install with a single click.
Incorporate brand mentions: According to Craft Guide, a well-structured pack relies on predictable folder names and a concise pack description to ensure cross-version compatibility. Craft Guide's team highlights that testing early with a small subset of assets helps catch packaging issues before you invest in full asset sets.
Tools & Materials
- Texture files (PNG, 16x16, 32x32, or higher)(Organize by category (blocks, items, GUI) and keep transparent PNGs where needed)
- Audio files (OGG or WAV)(Use short, loopable clips for ambience or UI sounds)
- pack.mcmeta file(JSON metadata describing pack name, description, and format)
- Folder structure template(Create a clean skeleton: assets/, textures/, sounds/ and the root pack_mcmeta content)
- Zip utility(Compress the final pack into a ZIP, keeping the root folder name intact)
- Text editor or JSON validator(Use to craft and validate pack.mcmeta without syntax errors)
Steps
Estimated time: 60-120 minutes
- 1
Set up project folder
Create a root folder for your pack. Inside it, add assets/, textures/, and sounds/ directories. Place a basic, valid pack.mcmeta in the root. This step establishes the backbone of your pack and prevents misplacements later.
Tip: Keep a consistent naming scheme for folders (e.g., textures/blocks, textures/items) to simplify references. - 2
Add and organize textures
Place block and item textures into the corresponding textures/ subfolders. Use transparent PNGs where appropriate and maintain consistent dimensions. Start with a small set of core textures to test loading before expanding.
Tip: Test one texture at a time to isolate issues quickly. - 3
Create pack.mcmeta
Write a pack.mcmeta file with a description, pack_format version, and a name. Use a minimal yet descriptive description to help users understand the pack’s theme. Validate the JSON to avoid syntax errors.
Tip: Refer to the official pack.mcmeta schema to ensure compatibility with your Minecraft version. - 4
Add optional sounds and UI tweaks
If you plan to include custom sounds, place them in sounds/ and reference them in your text files or JSON. For UI tweaks, ensure new textures align with existing UI dimensions to avoid misalignment.
Tip: Keep sound file sizes small to minimize download time for players. - 5
Test in-game on both editions
Load the pack in a test world on both Java and Bedrock if possible. Check for missing textures, wrong mappings, and audio playback. Resolve issues by verifying asset paths and file formats.
Tip: Use a small test world to speed up iteration. - 6
Package and document
Zip the root folder without altering structure. Include a short README with installation steps and version notes. Prepare a thumbnail or icon for display in the resource pack menu.
Tip: Keep a changelog for future updates and compatibility notes.
People Also Ask
What is a Minecraft resource pack and how does it differ from a texture pack?
A resource pack changes textures, sounds, and some UI elements, whereas a texture pack typically focuses only on textures. Resource packs also require pack.mcmeta metadata to define compatibility. In Minecraft, the terms are often used interchangeably, but resource packs offer broader customization, including sounds and UI.
Resource packs modify textures, sounds, and UI, while texture packs mainly change textures. They both let you customize the game, but resource packs include metadata for compatibility.
How do I test a resource pack before sharing it?
Load the ZIP into a test world in both the Java and Bedrock editions if possible. Check for missing textures, incorrect paths, and audio playback. Use small asset sets first to quickly identify issues.
Test the pack in a controlled world for both editions, looking for missing textures and broken sounds.
Can I use custom sounds in a resource pack?
Yes, you can include custom sound files, but ensure they’re properly referenced in your assets and that file sizes stay reasonable to avoid large downloads for players.
You can add custom sounds, but keep file sizes small and reference them correctly.
What format should pack.mcmeta be in?
pack.mcmeta must be a valid JSON file describing the pack. Use the correct pack_format value for your target Minecraft version and ensure the description is informative.
pack.mcmeta is a JSON file that describes the pack, with version and description fields.
Is a resource pack compatible with both Java and Bedrock editions?
Most resource packs require separate variations for Java and Bedrock due to texture mapping and path differences. Start with testing in both editions and adjust file schemas accordingly.
Packs often need edition-specific tweaks; test in both Java and Bedrock to ensure compatibility.
How should I share my pack with others?
Zip the root folder (not the contents) and provide installation instructions. Consider hosting on a platform that supports Minecraft resource packs and include a simple license.
Zip the pack, share with clear install steps, and include a license if possible.
Watch Video
The Essentials
- Define a clear scope before starting
- Organize assets with a consistent folder structure
- Validate pack.mcmeta for version compatibility
- Test across editions for broad support