How to Add Texture Packs in Minecraft
Learn how to add texture packs to Minecraft across Java and Bedrock editions, including safe sourcing, installation steps, activation in-game, and troubleshooting for optimal performance.

You’ll learn how to add texture packs to Minecraft across Java and Bedrock editions, including safe sourcing, installation, activation, and troubleshooting for best visuals. This guide emphasizes choosing compatible packs, avoiding unsafe downloads, and ensuring you enable textures in-game for the desired edition.
What texture packs are and why they matter
Texture packs, also called resource packs in newer Minecraft terminology, replace the game’s textures to alter appearance without changing core mechanics. They range from simple color tweaks to high-resolution textures that dramatically change blocks, items, and UI. According to Craft Guide, texture packs are a practical way to customize your world while preserving vanilla gameplay, provided you choose packs compatible with your version. When selecting a pack, consider resolution (e.g., 16x, 32x, 64x, or higher), support for your game version, and whether it requires Forge or other mods. Always verify that the pack includes all necessary assets for your edition, and be aware that higher resolutions may impact performance on lower-end devices. Texture packs can also affect how team builds look on servers, so if you play on multiplayer, check server rules and compatibility. By understanding the basics, you can decide whether you want a subtle change to textures or a complete overhaul of the game’s visuals. This section lays the groundwork for careful selection and safe installation.
Edition differences: Java vs Bedrock
Java Edition uses resource packs stored in the .minecraft/resourcepacks folder. To activate, you open Minecraft, go to Options > Resource Packs, select the pack, and click Done. Packs can be distributed as ZIP files; do not unzip them unless the pack’s README says otherwise. Bedrock Edition supports packs installed via the Marketplace or local resource packs (.mcpack). On Windows 10, you can double-click an .mcpack to import it into the game; on mobile, use the file manager to locate the .mcpack and import. After import, go to Settings > Global Resources (Bedrock) and enable the pack. Not every pack works in both editions, so pay attention to version-specific notes and any required mods or addons. Additionally, performance and feature support vary; some textures shine in higher-resolution modes while others offer a balance between quality and performance.
Finding safe texture packs and compatibility checks
Start with reputable sources and the official Minecraft community sites. Read user reviews, check the pack’s version notes, and confirm it matches your Minecraft edition and version. Craft Guide Analysis, 2026, emphasizes verifying compatibility before downloading to avoid corrupted files or missing assets. Avoid packs whose download pages require suspicious permissions or advertise malware. Once downloaded, scan the file with security software, and keep a simple inventory of packs you use to prevent conflicts. If you run into prompts about missing assets, the pack may be incomplete or outdated for your version.
Preparing your game for texture packs
Before installing a texture pack, back up your game saves and, if possible, your worlds. Update Minecraft to the latest stable release for your edition to ensure best texture compatibility. Check available RAM; high-resolution packs can demand more memory. Create a dedicated folder for downloaded texture packs to keep them organized, and always keep a copy of the pack file in a safe location. If you plan to use multiple packs, note potential visual overlaps or conflicts between textures; some packs alter the same textures and can clash. Finally, read the pack’s README for any special installation steps, such as specific version notes or required support packs.
Java Edition installation steps
Install Java Edition texture packs by placing the downloaded pack file into the Minecraft resource packs folder. For Java Edition, navigate to your .minecraft directory and locate the resourcepacks folder. Do not unzip ZIP files unless the pack’s README instructs you to do so. Start Minecraft, select Options, then Resource Packs, and move the desired pack from the left column to the right to activate it. Click Done and wait briefly as the game reloads assets. Finally, enter a world to verify that textures apply consistently across blocks and items. If you encounter lag or missing textures, consider lowering the pack resolution or allocating more RAM in the launcher settings. If the pack still doesn’t apply, re-download the pack from a trusted source or try a different pack.
Bedrock Edition installation steps
Bedrock Edition texture packs can be installed by importing an .mcpack file or via the Marketplace. If you have a local .mcpack, double-click it to import into the game. Open Minecraft, go to Settings > Global Resources, and enable the new pack. On Windows 10, you may see the pack appear under Local Resources before moving it to Global Resources. After activation, restart or reload the world to ensure textures render correctly. If you have console or mobile versions, use the platform’s file manager to locate and import the .mcpack, then enable from Settings. Always confirm compatibility with your device’s Minecraft edition and version.
Troubleshooting and optimization tips
If textures don’t appear, verify edition compatibility and ensure the pack is enabled in-game. Low FPS after enabling a high-resolution pack can be mitigated by reducing texture resolution, allocating more RAM, or lowering render distance. Some packs require a corresponding shader or resource upgrade; read the README for dependencies. If you experience glitches or missing textures, try a different pack or revert to a default texture set temporarily to confirm the issue is pack-related. Finally, keep packs organized and remove any expired or conflicting textures to maintain smoother gameplay.
Tools & Materials
- Minecraft game client(Ensure you have the edition you want to customize (Java or Bedrock) installed and updated.)
- Texture pack file (.zip or .mcpack)(Download from a reputable source; check edition compatibility.)
- Backup storage(Optional but recommended before changes.)
- ZIP extractor (if needed)(Some packs arrive as ZIPs that you may need to unzip per README.)
- File manager / explorer(Used to locate the resource packs folder or import files.)
- Internet connection(Needed for downloading or verifying sources.)
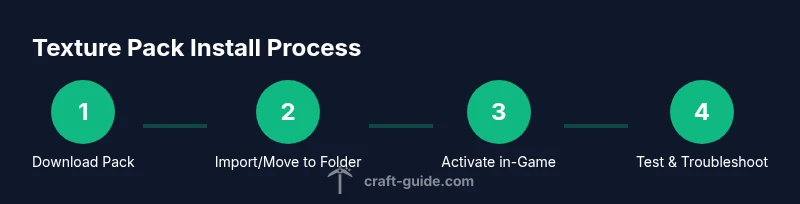
Steps
Estimated time: 20-40 minutes
- 1
Download a texture pack
Find a reputable texture pack that matches your Minecraft edition and version and download it to a known location. Ensure the file type is ZIP for Java or MCpack for Bedrock. Read any README notes for edition-specific instructions. This step ensures you start with a compatible, safe pack.
Tip: Always verify the source and scan for malware before opening the file. - 2
Verify compatibility and prerequisites
Check the pack’s compatibility notes for your exact Minecraft version and edition. If the pack requires additional mods or tools, install those first. This reduces the risk of missing assets or crashes later in the process.
Tip: If unsure, consult the pack’s comments or creator’s page for version alignment. - 3
Import or place the pack in the correct folder
For Java Edition, place the pack file into the .minecraft/resourcepacks folder. For Bedrock, double-click the MCpack to import automatically or use your platform’s importer. This step physically prepares the pack for activation.
Tip: Do not unzip ZIP packs unless the README specifies; many packs are ready-to-use as ZIPs. - 4
Open Minecraft and locate the texture packs menu
Launch Minecraft and navigate to the texture pack menu: Java Edition – Options > Resource Packs; Bedrock Edition – Settings > Global Resources. This step doesn’t apply the pack yet, it only makes it visible to enable.
Tip: Make sure you’re in the correct menu for your edition to avoid confusion. - 5
Activate the texture pack
Select the pack from the available list and move it to the active side. Confirm and reload textures if prompted. This applies the visuals to your game world.
Tip: If the pack is high-resolution, reloading may take a moment. - 6
Test in-game and verify textures
Enter a world and inspect multiple blocks, items, and UI elements to ensure textures render correctly. Look for any missing textures or glitches that indicate compatibility or installation issues.
Tip: Switch worlds or reload the world if textures don’t load immediately. - 7
Tune performance and troubleshoot
If you experience lag, reduce texture resolution or adjust graphics settings to balance quality and performance. Check for conflicts with other packs and ensure you are using the correct edition. Re-download from a trusted source if problems persist.
Tip: Try a lighter pack first to confirm system stability before moving to higher resolutions. - 8
Organize and manage texture packs
Maintain a simple catalog of packs by edition and resolution. Remove outdated packs and keep a favorite set ready for quick switching. This helps you avoid conflicts and keeps your Minecraft visuals consistent.
Tip: Document where you store packs to streamline future updates.
People Also Ask
What is a texture pack in Minecraft?
A texture pack (resource pack) changes how blocks, items, and UI look without altering gameplay. It can range from subtle color tweaks to high-resolution textures that overhaul visuals. Always ensure compatibility with your edition and version.
A texture pack changes how things look in the game but not how you play.
Can texture packs be used on all platforms?
Texture packs are available for Java and Bedrock editions, with installation steps that differ by edition. Marketplace packs are common on Bedrock, while Java uses the resourcepacks folder. Always check edition-specific instructions.
They work on Java and Bedrock, but you’ll install them differently depending on your edition.
How do I know a texture pack is compatible with my version?
Read the pack’s version notes and ensure it matches your Minecraft edition and version. If the README lists required mods or platform limitations, follow those notes before downloading.
Check the notes the creator provides to match your version.
Why isn’t the texture pack showing after installation?
This can happen if the pack isn’t enabled in-game, is incompatible with your version, or was placed in the wrong folder. Re-check the edition, location, and activation steps.
Make sure the pack is enabled and compatible with your version.
Do texture packs cost money?
Many texture packs are free from community creators, but some marketplace packs may require purchase. Always verify the source and any platform charges before downloading.
Most are free from players you can grab, some marketplaces charge for packs.
Where can I safely download texture packs?
Safe sources include official community sites or reputable modding communities. Avoid questionable pages that push suspicious downloads or require excessive permissions.
Stick to trusted sites and read reviews before downloading.
Watch Video
The Essentials
- Choose packs compatible with your edition.
- Back up saves before installing textures.
- Enable textures in-game to apply visuals.
- Test performance and adjust resolution if needed.
- Avoid conflicts by managing multiple packs carefully