Minecraft Papercraft: A Practical Step-by-Step Guide
Master Minecraft papercraft with this practical, beginner-friendly guide. Learn templates, printing, folding, coloring, and finishing techniques for durable, display-ready models.

You will learn how to convert popular Minecraft mobs and blocks into printable papercraft models that stand up and look sharp. The guide covers choosing designs, sizing, printing on sturdy cardstock, and precise folding and gluing. You will need a printer, cardstock, scissors, glue, a hobby knife, and optional scoring tools.
What is Minecraft papercraft?
Minecraft papercraft is a hands-on way to translate digital builds into physical models you can hold, display, and customize. By printing cut-and-crease templates and folding along score lines, players turn voxel blocks, mobs, and items into tangible characters. This craft form is especially friendly to beginners because it uses common supplies and straightforward geometric shapes. For builders who love Minecraft but want a tactile project, papercraft offers a low-cost, creative bridge between screens and real-world making. According to Craft Guide, starting with simple cubes and basic mobs helps you learn scaling, alignment, and closure techniques before attempting more complex silhouettes. As you gain confidence, you can layer shading, texture, and tiny details to achieve convincing results that resemble your favorite in-game designs. Papercraft also scales well with skill level: start with a single block from your world and gradually combine modules into a bigger sculpture. Templates typically include printable parts, creases, and tabs that help pieces stay aligned during assembly. If you want a quick win, choose designs built from a handful of blocks arranged in a simple configuration. Remember to size your templates to the scale you want in-game—this keeps the final model proportional and makes display easier.
Benefits of papercraft for Minecraft builders
Papercraft brings several benefits to Minecraft builders, from planning and geometry to hands-on testing of scale and silhouette. By translating a digital model into a physical prototype, you can study how light falls on corners and how different blocks interact at eye level. The tangible model helps you spot design gaps you might miss in the screen-only view, such as overhangs, symmetry issues, or fragile joints. Working with paper also teaches patience and precision: small folds and careful alignment create a stronger final build that stands up for display or classroom demos. For teachers and group projects, papercraft provides a shareable, collaborative activity that requires minimal specialized equipment. Craft Guide’s experience with hobbyists shows that beginners gain confidence faster when they can handle a complete, finishable project in a single sitting. More complex models—such as a creeper statue or a castle tower—become successive milestones that reinforce planning, cutting accuracy, and assembly sequencing. Overall, papercraft blends creative play with practical craft, echoing core Minecraft values: exploration, experimentation, and crafting with purpose.
Materials and prep for papercraft projects
Before you start cutting, gather materials and prepare your workspace for clean, accurate assembly. A stable, well-lit table reduces mistakes and helps you see tiny details. Cardstock or heavy paper gives the model durability and a crisp fold line that holds pages together. A printer with reliable color output will ensure your colors match the in-game look, especially for themed builds. Stock around 200–300 gsm is a good target for most papercraft templates. Scoring tools, such as a bone folder or the blunt end of a ruler, help you make precise valley and mountain folds without tearing the paper. Glue tabs should be secure but not overglued; liquid white glue dries slow but creates strong joints, while glue sticks are faster for simple shapes. Scissors or an exacto knife are essential for trimming. If you plan on painting, keep acrylic paints thin to avoid curling the paper. Finally, consider a protective spray or clear coat to seal the finished model.
Designing and choosing templates
Template design is where your papercraft creativity shines. Start by choosing a Minecraft papercraft template that matches your skill level and the scale you want for display. Simple models—like a single block cube, a sword, or a basic creature head—build confidence and establish a process you can repeat. As you grow, tackle multi-part templates that combine several small blocks into a larger sculpture. When selecting templates, look for clear fold lines, labeled tabs, and a color reference that matches your in-game palette. Some templates include shading gradients to simulate lighting on flat paper; others use minimal color with textured paper to achieve realism. If you draw your own designs, print a test page on plain paper first to verify alignment and border margins before committing to cardstock. Craft Guide recommends starting with templates that come with assembly guides and printable parts in the correct scale. Finally, consider what you plan to do with the finished model: a desk display may need a flat base, while a modular build could benefit from interlocking components for future expansion.
Printing tips for clean folds
Printing quality has a huge impact on how easily your papercraft folds and tabs fit together. Use a high-resolution PDF or image file and print at actual size to preserve scale. If your printer has a borderless option, enable it to maximize printable area; otherwise, use generous margins and trim carefully. Choose bright, opaque cardstock rather than thin printer paper; darker prints should be tested on a small area to avoid bleed-through. For color accuracy, calibrate your monitor and print a quick color test strip. Print a few test parts first to confirm alignment before proceeding to full sheets. If lines look faint, print a second pass or increase toner/ink. Finally, cut with sharp scissors or a craft knife and trim tabs precisely; misaligned cuts make assembly difficult and can damage the final piece.
Folding and assembly techniques
Folding is the heart of papercraft. Score lines using a bone folder or the back of a plastic ruler to create crisp valley folds; mountain folds are formed by bending away from you. Always dry-fit parts before gluing to verify alignment and fit. Start with the largest sections to establish the base and work toward smaller details. Apply glue to tabs sparingly and hold until tacky; using a quick-drying glue helps with speed, but slower glues produce stronger joints. Alignment matters: match edge-to-edge seams and keep the surfaces flat as you press. If a panel warps, clamp gently with light weights and let it dry. For curved surfaces, you may need to create extra tabs or slight panel bending. By practicing with a simple cube model first, you will develop a reliable rhythm for more complex builds.
Coloring, finishing, and display
Color and finishing bring Minecraft papercraft to life. If your template uses grayscale shading, you can apply colored pencils, markers, or light acrylic washes to add depth—practice on a scrap piece first. For solid colors, colored cardstock saves time, but you can still simulate textures through careful shading with pencils or paints. Seal your finished model with a spray varnish to prevent moisture damage and to help colors stay vibrant. Mount bases or stands to improve stability and create dramatic poses. Consider protective display cases for desk models or lightweight stands for shelf displays. Finally, store finished pieces flat or in segmented organizers to prevent creasing. Craft Guide notes that small, well-made models teach patience and precision and can become favorite display pieces in any Minecraft-themed room.
Scaling and customizing models for in-game fidelity
To maximize fidelity, learn how to scale your papercraft to the size of in-game blocks. Many templates are built for a standard unit that corresponds to a block in Minecraft; you can upscale or downscale with careful math and print tests. When you modify scale, re-check every folded edge for proportional consistency; a miscalculation can produce awkward silhouettes. For modular builds, design interlocking connectors that allow modules to join without glue, making it easy to assemble a larger scene. If you plan to recreate a specific skin or mob, study reference images to capture distinct features: eyes, armor plating, or spikes. Craft Guide recommends keeping a small set of core shapes you can reuse across multiple designs to speed up future projects.
Troubleshooting common papercraft issues
When projects don’t align, start by re-checking your template size and border margins. Print-test components to verify scale before cutting the final sheets. Warping usually indicates humidity exposure; use flatter storage and avoid humid rooms. If glue dries too quickly or too slowly, adjust application amount or switch to a different adhesive. Ragged edges are often caused by dull blades, so replace or sharpen blades and cut slowly. If colors bleed through, switch to heavier cardstock or print on the reverse side. For beginners, keep templates simple and increase complexity as your confidence grows; patience is essential for successful papercraft.
Tools & Materials
- Printer(Color or monochrome works; borderless printing is a bonus.)
- Cardstock or heavy paper(200–300 gsm is ideal for most templates.)
- Scissors(Sharp blades for clean cuts.)
- Craft knife (X-Acto)(For precise trimming on small parts.)
- Ruler(Metal or plastic; use for straight cuts and folds.)
- Bone folder or scoring tool(Crucial for crisp folds without tearing.)
- Glue (PVA/white glue) or glue sticks(Apply sparingly to avoid warping.)
- Scoring mat or cutting mat(Protects surfaces during cutting.)
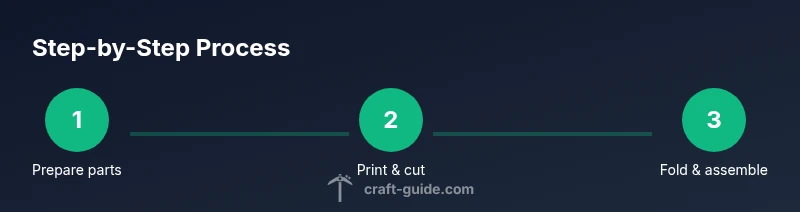
Steps
Estimated time: 60-90 minutes
- 1
Prepare workspace and templates
Set up a well-lit area and organize templates by model. Open the design file, check scale, and print a single test page to verify margins before printing the full sheets.
Tip: Keep an unused scrap sheet nearby to test folds without wasting template paper. - 2
Print and cut individual parts
Print the parts at actual size on sturdy cardstock. Use sharp scissors or a craft knife to trim along edges, following the included outlines with care.
Tip: Sort parts by type and label them if the template is multi-page to avoid mix-ups. - 3
Score folds and plan assembly
Score all valley folds first with a bone folder. Plan which sections form the base, walls, and decorative elements before applying glue.
Tip: Dry-fit first to ensure correct alignment before gluing any tabs. - 4
Glue tabs and assemble largest sections
Apply a light, continuous bead of glue to tabs and press edges together firmly. Build the model from the base upward, letting glue set briefly between stages.
Tip: Use clips or weights to hold seams while the glue dries. - 5
Add details and finish
Attach smaller parts, add shading or color touches, and apply a protective coat if desired. Check for any misaligned seams and adjust quickly while still tacky.
Tip: Test color on scrap before applying to the main piece to avoid color bleed. - 6
Display and store
Place the finished model on a stable base or stand. Store completed pieces flat in a folder or shallow box to prevent creases.
Tip: Label models with the build name for easy future retrieval and display planning.
People Also Ask
What cardstock thickness is best for Minecraft papercraft templates?
Most templates print well on 200-300 gsm cardstock. Heavier paper increases durability but may be harder to fold; lighter paper is easier for beginners but can warp if overhandled.
Most templates work best on 200-300 gsm cardstock, balancing durability and foldability.
Can I resize templates to fit a different display size?
Yes. Resize templates carefully by keeping the scale consistent across all parts and printing test sheets to verify fit before committing to cardstock.
Yes, you can resize templates, but keep scale consistent and test first.
Are there templates suitable for kids and classroom use?
Many templates are designed for beginners and classroom projects. Supervise cutting and gluing, and choose simple models at first to build confidence.
There are kid-friendly templates perfect for classrooms; supervise cutting and gluing.
What should I do if colors bleed on the paper?
Switch to heavier cardstock or print on the reverse side if color bleed occurs. Let ink dry fully before handling.
Use heavier cardstock or reverse-side printing to prevent bleeding, and let ink dry.
Is it acceptable to modify templates for unique builds?
Yes, you can modify templates for originality, but be sure to maintain fold lines and tab alignment to keep parts fitting.
Yes, you can modify templates as long as folds and tabs still align.
Watch Video
The Essentials
- Start simple with cubes and basic shapes.
- Use a scoring tool for crisp folds.
- Choose sturdy cardstock (200-300gsm) for durability.
- Dry-fit before gluing to ensure alignment.