Best Level for Iron in Minecraft: A Practical Guide
Discover the best mining level for iron in Minecraft, how vein density varies with level, and practical strategies to farm iron efficiently across versions.

Understanding Iron Ore Distribution
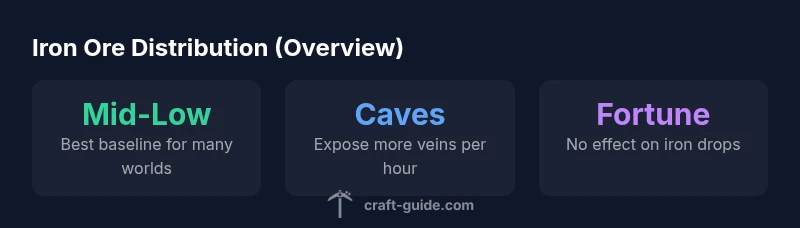
Iron ore is a fundamental resource for early and mid-game progress in Minecraft, and its distribution is a key factor in mining strategy. Unlike some ores that cluster in very narrow bands, iron appears across a broad vertical span. The density is influenced by world generation rules that vary by version, biome, and seed, so your personal experience may differ from someone else’s. A practical takeaway is that the “best level” is not a single fixed coordinate; rather, you’ll maximize efficiency by targeting mid-to-lower heights where vertical sections often yield more veins per hour when cave networks are present. Keep in mind that exploration and patience often beat blind tunneling, especially in new worlds where cave systems are still forming in your terrain.
In Craft Guide analyses from 2026, we see a consistent pattern: iron is generally easier to locate around mid-height ranges, particularly when you mix cave exploration with careful branch mining. This approach reduces empty tunnel time and increases ore encounter rates without excessive risk. While the exact vein frequency shifts with patches and world seeds, the mid-to-lower bands remain a reliable baseline for most players, especially those who want steady iron income for armor, buckets, and rails.
Seasoned players use a two-pronged approach: explore natural cave systems to stumble upon surface veins and then extend controlled mining corridors to connect multiple veins. This hybrid method minimizes wasted digging while maintaining a predictable cadence of ore finds. For beginners, starting with a few cave tours at mid-height can establish a baseline before committing to longer strip or branch-mining sessions.
Version Differences and Their Impact on Iron Spawns
Minecraft versions alter ore generation rules, which in turn affects the perceived “best level” for iron. Major updates that changed world creation or cave density often shift where iron veins cluster most densely. In newer versions, players report iron more frequently in mid-to-lower sections due to expanded cave networks and updated vein distribution logic. The practical implication is simple: when you start a new world under a different version, treat mid-height exploration as your initial baseline and adjust your plan after a few cave runs.
Historically, iron ore has shown broad vertical availability, but the density often correlates with how caves form in your world. This means your personal best levels may drift over time as updates refine cavern geometry and ore shuffling. Craft Guide’s guidance remains adaptable: begin with mid-to-lower levels, then observe vein patterns and tailor your approach to the local geology observed during early mining expeditions.
Identifying the Best Level Ranges in Your World
The trick to finding the right level is to gather local data from your world rather than assuming a universal peak. Turn on coordinate display (F3 on Java Edition) and perform short scouting runs at mid-height and just above or below it. Record the frequency and size of iron veins you encounter over several hours. It’s common to see more veins where cave networks are rich, so prioritize exploring those areas.
A practical workflow: establish a few safe mining corridors at a mid-height baseline, then extend into connected caves to expose additional veins. If you notice fewer veins in a corridor, consider excavating a parallel tunnel or adjusting the vertical start point by a few blocks. The goal is to balance surface accessibility with real ore encounter rates, which will vary from world to world and version to version.
Finally, use a breadcrumb plan: identify a rough mid-height ladder or shaft position, then map veins you encounter as you proceed. This helps you optimize future runs and reduce dead-end tunnels in subsequent sessions.
Practical Mining Strategies for Iron
The most efficient iron mining blends several techniques. Start by locating a safe cave network, then carve out short, consistent tunnels at your mid-height baseline. Use a two-block-wide strip-mining pattern that reveals ore without excessive digging. When you reach a vein, mine around it to maximize visibility and harvest multiple ores in a single pass.
In practice, you’ll combine cave exploration with planned corridors to expose multiple veins while maintaining manageable mining time. Place torches every so often to prevent mob spawns and keep your route easy to navigate. Remember that iron veins can be found along natural caverns and sometimes hidden behind layers of stone. Patience and systematic exploration beat random tunneling every time.
If you’re playing on Hardcore or on a server, consider a time-boxed mining sprint: 20-30 minutes of focused underground work, followed by a safe retreat to the surface. This habit preserves your resources and keeps mining sessions sustainable over long play sessions.
Tools, Efficiency, and Fortune
Iron mining benefits from the right tools and efficiency upgrades. An iron or diamond pickaxe with Efficiency enchantment speeds up ore collection, while Unbreaking helps durability in long sessions. Fortune is popular for diamonds and other ores, but Fortune does not affect iron ore drops in vanilla Minecraft, so investing in Fortune for iron payoffs isn’t usually worth it.
Plan your tool upgrades around ore yield goals and time spent digging. A well-maintained pickaxe and efficient mining routes often save more time than chasing marginal gains from enchantments that don’t affect iron. In environments with extensive cave networks, a steady, repeated mining pattern usually yields better long-term results than sporadic, high-risk digging.
As you advance in the game, you can upgrade to better strip-mining patterns or deeper, longer cave explorations, but your baseline mid-height approach remains a reliable starting point for iron farming.
Cave Exploration vs Strip Mining: Pros and Cons
Cave exploration offers the thrill of natural vein exposure and potential encounters with other ores and mobs, but it can be less predictable. Strip mining, by contrast, creates controlled exposure to ore and can be highly efficient when planned well, especially at mid-height baselines. The optimal method often blends both: begin with a cave run to locate veins and then expand into systematic corridors to maximize exposure.
Pros of cave exploration:
- Organic vein exposure
- Potentially higher ore density in natural caverns
- Lower boring repetition
Cons of cave exploration:
- Uneven vein distribution
- Higher risk from mobs if you’re not well prepared
Pros of strip mining:
- Predictable exposure of veins
- Efficient, scalable ore farming
- Easier to manage safety with long corridors
Cons of strip mining:
- Time-consuming setup
- Requires more torches and planning
Using Geological Cues to Find Iron
Iron veins often accompany cave networks and can be found where new tunnels intersect old ones. Look for large cavern craters, branching tunnels, and exposed iron near mineral-rich seams. While biomes do influence some ore distribution, the most practical indicators are the presence of extensive cave systems and natural chasms. If you notice a dense cluster of caves on your minimap or in your exploration logs, that area is worth deeper digging and more extensive strip-mining.
To leverage these cues, prioritize routes that connect multiple cave systems, which increases the chance of encountering several iron veins in a compact area. This strategy reduces wasted digging and helps you collect iron efficiently without spending excessive time in low-yield zones.
Iron vs Other Ore: When to Pivot
Iron remains essential early on, but you’ll often encounter iron in areas that also host other ores. If your goal is steady daily progress, plan a route that exposes a mix of iron, coal, and copper or redstone; however, avoid relying solely on a single ore type. As you advance, you’ll learn to pivot your mining plan to the most abundant ore in your immediate vicinity. This adaptive approach keeps your mining sessions productive and reduces the risk of empty-handed expeditions.
Remember that iron is the backbone of many early-game tools, armor, and infrastructure. Building a reliable iron supply is a core skill in Minecraft survival, and the best level for iron minecraft remains a reliable starting point for many players as they refine their own techniques over time.
Adapting to Updates: Should You Re-Tune Your Level Target?
Minecraft updates can subtly shift ore generation. As new versions roll out, rechecking the vein density at your established mid-height baseline is wise. If you notice a drop in iron finds after an update, adjust by exploring slightly higher or lower levels and test new routes through cave networks. The key is to remain flexible and re-evaluate your mining strategy after each major patch. With practice, you’ll identify your own local optimum that accounts for seed, version, and biome characteristics. Craft Guide recommends periodic re-evaluation to maintain peak iron yields across updates.