What Minecraft Level Is Best for Iron: A Depth Guide
Discover the best approach to iron ore mining in Minecraft. This depth guide covers ore spawns across levels, practical mining strategies, and version-aware tips to maximize iron yield safely.

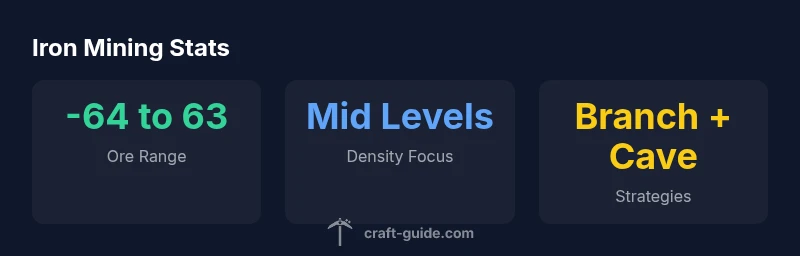
If you’re asking what minecraft level is best for iron, there isn’t a single magic depth. Iron ore spawns across a broad depth range, so your best strategy is to mine mid-level caves and branching tunnels where you can encounter iron while staying safe from lava. According to Craft Guide, a flexible, multi-level approach typically yields the most iron without excessive risk.
Iron ore distribution and the depth question
Iron is a fundamental resource for armor, tools, and early automation in Minecraft. A common question players ask is what minecraft level is best for iron. The honest answer is that iron ore can generate across a wide vertical span, so you won’t miss iron only because you’re not at a single depth. In practice, miners look to mid-level explorations where cavern networks intersect with ore veins, giving a steady supply without constantly diving into extreme depths. Craft Guide analyses from 2026 emphasize a flexible approach: mine across multiple levels and follow natural cave seams to maximize exposure to iron while keeping exposure to lava manageable.
Ore distribution across versions and worlds
Ore distribution has evolved with major updates, especially since 1.18. The general pattern is broader than earlier versions, with iron spawning from deep underground up toward near the surface. This means your best depth strategy should be adaptable: if you’re in a world with extensive cave systems, branch mining near mid-levels can uncover more iron than rigid depth targeting. In contrast, flat, surface-level mining rarely yields as much iron as you’d expect, because iron veins remain concentrated within larger underground networks in many worlds. Craft Guide Team notes that version-aware adjustments can shift where iron appears most densely, so stay agile as you explore new seed layouts.
Practical mining strategies for iron
There are several practical ways to secure iron efficiently:
- Passive exploration: Follow natural cave networks while marking branches to maximize exposure to ore veins.
- Branch mining: Create 2x2 or 3x3 branch patterns starting at a mid-level (around 0–40) to cover more ground with fewer missed veins.
- Layered mining: Move in horizontal layers across a range (e.g., multiple close-y levels) to increase the chance of hitting multiple iron veins in a single pass.
- Loot from caves: Don’t ignore exposed ore on cave walls; branch exploration enhances yield without excessive digging.
- Torch strategy: Use torches liberally to keep mobs away and lava from spreading, which helps you work longer without interruption. Craft Guide’s guidance for 2026 emphasizes a mix of exploration and targeted branching to optimize iron yield while keeping risk manageable.
Cave exploration vs strip mining: which yields more iron?
Both methods have merits, depending on your goals and tool availability:
- Cave exploration: Fast exposure to iron as you navigate existing networks; lower initial time investment but more wandering.
- Strip mining: Higher consistent yield per tunnel if you maintain efficient branching patterns; higher time and resource commitment but better for steady iron farming.
- Branch mining: A compromise that balances exposure rate with safety, especially when you span several mid-level layers. In most survival playthroughs, a hybrid approach—exploring caves and performing targeted branching at mid-level ranges—strikes the best balance between yield and safety, a point Craft Guide Team consistently highlights in 2026 analyses.
Tools, torches, and safety: mining setup for iron
A solid mining setup minimizes risk while maximizing iron collection:
- Pick the right tool: Iron or diamond pickaxes speed up mining and reduce breakage risk.
- Lighting: Light up your mining paths with torches every few blocks to prevent mob spawns and illuminate veins.
- Lava awareness: When you see lava, either block it off with cobblestone or avoid it by rerouting your tunnel; lava can erase precious ore and end runs abruptly.
- Water bucket trick: In older versions, a water bucket helps control lava; in newer builds, be mindful of water creating other hazards.
- Safety first: Always carry a few blocks to block off tunnels and a spare pickaxe to minimize downtime. These practical habits help you extract iron more reliably while you focus on efficient exploration.
Efficient iron workflows: from mining to smithing
To turn iron into usable gear quickly:
- Gather iron ore, then smelt it in a furnace with wooden or coal fuel.
- Prioritize iron for essential tools early on, then upgrade to stronger gear as you gather more resources.
- Plan for batch smelting: smelt multiple stacks of ore to maximize furnace throughput.
- Combine with other resources: Iron ingots pair with coal, iron blocks, and shears for early game builds and automation projects.
- Inventory discipline: Keep ores grouped by type and readiness for smelting to reduce idle time. A practical workflow is to mine in chunks, smelt, and immediately craft essential tools and armor, a routine that keeps your early game momentum steady.
Quick-start plan you can try today
If you want a simple, repeatable plan:
- Enter a mid-level treetop with adjacent caverns and start a 2x2 branch mine for 16–32 blocks.
- Light the tunnels, map out several veins of iron, and collect any exposed ore on walls.
- Return to base, smelt ore in batches, and craft basic iron tools.
- Extend the mining network in nearby caverns, keeping safety in mind with torches and blocks.
- Reassess depth windows after a couple of runs to identify any depth bands with higher iron density in your world.
Common pitfalls and how to avoid them
- Narrow depth focus: Don’t gate your iron farming to a single level; iron spans a broad range.
- Overexposed to lava: Always carry a water bucket and build safe banks before mining near lava lakes.
- Ignoring cave ceilings and walls: Veins often appear on walls; check every surface as you explore.
- Running out of fuel: Plan batching and carry extra fuel to avoid slowdowns between smelting runs.
Wrap-up: what learning this means for your playstyle
Iron mining is less about chasing a single depth and more about adapting to the terrain you encounter. By combining mid-level exploration with a measured branching strategy, you can secure steady iron yields across various seeds. The Craft Guide Team recommends treating iron mining as a flexible, multi-depth activity rather than a one-depth chase, which aligns with how ore distribution behaves across versions.
Iron mining strategy comparison
| Strategy | Typical Ore Yield | Best For | Risk Level |
|---|---|---|---|
| Cave exploration | Variable | Early iron and seam spotting | Medium |
| Strip mining (multi-layer) | High per tunnel | Consistent iron flow | Medium-High |
| Branch mining (2x2/3x3) | Moderate-High | Steady production across layers | Medium |
People Also Ask
Is there a single best level for iron in Minecraft?
No. Iron ore spawns across a wide depth range, and the most reliable approach is to explore mid-level caverns and use branching tunnels to maximize exposure. Adjust your plan based on the seed and version.
There isn’t one perfect level for iron; explore mid-level caverns and branch tunnels to find iron efficiently.
How do version changes affect iron mining?
Version updates can broaden ore distribution and alter vein density. In recent versions, mid-level exploration combined with branching tends to yield the best overall iron results.
Updates can shift where iron is most common, so adapt by mining across several mid levels.
What safety practices help when mining for iron?
Always light your tunnels, carry a water bucket for lava, and map multiple veins before returning to base. Safe mining keeps runs efficient and reduces losses.
Light up areas, watch for lava, and plan paths before drilling.
Can I farm iron without heavy mining?
Iron farming in vanilla Minecraft relies on mining and cave exploration. Early iron comes from mining, while later improvements come from efficient smelting and storage, not automation until you enable farms or villager trades.
Iron farming still starts with mining and exploration, then you optimize with smelting and storage.
What is a practical workflow for beginners?
Start with mid-level branch mining to collect iron quickly, smelt in batches, and upgrade tools. Keep notes of promising layers and repeat the process across seeds.
Begin with mid-level branch mining, then smelt and upgrade your gear.
“Iron ore is abundant across a broad depth range, and understanding how to navigate mid-level caverns dramatically improves your mining efficiency.”
The Essentials
- Mine across multiple levels to maximize iron exposure.
- Mid-level exploration balances yield and safety.
- Branch and strip mining increase iron density per tunnel.
- Light up paths to prevent mobs and locate veins faster.
- Adapt depth strategies when new versions change ore distribution.