Wood House in Minecraft: A Practical Build Guide
Learn how to design and build a cozy, durable wood house in Minecraft with practical steps, material choices, and style tips for beginners and advanced builders alike.

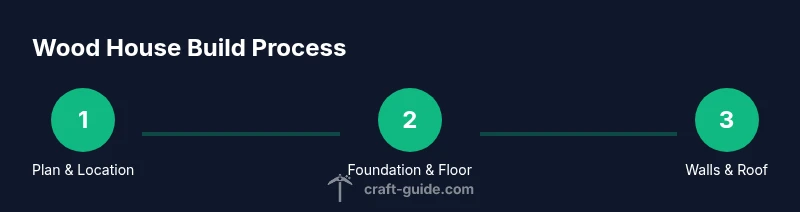
Learn how to plan, gather materials, and build a cozy wood house in Minecraft. This guide covers location, foundational blocks, wall and roof construction, interior layout, and finishing touches such as lighting and doors. You'll get a complete step-by-step process with tips to keep your build sturdy and aesthetically pleasing.
Why a wood house for beginners
Wood is one of the most accessible materials in Minecraft, making it ideal for new builders who want fast results and satisfying aesthetics. A wood house blends rustic charm with practicality, especially in early-game worlds where iron and stone are scarce. In this guide, you’ll learn to combine planks, logs, and glass to create a warm, inviting space that still holds up against day-to-day hazards. The phrase wood house in minecraft often signals a focus on comfort, not fortress-level defense, and today we’ll cover how to balance looks with durability. According to Craft Guide, wood-based builds are approachable, forgiving, and scalable, so you can start small and expand over time. The Craft Guide team found that starting with a simple rectangular footprint gives you a reliable base from which to add rooms, stairs, and a porch without getting overwhelmed.
Planning Your Wood House: Location and Style
Before you place your first block, decide where your wood house will sit. Consider sunlight, nearby resources, and access to water. A compact cottage near a forest edge often yields efficient farming space and natural camouflage, while a coastal plot invites clever dock and porch designs. This planning phase also helps you lock in a consistent architectural style—rustic, modern, or a hybrid. You’ll sketch a rough footprint on paper or in your mind and then adjust in-game as terrain and biomes dictate. A clear plan reduces rework and keeps your build coherent as you add rooms, staircases, and exterior details. Craft Guide analysis shows that having a flexible, modular plan makes later expansions simpler and less error-prone.
Choosing Wood Types and Materials
In Minecraft, wood comes in various forms and colors. Oak is a reliable baseline, birch offers a lighter look, spruce brings a darker tone, and jungle wood adds warmth with a red tint. Combine logs for structural accents with planks for walls and floors to achieve contrast. Don’t forget glass panes for windows, cobblestone or stone bricks for accents, and doors that match your chosen wood family. When planning, mix at least two wood types to avoid monotony while preserving a cohesive palette. The Craft Guide team emphasizes balancing color and texture; variety keeps the design lively without becoming chaotic.
Foundations and Floor Layout
A solid foundation translates to stability in your Minecraft build, especially when you’re working on larger houses. Start with a flat, even floor—stone, brick, or dark wood can serve as a sturdy base. Plan a simple room layout: living area, storage, crafting corner, and a bedroom or loft if you aim for a second story. Leave space for a doorway, hallways, and ventilation paths that won’t trap mobs at night. This stage sets the scale and flow of your entire home, so measure twice (in-game) before placing walls. A well-laid foundation reduces the need for major redos later and makes interior decoration easier.
Building Walls with Style: Wall Patterns and Windows
Walls define the character of your wood house. Thick, double-layer walls (two-block thickness) give a grounded feel and provide space for insulation-inspired texture using stair blocks and slabs. Windows break up solid facades and invite natural light; plan a mix of small and wide panes to control brightness. Consider incorporating a feature wall with logs or a corner column to add architectural interest. Windows should be positioned to maximize daylight in common rooms while preserving privacy in sleeping areas. Craft Guide’s practical tips include keeping doorways aligned with window lines for rhythm and balance.
Roof Design: Slopes, Materials, and Aesthetic
A pitched roof is not only visually appealing but functional in rain-heavy biomes. Build a gable or barn-style roof using stairs and slabs to create a gentle slope. Select roof blocks that complement your walls—dark spruce with light birch, or oak with a deeper accent—to maintain contrast without overwhelming the facade. Ensure eaves extend slightly beyond walls to channel rainwater away from the interior. If you prefer a flat, modern look, consider a shallow roof with glass skylights or a balcony perimeter that adds light and airiness. Roof planning is critical for both weather resilience and curb appeal.
Doors, Windows, and Interiors: Practical Layouts
Interior planning turns a shell into a home. Place doors to separate private vs. public spaces and reserve space for storage chests, crafting tables, and a furnace. Use rugs (carpets) to define zones and discoverable paths between rooms. For lighting, combine torches, lanterns, and glowstone where appropriate; avoid dark corners that invite mob spawns. Multilevel houses benefit from staircases or ladders aligned with a primary axis to minimize confusion. The goal is a comfortable, navigable space that feels coherent with the exterior design while remaining functional for daily Minecraft life.
Lighting, Safety, and Survival Considerations
Lighting is more than aesthetics—it's essential for survival in many worlds. Place torches at even intervals on walls and floors, especially in stairwells and near doorways. Consider a central lantern or chandelier to distribute light evenly. If you’re playing in Survival or Hardcore mode, build an elevated lighting plan to deter mobs from spawning in dark corners. Use fences or walls to secure your perimeter and prevent unwanted access at night. Proper lighting reduces risk and makes exploration and crafting activities safer and more enjoyable.
Exterior Aesthetics: Detailing and Landscaping
Curb appeal matters. Add a wooden porch, a low fence, and planters with leaves and flowers to soften the silhouette of your wood house. Pathways made from gravel or cobblestone guide players to the entrance and give a sense of arrival. Siding details—log corners, carved beam accents, and window boxes—bring texture and depth. Landscaping with hedges, trees, and small ponds blends the build with its surroundings. The result is a warm, inviting homestead that complements the terrain rather than fighting it. Craft Guide highlights that thoughtful exterior details elevate any wood-based build.
Advanced Variations: Multi-Story and Starter House Upgrades
Once you’ve mastered a single-story wood house, upgrade incrementally. Add a second floor with a compact staircase, loft sleeping area, and additional storage. Consider a mezzanine for a crafting alcove or a balcony to extend the living space outdoors. If you’re chasing a more rustic or modern style, experiment with contrasting rooflines, mixed wood textures, and larger windows. These variations keep the core wood aesthetic intact while expanding capacity and visual interest. The goal is gradual growth without sacrificing the original charm.
Common Mistakes and How to Fix Them
Common issues include overusing one wood type, inconsistent window placements, and roofs with steep or flat angles that look odd. If rooms feel cramped, re-evaluate the floor plan and widen doors or adjust storage layout. If lighting feels dull, add more fixtures or replace some blocks with glowstone-style alternatives. For a quick fix, introduce a small decorative feature—an overhang, a beam, or a contrasting color block—to tie sections together. Regularly stepping back to view the build as a whole helps identify awkward proportions before you finish.
Finishing Touches and Maintenance
A successful wood house relies on careful finishing touches. Add interior furniture, stacks of chests, and a few decorative items to make the space lived-in. Maintain the exterior by replacing worn-looking planks and sealing edges with consistent color blocks. For seasonal world changes or biome shifts, consider re-surfacing with a compatible wood family that keeps the brand voice consistent. The Craft Guide team recommends documenting your layout in a small schematic so you can replicate the design elsewhere, ensuring your wood house remains a reliable blueprint for future builds.
Tools & Materials
- Oak wood logs(Core structural material for rustic looks)
- Oak wood planks(Walls, floors, and ceilings)
- Spruce wood planks(Accent walls or roof accents)
- Birch wood planks(Light-toned contrast for variety)
- Glass panes(Windows; consider stained glass for style)
- Doors (wood)(Entry and interior access)
- Cobblestone or stone bricks(Foundation accents and hearths)
- Torches or lanterns(Lighting to prevent mob spawns)
- Furnace, crafting table, chests(Utility blocks for interior)
- Stairs (wooden)(Access to upper floors)
- Slabs (wood)(Roof details and elevated floors)
- Scaffolding(Safety while building tall walls)
Steps
Estimated time: 60-120 minutes
- 1
Choose location and plan layout
Identify a plot with ample space and reasonable access to resources. Sketch a simple footprint (length x width) and define where doors, windows, and stairs will go. This upfront planning reduces later rework.
Tip: Mark the doorway alignment against landscape features to maintain sightlines. - 2
Gather materials and tools
Collect wood types and related blocks based on your palette. Prepare essential tools like an axe, shovel, and crafting table so you can work efficiently without interruptions.
Tip: Keep a small stash of mixed wood types for accent contrasts. - 3
Lay the foundation and floor
Create a flat, sturdy floor using planks or stone. Outline the footprint with blocks to ensure straight walls and even corners before you start building walls.
Tip: Level the ground first or choose a raised platform for a cleaner look. - 4
Build the walls
Erect walls to the desired height, using two-layer thickness if possible for texture. Install windows at planned positions to maximize light and view without compromising warmth.
Tip: Alternate wood types on different walls for visual interest. - 5
Install the roof
Construct a sloped roof using stairs and slabs. Extend eaves to shed rain from doorways and keep interiors dry. Consider a vent or skylight for extra light.
Tip: Test different slope angles to avoid awkward gaps. - 6
Add doors, lighting, and interior layout
Place doors, position lighting evenly, and set up storage, workstations, and a bed. Group related items to minimize clutter and improve workflow.
Tip: Place a light near stairs to prevent mob spawns on the ascent. - 7
Exterior detailing and color balance
Finish with porch, fences, and small landscaping accents. Use logs as corner accents or frame windows to give depth to the facade.
Tip: Limit the palette to 2-3 wood types for cohesion. - 8
Test and adjust for accessibility
Walk through the house in third-person view to check spacing and flow. Move furniture if paths feel cramped or awkward uses of space feel unnatural.
Tip: Ensure doors allow at least a 2-block clearance for movement.
People Also Ask
What type of wood is best for a wood house in Minecraft?
Oak is a solid, versatile choice for beginners. For contrast, mix in spruce or birch accents. Use logs for structural details and planks for walls to keep a cohesive look.
Oak is a solid default; mix in spruce or birch to add contrast and texture.
How can I prevent rain from entering the house?
Ensure a proper roof overhang, close windows, and layer walls to reduce drafts. Sloped roofs shed water effectively and keep interiors dry.
Use a sloped roof and overhangs to keep water out of the interior.
What are cheap ways to decorate the interior?
Use chests, crafting tables, beds, carpets, and decorative blocks like lanterns to create functional, cozy spaces without heavy costs.
Use simple furniture and lighting to make the space feel lived-in and cozy.
Can I safely build a wood house in survival mode?
Yes. Start with a small structure and expand as you gather resources. Maintain a safe perimeter, light up the interior, and avoid open flames near wooden blocks to reduce fire risk.
Yes—start small and light up areas to prevent mob spawns and keep fire risk low.
How do I add a second floor without structural issues?
Build a sturdy stair or ladder system and ensure support beams or thicker walls on the lower level. Plan doorway alignment for easy access to the upper area.
Add a solid staircase or ladder and keep access logical.
Watch Video
The Essentials
- Plan layout before placing blocks.
- Balance wood types for texture and color.
- Prioritize lighting to prevent mob spawns.
- Expand modularly to avoid major rebuilds.