Fireplaces in Minecraft: A Practical Build Guide
Learn practical, step-by-step methods to build cozy, realistic fireplaces in Minecraft. Explore block choices, hearth layout, lighting, and optional redstone smoke to elevate your builds across worlds.

Learn to build cozy, safe fireplaces in Minecraft that fit any style—from rustic huts to modern villas. This guide covers block choices, hearth layout, lighting, and optional redstone smoke effects. By following practical steps, you’ll add warmth and ambiance to your world without overcomplicating your build. According to Craft Guide, repeatable layouts save time across projects.
Why fireplace design matters in Minecraft
Fireplaces in Minecraft are more than decorative; they anchor a room, guide lighting, and set the mood for your entire build. A well-placed hearth can define a living space, a reading nook, or a cozy cabin, making it feel lived-in and inviting. According to Craft Guide, a thoughtful fireplace enhances immersion and helps players iterate on room layouts more efficiently. The Craft Guide team found that consistent, well-proportioned layouts translate into faster builds and more cohesive worlds. In practice, start by choosing a focal wall and scale that matches your structure, then plan a hearth that fits the surrounding architecture without overpowering it. This approach keeps the fireplace practical for both creative and survival modes while preserving airflow and visibility in the room.
Design fundamentals: a quick palette and proportion guide
A great fireplace begins with a clear style and balanced proportions. Decide on a palette that matches your build—brick for rustic towns, stone bricks for medieval strongholds, or smooth quartz for modern interiors. Proportions matter more than size: aim for a hearth width about two-thirds of the wall height and a mantle that sits comfortably above eye level. Use symmetry for formal rooms or asymmetric offsets for cozy nooks. Lighting should feel warm, with a glow that suggests real flame without overpowering the space. Think about how the fireplace interacts with windows, doors, and seating—people should be able to sit near it without blocking pathways. Finally, plan subtle textural variation with blocks like cracked stone bricks or chiseled variants to add character without cluttering the scene.
Materials and blocks: what you’ll need and why
Choosing the right blocks is critical for a believable fireplace. Brick blocks and stone bricks are versatile and widely available, providing a warm, traditional look. Include brick stairs for mantels and small ledges, and slabs to soften edges or create a sunny hearth ledge. A chimney can be a separate vertical column that rises above the roofline, using the same material family to maintain cohesion. Flood the area with lighting—lanterns or glowstone hidden behind a mantle can create a soft glow without visible torches. Optional elements like chiseled stone bricks add texture, while trapdoors can mimic mantels and shelves. If you want a flicker effect, campfires are excellent, but they require careful placement to avoid accidental spread in wooden rooms. Flint and steel is handy for lighting, especially in survival mode.
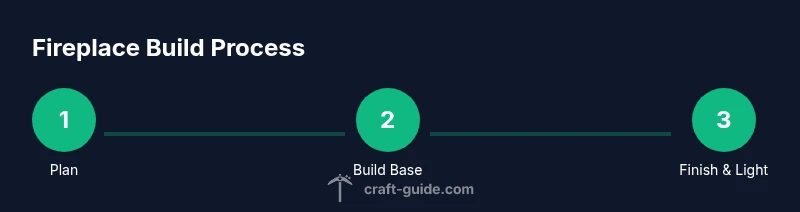
Step-by-step build guide: hearth, mantel, and chimney (overview)
While the detailed, step-by-step section below provides a precise, repeatable process, here is a high-level overview to orient you. Start with a stable hearth base and surround, then add a mantel at a comfortable height. Build a chimney that visually integrates with the roof or wall, ensuring a continuous vertical line. Finish by adding interior detailing—study lighting, seating, and shelves that frame the fireplace. Finally, test the design from multiple viewpoints to ensure sightlines are clear and the flame feels warm rather than overpowering. This approach keeps the project manageable in both creative and survival worlds.
Redstone and smoke effects: adding realism without overcomplication
For realism, consider a smoke effect using campfires placed behind glass or non-flammable blocks so the flame looks natural but doesn’t trigger unwanted block fires in wooden builds. A simple, safe smoke illusion can be achieved by placing campfires behind a chimney opening with air gaps that let smoke particles rise. If you’re comfortable with redstone, add a subtle glow using a daylight sensor and a controllable redstone lamp to simulate ember glow behind the mantle. However, keep circuitry minimal to avoid complicating the build or causing lag in large worlds. The goal is a believable ambiance, not a technical maze.
Placement strategies and integration into larger builds
A fireplace should feel like a natural part of the room, not an afterthought. Center it on a main wall or at the end of a long corridor to anchor the space visually. Consider sightlines: place seats about 2-3 blocks away from the hearth so players can enjoy the glow without blocking paths. Align the fireplace with existing architectural features—arches, doorways, or windows—for harmony. In larger builds, repeat a smaller, simpler version of the fireplace in other rooms to create a cohesive interior rhythm. If you’re building in survival mode, choose durable materials that resist wear and tear and make the fireplace a practical source of light and warmth in your base.
Common mistakes and how to fix them
Haste makes waste with fireplaces. Common errors include placing flames directly on wooden blocks, overbearing mantel heights, and mismatched block palettes. To fix, swap in non-flammable surround blocks like brick or stone, lower the mantle to a comfortable height, and unify the color family across the hearth and room. Overly tall chimneys can make the room feel small; keep the chimney proportionate to the wall. Finally, ensure you have enough ambient light around seating to avoid dark corners that kill the mood. By avoiding these pitfalls, your fireplace remains a focal point that enhances rather than overwhelms the space.
Tools & Materials
- Brick blocks(Main hearth surround and mantle.)
- Stone bricks(Alternate palette option with a weathered look.)
- Brick stairs(Mantel detailing and tiered shelves.)
- Slabs(Hearth edge and mantels without bulk.)
- Chiseled stone bricks(Texture variety for depth.)
- Campfire(Realistic flame and optional smoke.)
- Furnace(Decorative or chimney-cap detail where suitable.)
- Flint and steel(Light the flame if not using campfire.)
- Glowstone / Lanterns(Laboratory glow or ambient lighting.)
- Trapdoors(Mantel or shelf accents.)
- Glass panes(Display or smoke separation.)
Steps
Estimated time: 60-90 minutes
- 1
Plan location and scale
Choose a wall that defines the room and measure a base hearth that fits the space. Mark the mantel height and ensure seating will have clear sightlines to the flames. This planning saves rework later.
Tip: Sketch a quick block outline on the wall to visualize scale before placing any blocks. - 2
Lay the hearth base
Place brick blocks to form a rectangular hearth, with slabs outlining the edge for a lighter profile. Keep the base flush with the floor and level with adjacent tiles for seamless integration.
Tip: Use bricks and slabs together to avoid bulky edges while maintaining a solid foundation. - 3
Build the mantel
Add brick stairs on top of the hearth to create a mantel ledge. Extend to the sides to frame seating, then add a few decorative blocks as shelves above the mantel.
Tip: Keep mantels low enough to see faces over the edge; avoid too many overhangs that obscure the flame view. - 4
Construct the chimney
Rise a vertical column of brick blocks or stone bricks above the hearth, ensuring it visually connects with the room roofline. If the chimney passes through a roof, taper or widen it slightly for realism.
Tip: Maintain a consistent material family to avoid a jarring transition between wall and chimney. - 5
Add lighting and flame
Place a campfire behind the mantel or use flint and steel to ignite a fire-safe block. Hide the ignition source with a decorative block so the flame remains visible but unobstructed.
Tip: If using a campfire, ensure the surrounding blocks can support smoke without catching fire. - 6
Finish with details
Intersperse texture with cracked bricks or quartz trims, add a few seating blocks, and place lanterns or glowstone to bathe the area in warm light. Ensure the area remains safe and non-flammable.
Tip: Use symmetry or a subtle asymmetry to keep the fireplace visually engaging. - 7
Test and adjust
View the fireplace from multiple angles, adjust block spacing if the flame seems crowded, and confirm there’s a clear pathway for players to sit or walk around.
Tip: Walk through the room at eye level to ensure the flame line of sight feels natural. - 8
Document and replicate
Take screenshots of the final layout for future builds. Reusing the hearth template across rooms saves time on large projects.
Tip: Create a simple blueprint with a note on block palette for easy replication.
People Also Ask
Can I place fire on any block in Minecraft?
No. Fire can only be placed on certain blocks or surfaces, and is often best controlled with campfires or protected by non-flammable surrounds. In survival mode, lighting a fireplace should be planned with safety in mind to avoid accidental fires near wood.
Fire can’t be placed on every block. Use campfires or safe surrounds to light a fireplace, especially in survival mode.
What blocks look best for a fireplace?
Brick blocks and stone bricks are classic choices that read warmly on screen. For texture, mix in a few slabs or stairs to create a mantel and ledges. Avoid overly glossy blocks that look out of place in a cozy room.
Brick and stone bricks are a great starting point; add a mantel with stairs and some texture with slabs.
How can I add smoke without triggering fires in wooden rooms?
Use campfires placed behind non-flammable blocks, such as bricks or stone, to create smoke particles without risking nearby wood. If you prefer redstone, subtle ember glows behind a mantle can enhance realism without adding fire risk.
Place campfires behind safe blocks to get smoke, and use subtle lighting to simulate embers.
Is a fireplace useful in survival mode?
Yes. While decorative, a fireplace can provide ambient lighting and warmth cues in bases. Build it with durable materials and keep safety in mind to ensure long-term functionality.
Fireplaces work in survival for light and atmosphere; build with sturdy materials.
How do I hide the ignition source but keep flames visible?
Position the flame behind a mantel or glass pane while the flame remains visible from the room. This technique keeps the glow and movement of fire without an exposed ignition block.
Hide the ignition behind a mantel so the flame shows but the source isn’t obvious.
What lighting options pair well with fireplaces?
Glowstone, lanterns, or sea lanterns provide warm, dim light that complements a fireplace. Place lighting behind decorative blocks to avoid harsh glare while maintaining visibility.
Use warm lighting like lanterns or glowstone around the fireplace for a cozy vibe.
Watch Video
The Essentials
- Plan scale before placing blocks.
- Use bricks or stone bricks for a cohesive look.
- Mantel and chimney should align with room proportions.
- Light sources should feel warm but safe.
- Document your layout for easy reuse on future builds.