Minecraft Building Planner: Step-by-Step Guide
Master Minecraft planning with a dedicated building planner. This step-by-step guide covers essential tools, workflows, and practical tips for scalable builds.

With a minecraft building planner, you will map out complex builds before placing blocks. This guide shows how to choose a planner, set a scalable grid, and translate ideas into a workable blueprint. According to Craft Guide, the right tool and a clear workflow save time and reduce errors. By the end, you’ll have a reusable process for any project, from cabins to castles.
Why a Minecraft Building Planner Helps Your Builds
In Minecraft, planning your build before placing blocks reduces trial-and-error, keeps your design coherent, and helps you manage resources. A building planner gives you a bird's-eye view, lets you test layouts, and makes it easier to communicate ideas with teammates in multiplayer worlds. According to Craft Guide, starting with a clear blueprint saves time and prevents costly mistakes during late-stage construction. Using grids, layers, and reference images, you translate imagination into a tangible plan.
How to Choose a Building Planner Tool
There are several options: web-based planners, desktop apps, or modular mods. Look for grid support, import/export, layer stacking, and cross-version compatibility. If you plan in Java Edition or Bedrock, confirm the tool can export compatible blueprints. Craft Guide recommends trying a few free options and picking the one that fits your workflow and team size.
Laying Out Your First Project: Grid, Scale, and Rooms
Start with a simple grid to map rooms, corridors, and outdoor areas. Decide on a scale (for Minecraft, blocks are the unit) and mark zones for living areas, storage, farms, and defenses. Use reference images to lock in proportions and rhythms before committing to building. This foundation will guide every subsequent decision.
Design Principles for Efficient Builds
Design efficiency comes from a consistent grid, deliberate rhythm, and material coherence. Plan transitions between interior and exterior spaces, consider lighting and airflow, and keep a limited palette to save resources. Document design decisions in your planner so you can reproduce successful patterns in future projects.
Common Pitfalls and How to Avoid Them
Overcomplicating layouts, ignoring scale, or failing to save iterations can derail a project. Regularly test layouts in-game, export snapshots, and compare dimensions with your planned blueprint. Stay flexible and iterate based on in-game exploration.
Extending Your Planner: Mods, Community Resources, and Examples
Some planners support schematic imports, community blueprints, and shareable examples. Explore pattern libraries, color-coded zones, and layered plans to speed up future builds. Use mods or servers that support blueprint sharing to learn from others.
Tools & Materials
- Computer or tablet with internet access(For running the Minecraft building planner and web-based tools)
- Minecraft world or blueprint references(Inspiration sheets or screenshots)
- Digital ruler or scale reference(Precise measurements in blocks)
- Note-taking app or paper and pencil(Jot down ideas and adjustments)
- Screenshot/recording software(Capture grid and layout for sharing)
Steps
Estimated time: 60-90 minutes
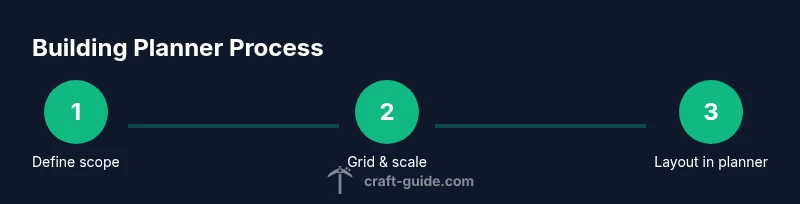
- 1
Define project scope
Clarify the purpose, size, and essential features of your build. Create a wish list of rooms and key dimensions to guide the planner.
Tip: Start with a rough list of required rooms and approximate sizes. - 2
Gather reference images
Collect images or sketches that capture style, proportion, and materials. References help keep designs cohesive as you translate ideas into the grid.
Tip: Organize refs by room type to speed up layout decisions. - 3
Create a scalable grid
Set a grid that maps to Minecraft blocks and works at your target build size. Use layers to separate floors and exterior; this keeps planning organized.
Tip: Label grid lines with coordinates to avoid confusion. - 4
Outline the rough layout
Place rooms, corridors, and outdoor areas on the planner. Check flow, accessibility, and sightlines before committing to dimensions.
Tip: Iterate interior paths to ensure efficient navigation. - 5
Refine with materials and windows
Assign material palettes to each zone and mark light sources, windows, and doorways. This helps validate the visual rhythm.
Tip: Limit palettes to 2-3 base blocks for consistency. - 6
Export and test in-game
Export your blueprint or schematic and test in a sandbox world. Compare with your planner to catch inconsistencies.
Tip: Save multiple versions to track changes.
People Also Ask
What is a minecraft building planner?
A planner helps map out builds before placing blocks, using grids, scales, and exportable blueprints to organize ideas and resources.
A planner helps map builds before placing blocks using grids and blueprints.
Do I need a planner for small builds?
Not required, but it can still help ensure proportions and layouts stay clean even in modest projects.
It's not required for small builds, but helpful for consistent layouts.
Which tools work across Java and Bedrock?
Most modern web-based planners support multiple editions; verify import/export compatibility for your version.
Check that the planner supports your game edition and can export compatible files.
Can planners export blueprints for Minecraft?
Yes, many planners export schematics or blueprint images that you can use in-game or with server mods.
They can export blueprints that you import into Minecraft, or share with teammates.
How accurate are planners for block counts?
Planners provide close estimates based on scale; accuracy depends on scale and unit definitions.
They give good estimates; accuracy depends on scale and number of detail blocks.
Watch Video
The Essentials
- Plan before building to save time.
- Set and stick to a clear grid.
- Export blueprints for in-game validation.
- Iterate designs based on playtesting.