Minecraft Block Building: A Practical How-To Guide
Learn practical Minecraft block building with clear, beginner-friendly steps. Plan your palette, lay foundations, build textures, and scale designs with confidence.

By following practical, step-by-step strategies, you will learn how to plan a Minecraft block building project, select a cohesive palette, lay foundations, build walls with texture, and finish with lighting and interior details. This guide emphasizes accessible techniques, reusable patterns, and scalable design so beginners can create impressive structures quickly.
Why Minecraft block building matters
According to Craft Guide, block-building starts with a plan and a clear palette. In Minecraft, every structure begins with blocks, but the difference between a rough heap and a cohesive home lies in organization. The Craft Guide team found that players who sketch a footprint, choose a color theme, and map material quantities before placing the first block consistently produce more polished outcomes. This section explains why strategic planning matters, how to read the terrain for inspiration, and how to set a believable scale. Expect practical tips on forming a design statement, sticking to a theme, and translating an idea into a build that reads well from multiple angles.
Core techniques for solid block building
Excellent block-building hinges on repeatable techniques that minimize waste and maximize visual impact. Start with grid-based planning to keep dimensions consistent, then develop modular components you can reuse across projects. Use patterns such as alternating light and dark blocks, or staggered layers, to create depth without overcommitting resources. Vertical variation—stacks, columns, and ledges—adds personality, while proper lighting prevents flat, dull surfaces. This section includes labeled examples like a simple cottage, a small statue, and a terrace garden to illustrate how to combine symmetry with organic details. Craft Guide emphasizes documenting your process so you can reuse it later.
Choosing your palette: blocks, textures, and color
A cohesive palette is the backbone of memorable builds. Start with a base palette of 3–5 block types that share tonal relationships (warm, cool, neutral). Introduce accent materials to punctuate key features, such as door frames, windows, or roof edges. Texture is built through layering: place slabs and stairs to create overhangs, use combining materials for subtle contrast, and exploit color shifts to imply materials like stone, wood, and metal. This section provides practical examples of color families, recommended blocks for early projects, and how to avoid palette chaos by planning swatches on grid paper or a digital board.
Practical step-by-step example: a small modular house
This example guides you through designing and building a compact, scalable house that demonstrates core techniques. Begin with a simple footprint, then add a modular wall system, a pitched roof, and a front porch with texture variation. Use repeatable modules for rooms, hallways, and exterior accents so you can expand later without redesigning the core. Each stage includes checklists for block selection, measurements, and detailing. The aim is to teach you how to apply a consistent logic to every new project, so you can grow your town of structures efficiently.
Advanced builds: symmetry, patterns, and scale
When you push beyond basics, symmetry and pattern become design tools rather than constraints. Explore mirror-building for larger structures, grid-based scaling, and repeating motifs that can be scaled up with minimal material waste. Techniques such as stepped roofs, parabolic curves using blocks, and texture alternation create visual interest at any size. This section shows how to plan for large builds by outlining a master blueprint, then executing it piece by piece while preserving proportion and balance.
Common mistakes and how to fix them
New builders often overcommit early, choose mismatched palettes, or neglect lighting, resulting in flat, unsafe-looking structures. Typical fixes include rethinking the base layout, refining color relationships, and adding textures to emphasize depth. Learn how to rework a misplaced door, adjust window spacing for readability, and incorporate shading to simulate mass. The goal is to cultivate a habit of pausing to inspect scale, symmetry, and rhythm before committing to a final block placement.
Tools, mods, and resources to speed up building
A successful build benefits from a few practical tools: a planning grid, a versatile palette, and optional mods like WorldEdit for rapid editing or texture packs for exploring color and texture quickly. This section lists recommended resources, including practice maps, reference guides, and where to find community templates. Remember to balance convenience with your in-game goals; mods can accelerate progress but may not be allowed on all servers or modes. Craft Guide highlights that choosing the right tools shortens iterations and boosts confidence in your designs.
Tools & Materials
- Minecraft game (Java or Bedrock edition)(Use Creative mode to plan, test, and iterate easily; switch to Survival for resource constraints later.)
- Planning grid or schematic references(Print or screenshot a 1-block-per-unit grid to map dimensions.)
- Grid paper or digital planning app(Helpful for tracking palette and module counts before placing blocks.)
- WorldEdit or similar build tools (optional)(Speed up large edits on PC Java Edition.)
- Texture packs or resource packs(Experiment with color and texture to expand palette choices.)
- Screenshot tool for references(Capture progress to compare against your plan.)
Steps
Estimated time: 2-4 hours
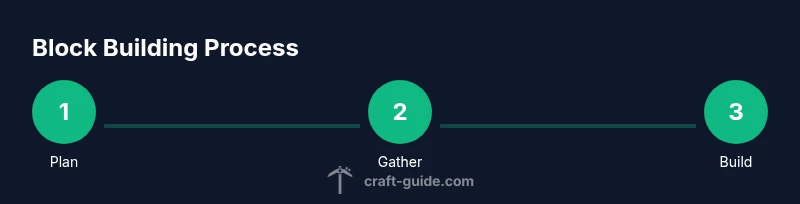
- 1
Plan your build
Define purpose, theme, and scale. Sketch a footprint on grid paper or in a planning app, noting materials and key colors. Confirm accessibility and viewing angles so the design reads well from multiple sides.
Tip: Start with a simple silhouette and outline crucial dimensions to avoid mid-project redesign. - 2
Gather blocks and materials
Inventory blocks that fit your palette. Prioritize repeatable modules and bulk-friendly textures to minimize waste. Create a quick bill of materials to avoid mid-build shortages.
Tip: Reserve a module kit (e.g., three wall types, two roof types) for consistency. - 3
Lay the foundation and footprint
Mark the base layout on the ground using your planned footprint. Check symmetry by counting blocks along each axis and confirm corners align with grid references.
Tip: Double-check measurements by stepping around the base and comparing to your plan. - 4
Build walls and openings
Assemble walls with uniform height, place doors and windows in designated intervals, and introduce texture with staggered layers to create depth.
Tip: Use stairs or slabs to create subtle ledges that catch the eye. - 5
Add texture and depth
Layer materials in alternating rows, add overhangs, and incorporate small architectural details like corners or corner shelves to break flat surfaces.
Tip: Mix two or three related materials for a cohesive yet varied look. - 6
Lighting and interiors
Place lighting to avoid dark corners, plan interior layout, and ensure important spaces feel usable. Consider how exterior lighting affects the overall silhouette.
Tip: Use hidden light sources to keep a clean exterior while ensuring visibility inside. - 7
Review, iterate, and scale
Walk around the build, compare to plan, and identify areas for improvement. Iterate in modules so you can scale later without reworking the entire structure.
Tip: Take a break and return with a fresh perspective to spot consistency issues.
People Also Ask
What is block building in Minecraft and why start now?
Block building is arranging Minecraft blocks to create structures. It helps you practice planning, proportion, and creativity, turning ideas into tangible in-game forms. This guide emphasizes practical, repeatable methods suitable for beginners.
Block building means arranging blocks to form structures. It helps you plan, design, and create with confidence, starting with simple layouts and growing in complexity.
Should I start in Creative or Survival mode?
Creative mode lets you prototype quickly with unlimited blocks and flight, which speeds learning. Survival mode adds resource management and realism, and you can switch modes as you grow more confident.
Creative is best for learning structure and planning; Survival teaches resource management when you’re ready to test under challenge.
How can I scale a build while preserving proportion?
Plan with a grid, build modular components, and maintain consistent block sizes. Use a master blueprint to guide expansions without losing proportion.
Use a grid and modular blocks to keep scale consistent as you grow the build.
What are beginner-friendly projects to start with?
Try a small house, a garden terrace, or a statue. Build in stages, using repeated patterns to reinforce consistency.
Good starter projects are small houses, statues, and simple terraces to practice fundamentals.
How can I learn from mistakes effectively?
Review your build against the plan, note where proportions drifted, and refine your layout before expanding. Keep a log of changes for future reference.
Compare your build to your plan and adjust what doesn’t match. Document changes for future improvements.
Watch Video
The Essentials
- Plan before placing blocks.
- Choose a cohesive color palette.
- Use repeating patterns to save resources.
- Add depth with texture and lighting.