Inside Houses in Minecraft: Interior Design Guide
Learn practical, beginner-friendly techniques to design cozy, functional interiors inside Minecraft houses. From layout to lighting and storage, get step-by-step guidance to transform bare spaces into lived-in, efficient rooms.

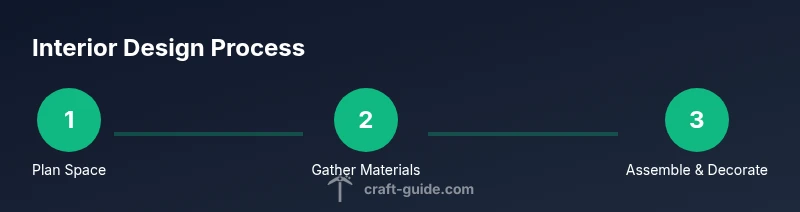
By the end of this guide you will be able to create functional, aesthetically pleasing interiors for any Minecraft house. You’ll plan room layouts, choose furniture and lighting, and optimize storage and airflow inside houses in minecraft. This step-by-step approach uses common blocks and realistic scale to transform bare spaces into cozy, practical living areas in your world.
Assessing space, size, and flow
Begin with a clear sense of the room’s footprint and how you want players to move through it. In Minecraft, even a small footprint can feel expansive with careful zoning and furniture placement. Use temporary blocks or a chalkboard-style map on a wall to sketch the layout before committing to materials. Note doorways, windows, and potential mob-spawn points, because lighting and pathways will influence safety and usability. Visualize zones like a living area, crafting nook, and storage hub, then test walk paths to ensure you can reach everything without detours. Craft Guide analysis shows that deliberate layout reduces wandering, speeds tasks, and makes routine activities feel more satisfying. Remember: inside houses in minecraft quality design increases immersion and play value, so plan for scale, sightlines, and accessibility from the start.
Planning zones: living area, crafting nook, and storage hub
Organize the interior into distinct zones that fit your playstyle. The living area might feature a sofa-like arrangement using stairs and slabs, plus a small coffee table built from slabs and a rug using carpets. A crafting nook should house a crafting table, a nearby workstation, and a bookshelf to simulate enchantment preparation. The storage hub belongs near the entrance and should include several chests or barrels, labeled with item frames or signs for quick access. Use stacked blocks or raised platforms to create subtle separation without closing off spaces. Repeating a restrained color palette (e.g., oak, white concrete, and dark oak) across furniture and walls creates cohesion and helps orientation. Maintain clear sightlines and leave roomy walkways between zones to support fluid movement. Craft Guide’s experience shows that consistent color and form improve mood and navigation, especially in smaller interiors.
Choosing furniture with Minecraft blocks
Furnish interiors with blocks that convey texture and scale. Use stairs as seating around a low coffee table built from slabs, with a decorative centerpiece block on top. A small desk can be built from a slab surface with a sign for labeling and a chest behind for storage. Place cushions using carpets and hats or banners to add color and personality. Storage can be integrated behind seating as a compact cabinet or shelf, using item frames to display tools or resources. Lighting should be layered: a ceiling glow from lanterns or glowstone, plus side lamps near work zones. Keep edges clear to preserve line-of-sight and avoid visual clutter. Craft Guide’s practical approach favors readily available blocks, clear shapes, and accessible layouts that players of all levels can replicate.
Lighting and ambiance: torches, lanterns, glowstone, and redstone lighting
Lighting inside houses in minecraft is critical for function and mood. Use a layered approach: ambient ceiling light via lanterns or glowstone, task lighting near workstations, and decorative accents along walls. Avoid leaving corners dark where hostile mobs can spawn. A single lantern per corner provides comfort without glare; adding a hidden redstone lamp behind a bookshelf or under a stair creates dynamic effects for special builds. Redstone lighting can be used to create smart dimming that responds to in-game time, improving immersion. White or warm-toned blocks help create a cozy feel, while blue or purple hues give a magical effect—use sparingly to avoid visual fatigue. Test light levels by switching between day and night and walking the layout to ensure no dark spots remain. Craft Guide team recommends modular lighting that’s easy to reconfigure as the space evolves.
Storage and organization: chests, barrels, item frames, signs
Storage is the backbone of a functional Minecraft interior. Group chests and barrels by theme (resources, tools, blocks) and place them along a wall to minimize wandering. Use item frames to label chests, signs for quick access, and consider a small storage island near the crafting nook to reduce trips across the room. Vertical shelving and chest ladders maximize floor space while preserving a calm aesthetic. Color-coded banners or blocks can reinforce the palette and improve quick recognition. If you use modular builds, create add-on storage modules that can be swapped in without breaking the room’s coherence. Practical organization means items are easy to find and spaces stay tidy during ongoing projects.
Finishing touches: color, decor, and mob safety
Decor is the glue that makes a space feel alive. Add color with carpets, beds, and curtain blocks while keeping a few framed maps or item frames for character. Use warm woods like oak for a welcoming vibe and incorporate green accents with potted plants for a touch of realism. Banners can introduce wall patterns, while carefully placed torches keep areas safely lit without becoming intrusive. Check mob safety by ensuring doors are in place and light levels stay consistent in hallways. A small painted floor pattern using contrasting blocks can add personality without overwhelming the space. Finally, test the interior’s look under different lighting and times of day; a minor lamp reposition can dramatically shift the mood. Craft Guide’s finishing-touches philosophy emphasizes reversibility and palette consistency for quick iteration.
Tools & Materials
- Crafting table(Core for furniture pieces and layout ideas)
- Chest(Main storage for room items)
- Barrel(Alternative compact storage)
- Oak stairs(Seating for living area)
- Slabs(Table surfaces and platforms)
- Carpets(Color accents and zone markers)
- Lanterns(Primary indoor lighting)
- Signs(Label zones and storage)
- Item frames(Display items and create focal points)
- Glass panes(Window treatment for light without glare)
Steps
Estimated time: 60-90 minutes
- 1
Measure and map the room
Place temporary blocks to map length, width, and height. Mark entrances, windows, and zones to ensure you understand the flow before building. Create a rough sketch on paper or a wall to visualize layout.
Tip: Double-check doorways and corridors to avoid blocking movement. - 2
Gather materials in a dedicated chest
Collect blocks that match your palette and needed furniture components. Use your crafting table to preview furniture designs, then store everything in labeled chests for quick access.
Tip: Keep color-consistent materials together to speed assembly. - 3
Lay out zones with visible markers
Define living, crafting, and storage zones using block choices and sign markers. Ensure pathways remain at least two blocks wide and don’t obstruct chests or doors.
Tip: Symmetry can help readability; test different layouts in small-scale mockups. - 4
Place furniture and lighting
Install seating with stairs, tables from slabs, and layering lighting with lanterns and glowstone. Position glow near workstations and avoid glare that reduces visibility.
Tip: Test lighting at night to confirm no dark corners remain. - 5
Test flow and adjust
Walk the space, attempting common actions (sitting, crafting, finding storage). Move furniture if it obstructs movement or visibility, and adjust color balance for harmony.
Tip: Keep changes reversible; take screenshots before large changes.
People Also Ask
What is the best lighting setup for indoor comfort in Minecraft?
Use a layered lighting approach: ambient ceiling lights, task lighting near work zones, and decorative accents along walls to create warmth while keeping mobs at bay.
Layer lights for warmth and safety: ambient ceiling lights, task lights near work areas, and accent lights for mood.
How many chests should I place in a small house?
Aim for 2-4 chests per room depending on storage needs, and label them with signs or item frames for quick access.
Two to four chests per room usually works well, label them for quick access.
Which blocks work best for furniture?
Stairs, slabs, carpets, and item frames create practical, affordable furniture that fits most interiors.
Stairs and slabs make great seating, carpets add color, and item frames label storage.
Can you incorporate redstone lighting into interiors?
Yes. Use redstone lamps or dimmable lamp setups to create adjustable lighting scenes while keeping performance reasonable.
Redstone lighting can adapt to mood and time, keep it efficient.
How to decorate small houses efficiently?
Focus on vertical storage, a single focal point, and modular furniture to maximize space without clutter.
Keep it simple and scalable with a strong focal point.
Watch Video
The Essentials
- Plan first, build later to avoid wasted materials.
- Use a cohesive color palette across zones.
- Layer lighting to improve mood and functionality.
- Label and organize storage for quick access.