How to Make a Painting in Minecraft: A Practical Guide
Learn how to make a painting in Minecraft with an item frame, cycle artworks, and decorate walls. This guide covers materials, placement, design ideas, and gallery tips for creative builds.

You can make a painting in Minecraft by using an item frame mounted on a solid wall and placing a painting inside it. Right-click the frame to cycle through available artworks until you find one that fits your space and mood. This quick guide points you to the step-by-step process and design ideas.
What you need to make a painting in Minecraft
According to Craft Guide, painting is a simple yet powerful way to decorate walls and convey a theme across a base. The core requirement is an item frame that you attach to a solid block on a wall. Once the frame is in place, right-click to cycle through the gallery of paintings until you find one that fits the space and your design intent. This works in both survival and creative modes, though resource availability and inventory management influence where you display art first. When planning a gallery, measure wall space, consider wall color, and think about painting sizes that look best in your rooms. Shorter, taller frames introduce vertical interest, while wide frames stretch across larger walls. For bigger builds, combine several frames into a cohesive mural to tell a story or evoke a mood—calm seascapes, bold abstracts, or rustic scenes all work well. Start with one centerpiece piece and expand outward to build balance and rhythm.
Designing with paintings is not just about decoration; it’s a chance to experiment with color, scale, and composition, turning ordinary walls into immersive spaces. Craft Guide’s guidance highlights how thoughtful placement can unify a room’s theme and improve navigation cues within your build.
noteParentheticalResourceOkayOnlyForMarkdownAfterThisPointFromFirstSentenceButNotInField
Tools & Materials
- Item frame(Craft or obtain; attach to a solid wall)
- Wall space(Choose a flat surface with enough room for the chosen painting size)
- Additional frames (optional)(Create a gallery wall with multiple frames for a cohesive look)
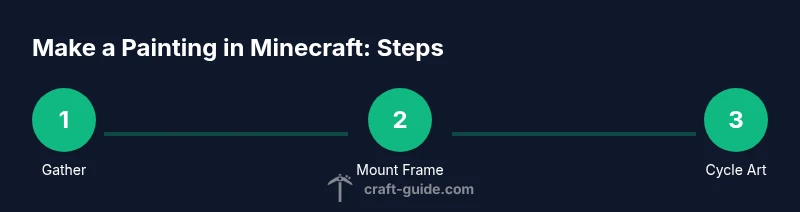
Steps
Estimated time: Total time: 5-15 minutes
- 1
Gather your item frame and wall space
Collect at least one item frame and identify a solid wall where you want to hang the painting. Clear any blocks that might obstruct the frame’s placement and choose a height that aligns with your eye level. This step sets the stage for a clean, balanced display.
Tip: If you’re unsure about height, place a temporary marker on the wall to visualize eye-level alignment. - 2
Mount the item frame on the wall
Place the item frame on the chosen wall face. Ensure the frame is oriented so the opening faces into the room for easy access. The frame will anchor your painting and determine how it sits visually within the space.
Tip: Wiggle the frame slightly after placement to confirm it’s secure against the wall. - 3
Cycle through paintings until you fit the space
Right-click the frame to cycle through available paintings. Continue until you find a piece that fits the wall’s aspect ratio and color scheme. Larger walls may benefit from taller paintings; smaller walls, wider or square artworks can feel balanced.
Tip: If none of the default paintings fit, try a different wall or allow room for a second frame nearby to create a diptych. - 4
Add more frames for a gallery
For a curated gallery, place additional frames around the central piece to create a coherent narrative or theme. Align frames with consistent spacing and consider repeating hues or motifs to reinforce the mood.
Tip: Use a simple grid or a staggered arrangement to avoid visual clutter. - 5
Finalize and adjust
Review the overall composition in different lighting. Move frames, swap paintings, or add subtle lighting to enhance the artwork’s visibility at night. This final polish elevates the display from decoration to focal point.
Tip: Lighting at painting level helps prevent glare and highlights textures in the artwork.
People Also Ask
Can I repaint a painting after placing it?
Yes. Right-click the frame to cycle through the available paintings until you find a new one. You can change as often as you like.
You can change the painting by right-clicking the frame to cycle through options.
Do I need any special items besides the item frame?
Only an item frame is essential; you also need a solid wall to attach it to. Paintings themselves are selected from the frame’s options.
Just an item frame and a wall—no other special items are required.
What if the painting doesn’t fit the wall space?
Try a different painting with a more suitable aspect ratio, or place the frame on a different wall that matches the space better.
If a painting won’t fit, switch to a different artwork or relocate the frame.
Can I display multiple paintings on a single wall?
Yes. Place several frames with consistent spacing to create a gallery; vary sizes for visual interest while maintaining balance.
Absolutely—use several frames to form a gallery and keep the spacing even.
Is painting in Minecraft available in Bedrock edition?
Paintings are available in Bedrock Edition as well as Java; the cycling mechanism is the same regardless of edition.
Paintings work in Bedrock as in Java; you cycle artwork by right-clicking the frame.
Watch Video
The Essentials
- Choose the right wall space and frame size
- Cycle frames to find a fit that complements the room
- Use multiple frames to create a cohesive gallery
- Experiment with layout and lighting for maximum impact