How to Make an Item Frame in Minecraft
Learn how to craft and place an item frame in Minecraft, with practical tips for Java and Bedrock editions, plus rotation, display ideas, and troubleshooting.

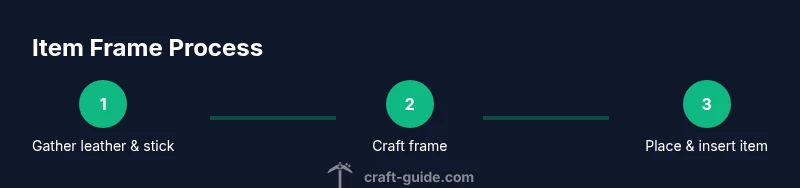
By the end of this guide, you will know how to make an item frame in Minecraft and use it to display your items. You’ll gather leather and a stick, craft the frame in a crafting table, and place it on walls, shelves, or item frames. This tutorial covers both Java and Bedrock editions with practical tips.
What is an Item Frame in Minecraft and why use one?
An item frame is a small display block you can attach to walls or other solid surfaces to showcase items, maps, banners, or other loot. It functions like a tiny exhibit case, helping builders organize storage rooms, create informative displays for tutorials, or simply add character to a base. The item inside can be rotated to show different angles or items, making it a flexible tool for both practical storage and creative builds. Whether you’re organizing loot in a rail station or designing a museum room in a village, item frames are a simple, rewarding feature for players of all skill levels. Craft Guide’s Minecraft guides emphasize that frames are inexpensive to make and easy to adapt as you expand your world.
Quick note on rotation and placement
When you place an item frame on a solid block, it faces outward from that surface. You can rotate the displayed item by interacting with the frame (e.g., right-clicking or using the appropriate action for your platform). This lets you cycle through different orientations and show off multiple items without moving the frame itself. It’s a small feature, but it can dramatically improve how you present gear, maps, or collectibles in your base.
Why you might want to use item frames
- Organization: A wall of item frames simplifies inventory management and quick access to gear.
- Decoration: Frames can highlight rare items, enchanted tools, or completed map sets.
- Instructional displays: Use frames to show recipes, sample builds, or quest items in a tutorial world. Craft Guide advocates starting with a few frames near your storage area to practice alignment and rotation before expanding to larger galleries.
Edition considerations and consistency
Item frames exist in multiple Minecraft editions, with consistent core behavior across Java and Bedrock. The crafting recipe is the same general idea (one leather plus a stick, crafted on a 3x3 grid), and placement works on any solid surface. Minor UI differences may appear between editions, but the basic flow—gather materials, craft, place, then insert items—remains constant. If you’re switching between versions, quickly verify the exact recipe in-game to confirm any interface changes.
Getting comfortable with the basics
Before you build an expansive frame gallery, practice with two to four frames. Place them on a flat wall at eye level, insert a few items, and rotate to understand how orientation affects readability. This foundational step helps you design your space more efficiently and reduces the chance of misaligned displays as your collection grows.
Tools & Materials
- Crafting table(Needed to access the 3x3 crafting grid for item frame recipes.)
- Leather(Obtained by killing cows; used in the item frame recipe.)
- Stick(Crafted from wooden planks; required alongside leather for the frame.)
- Solid wall or surface(A sturdy block to attach the frame to (e.g., stone or wood).)
- Items to display(Any item you want to showcase once the frame is placed.)
Steps
Estimated time: 10-15 minutes
- 1
Gather materials
Collect leather and a stick, and ensure you have access to a crafting table. Leather comes from cows, while sticks come from wooden planks. Having a few extra leather pieces helps with replacements down the line.
Tip: Plan ahead by collecting more leather than you think you need. - 2
Open the crafting interface
Right-click the crafting table to open the 3x3 grid. You will place leather and stick into this grid to craft a frame.
Tip: Arrange your inventory so the leather and stick are easy to reach during crafting. - 3
Craft the item frame
Place leather and a stick in the grid following the edition’s recipe to create an item frame. If the recipe isn’t visible, update the game or check your edition’s documentation for the exact layout.
Tip: If you don’t see the recipe, refresh or re-open the recipe book in-game. - 4
Collect the frame
Move the newly crafted frame from the crafting grid into your inventory.
Tip: Keep a few frames in a chest near your storage to speed up builds. - 5
Choose a placement spot
Identify a solid surface where the frame will look best. Consider height, lighting, and surrounding items to make the display readable.
Tip: Mark the spot with a temporary block to ensure alignment across multiple frames. - 6
Place the frame
Right-click the wall to place the frame so it faces outward. The frame orientation is determined by your placement direction.
Tip: If the frame faces the wrong way, pick it back up and re-place in the intended direction. - 7
Insert an item into the frame
Hold the item you want to display and right-click the frame to insert it. You can cycle through display orientations by repeating the action with the item in hand.
Tip: Start with a simple item to verify rotation works as expected before moving to rare items.
People Also Ask
Do item frames work in both Java Edition and Bedrock Edition?
Yes. Item frames function in both Java and Bedrock editions, with similar crafting and placement mechanics. Some edition-specific tweaks may apply to rotation or texture behavior.
Item frames work in both Java and Bedrock editions, though a few edition-specific tweaks may exist.
Can you display maps in an item frame?
Maps can be placed inside item frames, turning the wall into a dynamic navigation display that updates as you explore new areas.
You can display maps in item frames, and they update as you explore.
What’s the maximum number of item frames I can place in a single area?
There isn’t a fixed global limit; practical constraints come from space, layout, and game performance. Plan your display size accordingly.
No fixed cap—plan for space and performance when adding many frames.
How do I rotate the item inside the frame?
Right-click the frame with the item in your hand to cycle through available orientations. Continue clicking to browse display options.
To rotate, right-click with the item in hand to cycle orientations.
What happens if a frame is destroyed?
If a frame is broken, the frame itself drops as an item, and any displayed item drops separately if it was included in the frame’s content.
Breaking a frame drops the frame; the item may drop separately.
Watch Video
The Essentials
- Gather leather and sticks to craft frames.
- Place frames at eye level on solid surfaces.
- Insert items to display and rotate orientation as needed.
- Experiment with displays to enhance organization and aesthetics.