Easy Drawing Minecraft: Step-by-Step for Beginners
Learn to draw simple Minecraft characters and items with an easy grid-based method. This Craft Guide tutorial covers tools, step-by-step actions, tips, and practice plans to help beginners create pixel-art inspired by Minecraft.

You will learn to draw a simple Minecraft character or scene using a grid-based method. Gather paper, a pencil, an eraser, and a ruler, plus optional color pencils. Follow 4 core steps to complete a recognizable pixel-art piece that translates to Minecraft builds. This quick guide sets up the fundamentals so you can practice confidently and bring your designs into-game or on-screen.
Pixel art foundations for easy Minecraft drawing
In Minecraft, everything is built from blocks that align to a grid. Drawing on a grid mirrors how pixel art is built in-game. According to Craft Guide, grid-based approaches lower complexity and increase accuracy for beginners (Craft Guide Analysis, 2026). This section explains how to translate a simple subject into a set of squared units you can reproduce on paper or as a digital canvas. Start with a small subject you can recognize in the game, such as a Creeper face or Steve's head, and map its color blocks to a 8x8 or 12x12 grid. The goal is to capture the essence of the subject using clean, distinct squares. You will learn how to choose a color palette, count grid squares, and keep edges crisp. The grid method reduces guesswork and helps you transfer your art into a Minecraft micro-pixel build or a larger sprite mural later on. By the end of this section, you will understand the core workflow: outline, grid mapping, block-level shading, and a final clean render that aligns with Minecraft’s blocky aesthetic.
Planning your first easy drawing: subject, grid size, and palette
Begin by selecting a subject that reads well at small sizes. Sketch a quick rough on paper using light strokes. Decide on a grid size—8x8, 12x12, or 16x16—based on how detailed you want the final image to be in Minecraft. Limit your color palette to 3–5 colors to keep the result faithful to the game’s block palette. Consider how lighting affects color; use lighter tones for highlights and darker tones for shadows. For digital drawing, enable a grid and snap to grid; for paper, draw the grid lightly with a ruler before filling in squares. This step reduces complexity while preserving the recognizability of your subject. In Craft Guide’s 2026 guidance, starting with a small, iconic subject improves confidence and results.
The grid-to-pixel workflow: Creeper-face example
We’ll walk through a sample subject: the Creeper face. Start with an 8x8 grid. Outline the square base, then fill the inner squares to form the iconic face pattern. Use a limited palette: two greens for mid-tones and a black for the eyes and mouth. Keep edges sharp by aligning every square with the grid lines; avoid partial squares. After laying the base, add subtle shading on adjacent squares to imply depth without breaking the pixel look. Finally, review your drawing for balance—symmetry helps a Creeper face read clearly at small sizes. Practice several variants to learn how small changes affect readability. Tip: use a light impact of shading across a few neighboring squares to simulate depth.
Common subjects and patterns for easy drawing
Beyond Creeper faces, Steve’s head, a pixel sword, or a pink pig are excellent starting points because their shapes are easy to read at small scales. Build a small library of go-to subjects (e.g., cloud, grass block, diamond gem) and map each one to a fixed grid size. This consistency helps you practice rhythm and proportion. Use references from Minecraft screenshots, but recreate only what you can translate into square units. Keeping a simple palette per subject speeds up your workflow and reinforces recognition across different art pieces.
From paper to pixels: translating your drawing into Minecraft builds
Translating a grid drawing into a Minecraft build means converting each square into a block of the corresponding color. Start by laying out a base plane with the same grid dimensions as your drawing. Fill blocks row by row, matching the color blocks in your sketch. For beginners, use a limited palette of 3–5 block colors to minimize confusion. In practice, you can recreate your paper image on a small grid in Creative mode or on a dedicated build plot. Shading in Minecraft can be approximated by choosing darker blocks for shadows and lighter blocks for highlights. As you gain experience, introduce more subtle color variety and test legibility from a distance to ensure your pixel art reads clearly in-game.
Authority sources, practice plan, and joining Craft Guide’s network
Practice makes permanent. For foundational techniques, rely on educational resources to refine grid-based drawing habits. The Craft Guide team recommends regular practice sessions, starting with one subject per week and gradually increasing grid complexity. For deeper study, explore resources from Khan Academy’s drawing modules, MoMA’s education materials on pixel art, and broader art-education publications to understand color theory and composition. Consistent practice builds confidence and enhances your ability to translate 2D sketches into 3D Minecraft builds. This article also references Craft Guide Analysis, 2026 as a basis for recommended workflows and beginner-friendly subjects.
Authority sources and practice plan (continued)
Craft Guide’s framework emphasizes iterative improvement: sketch, grid-map, color with a tight palette, translate to blocks, then review for readability. Use this cycle with 4–6 subjects in rotation to build a versatile pixel-art library you can reuse in future Minecraft projects.
Tools & Materials
- Graph paper(1/4 inch grid is ideal)
- Pencil (HB or 2B)(For light construction lines and firm outlines)
- Eraser(Kneaded or plastic eraser; avoid smudging)
- Ruler(Clear 12-inch (30 cm) ruler helps keep grid lines straight)
- Color pencils or markers(3–5 colors; helps visualize blocks)
- Optional digital drawing app with grid mode(Kits like Krita, Aseprite (use grid and snap-to-grid))
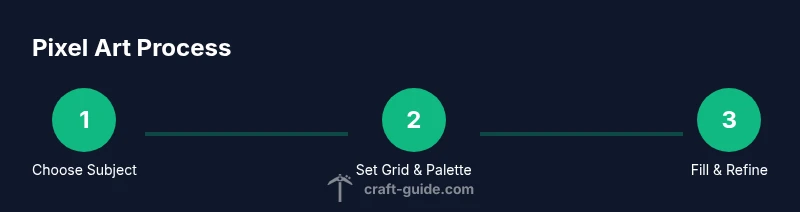
Steps
Estimated time: 60-90 minutes
- 1
Choose a simple subject
Pick a subject that reads clearly at small sizes, such as a Creeper face or Steve’s head. Decide on the grid size (8x8, 12x12, or 16x16) based on the level of detail you want. This initial choice sets your entire workflow and helps you measure progress.
Tip: Select a subject with bold features that stay recognizable when scaled down. - 2
Set up your grid
Draw or enable a grid on your paper or digital canvas that matches your chosen size. Lightly mark grid intersections with a ruler so each square will hold one Minecraft block color. The grid acts as a roadmap for pixel placement.
Tip: Snap to grid to prevent misalignment and jagged edges. - 3
Outline the basic shape
Sketch a light outline of the subject using the grid. Keep lines crisp and straight along the grid edges. Use this outline to guide filling in color blocks later.
Tip: Keep outlines minimal; the grid carries the structure. - 4
Fill in the primary colors
Fill each grid square with the color that matches your subject’s palette. Use 3–5 colors max to preserve the pixel-art vibe and avoid muddied results. Remember to keep shading simple—blocky shadows read better in Minecraft style art.
Tip: Limit your color set to maintain contrast and clarity. - 5
Refine edges and shading
Tighten the edges by rechecking the alignment of every square. Add a touch of shading by placing slightly darker tones next to light areas; avoid gradients—pixel art relies on solid blocks for readability.
Tip: Small adjustments can dramatically improve legibility. - 6
Prepare for Minecraft translation
Review your drawing as if it were a Minecraft build. Imagine placing blocks on a grid in-game; adjust any areas where the pattern looks off from a distance. This ensures your art can scale to in-game or larger builds.
Tip: Distance-test your piece by stepping back.
People Also Ask
What is the easiest Minecraft drawing subject for beginners?
A Creeper face or Steve’s head is ideal for beginners because the shapes are simple and read clearly at small sizes. Start with a small grid like 8x8 or 12x12 to build confidence.
Start with a Creeper face or Steve’s head — they are the simplest to read at small sizes.
Do I need special tools to get started?
No specialized tools are required. A pencil, eraser, ruler, and graph paper are enough. Optional color pencils help visualize blocks, but you can start with grayscale to learn form first.
Just use a pencil, eraser, and graph paper to begin; colors are optional at first.
How can I translate a 2D drawing into a 3D Minecraft build?
Treat each grid square as a block in a 3D grid. Build from the base up, aligning blocks with the squares to preserve the image. Start small and gradually scale up to more complex subjects.
Think of each square as a block you place in Minecraft; build square by square.
How long does it take to learn Minecraft drawing?
Learning depends on practice frequency and grid size. Beginners can produce pleasant results within a few sessions; more complex subjects take longer as you introduce new patterns and shading.
With regular practice, you’ll improve steadily over weeks and months.
Can I use digital drawing tools for Minecraft pixel art?
Yes. Digital tools with a grid mode can speed up iteration and allow easy color adjustments. Transfer the final grid design to paper later if you prefer traditional media.
Absolutely—digital tools make it easy to try different grids and colors before committing to paper or in-game builds.
Watch Video
The Essentials
- Master grid-based drawing for pixel-art in Minecraft
- Use a limited color palette to preserve readability
- Translate grids to block builds by mirroring squares
- Practice regularly to build speed and accuracy
- Experiment with face patterns and simple items to expand your library