How to Build a Cool House in Minecraft: A Practical Guide
Learn how to design and build a cool house in Minecraft with practical steps, materials, lighting, and interior ideas. This educational guide walks beginners through planning, building, and finishing a visually striking Minecraft home with clear, actionable steps.

With this guide, you'll learn how to plan, design, and build a cool house on minecraft that stands out. You'll lock in a theme, choose materials, and follow a clear step-by-step process to craft a sturdy, visually striking home. This approach works for beginners and seasoned builders alike. Follow along for practical tips and quick wins. Craft Guide's insights guide every detail.
Planning your build: theme, scale, and location
According to Craft Guide, a successful plan begins with a clear theme, defined scale, and a good site. In building a cool house on minecraft, decide early whether you want a sleek modern villa, a cozy cottage, or an imaginative fantasy tower. Pick a color palette and block families before you place the first block to prevent mid-build clashes. Plan the footprint, access points, and rough floor plan so every room serves a purpose and the overall silhouette reinforces the chosen theme. A cohesive plan saves materials and time while helping your build feel intentional.
Core design principles for a stunning Minecraft house
Strong Minecraft homes balance proportion, silhouette, and function. Aim for readable shapes—rectangles, triangles for roofs, or towers—that read well from a distance. Use symmetry sparingly to create visual interest while keeping paths and entrances intuitive. Add a signature feature (a tower, balcony, or glass-walled nook) to make your house instantly recognizable. Consider how interior spaces flow from room to room, ensuring that lighting, doors, and windows support daily use and exploration.
Materials and aesthetics: choosing blocks that pop
The right palette ties your exterior to its surroundings. Mix textures—stone for structure, wood for warmth, and glass for openness—while sticking to a cohesive color family. Accent blocks (concrete, terracotta, or glazed blocks) can highlight edges, trim, and focal points. Use durable materials for structural elements and lighter blocks for details to avoid a heavy, overbearing look. Craft Guide analysis shows that a consistent material mix with deliberate accents yields a polished, professional result.
Lighting, windows, and interior layout tips
Lighting shapes atmosphere and safety in Minecraft. Combine ambient lighting with accent sources like lanterns or glowstone to reduce dark corners. Place windows to frame vistas while avoiding excessive exposure to mobs. Plan interior layouts with clear sightlines to major zones (kitchen, living, storage, and crafting areas). Use height variation and mezzanines to add depth without expanding the footprint. Thoughtful lighting and smart zoning elevate a simple house into a memorable home.
Common mistakes and how to avoid them
Overcrowding spaces with too many blocks or overly ambitious curves can spoil readability. Start with a solid base and expand in increments to keep proportions right. Neglecting ventilation or natural light can make interiors feel cramped; incorporate windows, skylights, and breathable layouts. Finally, skipping detailing—like furniture, stairs, and textures—leaves a flat experience. The best builds pair practical layout with tasteful accents that enhance both form and function.
notes":null}],
toolsMaterials Sketch?
toolsMaterials: {"items": [{"name":"Assorted building blocks (wood planks, stone bricks, concrete)","required":true,"note":"Choose a cohesive color palette before starting"},{"name":"Stone bricks","required":true,"note":"For clean, modern lines"},{"name":"Glass panes","required":true,"note":"For windows and skylights"},{"name":"Wooden stairs","required":true,"note":"Create elevated entrances and porches"},{"name":"Glowstone or lanterns","required":true,"note":"For ambient lighting"},{"name":"Dyes or concrete powder","required":false,"note":"Accent colors"},{"name":"Scaffolding","required":false,"note":"For safe working height"},{"name":"Crafting table, furnace, chest","required":true,"note":"Essential tools to craft/build"},{"name":"Seating and furniture blocks (stairs, slabs, fences)","required":false,"note":"Interior details"}]}
stepByStep_removed_text_column_1_placeholder
stepByStep_removed_text_column_2_placeholder
stepByStep_removed_text_column_3_placeholder
STEP-BY-STEP
steps:[{"number":1,"title":"Choose your theme and site","description":"Select a cohesive theme (modern, rustic, or fantasy) and evaluate the terrain for fit. This establishes the map’s visual direction and ensures the footprint aligns with your landscape. ","tip":"Decide on a single dominant theme before detailing color and materials."},{"number":2,"title":"Lay the foundation and footprint","description":"Mark the building’s outline, then clear space and level terrain as needed. A solid foundation prevents future structural issues and helps with symmetry.","tip":"Use compact, consistent dimensions to maintain proportion."},{"number":3,"title":"Build the frame and walls","description":"Erect the main frame with vertical supports and define floor heights. Add exterior walls using your chosen materials, keeping openings for doors and windows deliberate.","tip":"Keep roofline and wall heights balanced to avoid top-heavy looks."},{"number":4,"title":"Add roofing and shape","description":"Create a roof silhouette that complements the theme (sloped, gabled, or flat). Add overhangs to create depth and shade, which also helps with in-game lighting.","tip":"Overhangs protect interiors and soften the building’s edge."},{"number":5,"title":"Install windows, doors, and partitions","description":"Insert windows to frame views and allow light; place doors for easy access between rooms. Use interior partitions to define spaces without closing off the flow.","tip":"Vary window sizes to emphasize focal points and facade rhythm."},{"number":6,"title":"Finish interior details and furnishings","description":"Add floors, furniture, and storage. Use color accents and textures to reflect the exterior theme inside.","tip":"Layer textures with rugs, seating, and shelves to boost realism."},{"number":7,"title":"Lighting, landscaping, and final polish","description":"Implement a balanced lighting plan and add exterior landscaping (pathways, planters, and terrain tweaks). Do a final walk-through to adjust minor details.","tip":"Test lighting at different game times to ensure mood and visibility."}],"estimatedTime":"3-5 hours"}
tipsList_removed_text_block_placeholder
keyTakeaways_removed_text_block_placeholder
videoEmbed_removed_text_block_placeholder
Tools & Materials
- Assorted building blocks (wood planks, stone bricks, concrete)(Choose a cohesive color palette before starting)
- Stone bricks(For clean, modern lines)
- Glass panes(For windows and skylights)
- Wooden stairs(Create elevated entrances and porches)
- Glowstone or lanterns(For ambient lighting)
- Dyes or concrete powder(Accent colors)
- Scaffolding(For safe working height)
- Crafting table, furnace, chest(Essential tools to craft/build)
- Seating and furniture blocks (stairs, slabs, fences)(Interior details)
Steps
Estimated time: 3-5 hours
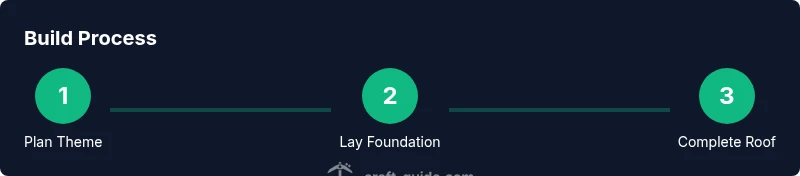
- 1
Choose your theme and site
Select a cohesive theme (modern, rustic, or fantasy) and evaluate the terrain for fit. This establishes the map’s visual direction and ensures the footprint aligns with your landscape.
Tip: Decide on a single dominant theme before detailing color and materials. - 2
Lay the foundation and footprint
Mark the building’s outline, then clear space and level terrain as needed. A solid foundation prevents future structural issues and helps with symmetry.
Tip: Use compact, consistent dimensions to maintain proportion. - 3
Build the frame and walls
Erect the main frame with vertical supports and define floor heights. Add exterior walls using your chosen materials, keeping openings for doors and windows.
Tip: Keep roofline and wall heights balanced to avoid top-heavy looks. - 4
Add roofing and shape
Create a roof silhouette that complements the theme (sloped, gabled, or flat). Add overhangs to create depth and shade, which also helps with in-game lighting.
Tip: Overhangs protect interiors and soften the building’s edge. - 5
Install windows, doors, and partitions
Insert windows to frame views and allow light; place doors for easy access between rooms. Use interior partitions to define spaces without closing off the flow.
Tip: Vary window sizes to emphasize focal points and facade rhythm. - 6
Finish interior details and furnishings
Add floors, furniture, and storage. Use color accents and textures to reflect the exterior theme inside.
Tip: Layer textures with rugs, seating, and shelves to boost realism. - 7
Lighting, landscaping, and final polish
Implement a balanced lighting plan and add exterior landscaping (pathways, planters, and terrain tweaks). Do a final walk-through to adjust minor details.
Tip: Test lighting at different game times to ensure mood and visibility.
People Also Ask
What is the best theme for a cool house in Minecraft?
Popular themes include modern, rustic, and fantasy towers. Pick one and tailor materials, colors, and shapes to reinforce that identity. Consistency beats complexity for a cohesive build.
A good starter question is: choose a theme—modern, rustic, or fantasy—and stick with it for best results.
Which blocks create a modern look?
For a modern aesthetic, use smooth stone, concrete, glass panes, and dark accents. Keep lines clean and avoid overly busy textures. Balance bold blocks with lighter tones.
For a modern look, go with smooth stone, concrete, and glass while keeping textures calm and lines crisp.
How can I add interior lighting safely?
Place light sources such that all rooms are well-lit without creating harsh shadows. Use a mix of lamps, lanterns, and hidden lighting behind blocks for a clean look.
Light each room evenly and use ambient lighting to avoid dark corners.
Can this design be adapted for survival mode?
Yes. In survival, focus on resource efficiency, avoid overbuilding before gathering materials, and plan trap for mobs. Prioritize practical access and safety features like lighting and doors.
Absolutely—adapt plans to the survival resource pace and safety needs.
How do I scale this build for larger plots?
Extend the footprint in logical increments, maintain the same roof style, and repeat exterior motifs to preserve harmony. Add wings or towers to scale without losing balance.
Scale by adding wings or towers that mirror the main structure.
What common mistakes should I avoid?
Avoid changing themes mid-build, skip detailing, and neglect lighting. Consistency and care with shading and perspective create a believable, immersive home.
Stick to your theme, add detail, and light interiors well to avoid flat results.
Watch Video
The Essentials
- Plan themes and scale before placing blocks
- Choose a cohesive material palette for a polished look
- Incorporate lighting and windows to enhance mood and usability
- Execute a clear, step-by-step build from foundation to finish