How to deal with pillagers in Minecraft
Master how to deal with pillagers Minecraft with practical defense, raid management, and villager safety tips. Learn scouting, fortification, and combat strategies to keep your base secure for 2026.

Learn how to deal with pillagers Minecraft by preparing safe routes, locating pillager outposts, and using effective defensive builds. This guide covers early warning signs of raids, combat tactics, and raid-safe base design, plus tips for both solo play and multiplayer servers. By following these steps, you can reduce raid risk and protect your hard-earned structures.
Understanding Pillagers and Raids
Pillagers are hostile ranged mobs that coordinate raids on villages and exposed bases. Raids trigger when a player either visits a village that doesn’t have a stable raid history or when a raid is awakened at an outpost or village nearby, especially after the Bad Omen effect is triggered by a vindicator or pillager raid event. The event unfolds in waves, with basic pillagers appearing first, followed by more dangerous mobs like vindicators and, in later waves, Ravagers. According to Craft Guide, modern players who understand raid progression can anticipate threat levels and prepare countermeasures in advance. This knowledge helps you plan safer routes, secure perimeters, and pace engagements during a raid, rather than reacting in the moment. In short, knowing how pillagers operate lets you minimize damage and preserve your resources.
Understanding Pillagers and Raids
Tools & Materials
- Shield(Craft at least 1; hold to block arrows during engagements.)
- Iron Armor (full set)(Helmet, chestplate, leggings, boots; durability matters in longer raids.)
- Iron Sword or better(Good balance of damage and speed for quick threats.)
- Bow or Crossbow(Carry a healthy supply of arrows; consider enchantments if available.)
- Arrows(Stock 64+ for extended encounters; conserve when possible.)
- Torches / Lighting blocks(Illuminate paths and critical approach routes to deter ambushes.)
- Cobblestone / Stone blocks(Fortify doors, create barriers, and build quick cover.)
- Food / Healing items(Ensure you have enough to sustain through raid waves.)
- Trap-free escape routes(Plan safe retreats if engagement becomes overwhelming.)
Steps
Estimated time: 30-45 minutes
- 1
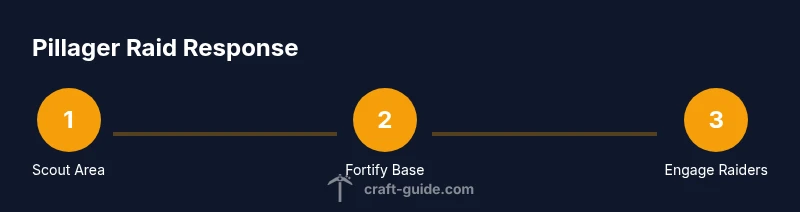
Scout for nearby pillager activity
Begin with a quiet scout to identify any pillager outposts or suspicious activity around your village or base. Note wind direction, nearby plains, and visibility to determine optimal approach. This helps you avoid being caught off-guard when a raid starts.
Tip: Move with the wind in mind; approach from higher ground to spot patrols early. - 2
Choose your defensive approach
Decide whether you’ll fortify a perimeter, defend key chokepoints, or move villagers to a safe shelter. A prepared layout reduces raid damage and keeps your focus on survival rather than chaotic skirmishes.
Tip: Prioritize chokepoints and lighting to slow attackers and give you reaction time. - 3
Fortify entry points and paths
Reinforce doors, corners, and access points with cobblestone or solid blocks. Create a protected corridor from the village to a safe haven, and ensure any gaps are covered with shields or blocks to prevent ambushes.
Tip: Place torches at both ends of corridors to prevent dark spots that attract more mobs. - 4
Equip your defense gear
Ensure your shield is ready, armor is intact, and your weapon is charged. If using a crossbow, load a few bolts to respond quickly when a group breaches the perimeter.
Tip: Test shield timing on training targets to maximize your parry windows. - 5
Engage pillagers safely during patrols
When engagement is necessary, keep your shield raised and use arrows to thin lines from a safe distance. Move through cover to minimize exposure and avoid getting boxed in by multiple raiders.
Tip: Aim for exposed pillagers first to reduce incoming damage from groups. - 6
Respond to a raid wave
During a raid, prioritize keeping villagers safe, then focus on eliminating ranged threats. Use terrain to your advantage and call for help if playing on a server with others.
Tip: If overwhelmed, retreat to your fortified shelter and regroup before resuming. - 7
Reinforce and recover after the raid
Repair damaged blocks, restock gear, and review what triggered the raid with your team. Replenish arrows, food, and armor durability to prepare for future waves.
Tip: Document lessons learned so you can improve your setup for the next event. - 8
Review and adjust defenses
After a raid, evaluate what worked and what failed. Adjust lighting, reinforcement points, and patrol routes to reduce future vulnerability.
Tip: Practice in a controlled scenario to cement new defensive routines.
People Also Ask
What triggers a raid in Minecraft?
Raids trigger when you encounter a village with the Bad Omen effect or awaken a raid near a pillager outpost. Understanding this helps you prepare defenses and plan escape routes before waves begin.
Raids start when you trigger a Bad Omen or approach a village during a raid, so be prepared with defenses and escape plans.
Is it possible to avoid raids entirely?
You can minimize risk by avoiding triggering events near villages and pillager outposts, and by lighting and fortifying key routes. Skillful scouting helps you steer clear of raid-prone zones when possible.
You can reduce risk by avoiding triggers and fortifying key routes; careful scouting helps you stay clear of raid-prone areas.
What is the best armor type for pillager encounters?
An iron set or better provides solid protection during pillager encounters. Diamond armor offers higher durability for frequent raids or multiplayer scenarios.
Iron armor or better is good for pillager encounters; diamond lasts longer in tougher raids.
Can villagers be protected during raids?
Yes. Build secure shelters or fenced enclosures with controlled access doors to keep villagers safe during raids. Prioritize quick evacuation routes to the shelter.
Yes, protect villagers with secure shelters and clear evacuation routes.
Do raids occur on Peaceful difficulty?
Raids do not occur on Peaceful difficulty. If you see waves appearing, check the difficulty setting and adjust to a non-Peaceful mode for normal gameplay.
Raids don’t happen on Peaceful. Switch to a non-Peaceful mode to experience raiding in survival.
How can I deal with Ravagers effectively?
Keep distance when Ravagers appear, use terrain to avoid direct charges, and use a shield to mitigate damage while you strike with ranged or melee attacks when safe.
Stay back from Ravagers, shield up, and use ranged attacks when you can safely strike.
Watch Video
The Essentials
- Fortify entrances and paths before dark.
- Always carry a shield and ranged weapon when patrolling.
- Scout and anticipate raid waves using smart routes.
- Keep villagers safe with secure shelters during raids.
- Review and adapt defenses after each raid encounter.