How to Stop a Minecraft Raid: Practical Guide
Learn practical strategies to stop a Minecraft raid quickly and safely, including fortifications, countermeasures, and post-raid recovery. Craft Guide analyzes raid mechanics to help players of all levels defend villages effectively in 2026.

In this guide you’ll learn how to stop a Minecraft raid by preparing your village, preventing Bad Omen triggers, and countering raid waves with iron golems, walls, and smart evacuations. You’ll follow a practical, step-by-step plan you can apply in any world, plus safety tips to minimize losses. According to Craft Guide Analysis, 2026, this approach balances defense, timing, and resource management for seasoned players and newcomers alike.
Understanding Raid Mechanics and Why They Start
Raids in Minecraft are dynamic, wave-based assaults triggered by specific conditions. A player who has acquired the Bad Omen effect, usually after defeating a Pillager captain, will trigger a raid when they enter a village. Once started, waves spawn independently of the player’s location, making it essential to understand the raid’s lifecycle. Each wave grows progressively tougher, with Pillagers, Vindicators, Ravagers, and a Captain appearing at various points. Knowing the spawn logic helps you position defenses, time your countermeasures, and avoid unnecessary casualties. The Craft Guide team notes that preparation reduces raid duration and mitigates losses, a conclusion supported by Craft Guide Analysis, 2026. During a raid, villagers inside the village generate panic behavior, doors and gates become critical choke points, and raiders seek villager targets. Your goal is to minimize villager casualties, reduce the number of raiders as quickly as possible, and prevent the final wave from causing lasting damage to your base.
Key takeaway: raids are not a single moment but a sequence; countering early waves can dramatically reduce later threat and loot loss.
Quick Wins: Immediate Actions to Calm a Live Raid
When a raid is in progress, prioritize containment and safety. First, close all outer gates and secure any exposed pathways to prevent raiders from breaking through. Move villagers into secure buildings with sturdy walls and a contained space. Activate any bells or alarms to draw raiders toward a kill zone where you and your defenses have a clear advantage. Use iron golems as rear-guard defenders near the center of the village; they’re strong enough to withstand multiple raiders and can distract tougher foes. Lighting is crucial—ensure high visibility throughout the village to discourage extra spawns around your base floor plan. If ravagers breach, use solid cover and high ground to maximize ranged or melee counters. The aim is to reduce chaos quickly, so you can finish the raid with minimal damage. Craft Guide analyses suggest that rapid, organized responses shorten raid duration and preserve resources.
Pro-tip: designate a “safe room” for villagers that is stocked with supplies and a clear exit route for quick evacuation if the situation deteriorates.
Building Your Raid-Resistant Village: Fortifications and Traps
Fortifying your village before a raid is often more effective than fighting the raid itself. Start with a perimeter wall that is at least two to three blocks thick and tall enough to keep raiders from easily vaulting it. Place gates that close quickly, and install a secondary inner wall to create a layered defense. Lighting should be dense to deter raiders from spawning inside the outer ring. Bells not only alert you to danger but can also lure raiders into controlled areas where you have kill zones and traps. Consider funnels or chokepoints that force raiders to walk through kill corridors where you can use ranged weapons, fire, or traps to thin their numbers. Iron golems should be placed near the center of the village and the safe houses; they provide critical extra defense and help manage high-damage waves. Finally, keep a supply of water buckets, ladders, and blocks to quickly alter the terrain and create new choke points during a raid.
Note: sturdy fortifications reduce survivability risk and give you more time to implement a longer-term defense strategy.
Step-by-Step Plan to Stop a Raid (In-Progress)
If you’re in the middle of a raid, follow a structured plan to regain control. First, locate the raid’s epicenter and identify the current wave. Then, position your iron golems and archers to cover the most vulnerable villager clusters. Seal off exits to create a kill zone where raiders must pass through your line of defense. Redirect raiders away from valuable villagers by guiding them toward prepared traps or kill corridors. If you have a safe room, guide villagers there while you focus on eliminating wave threats. Finally, when the last raiders are defeated or routed, perform a quick sweep of the village to find any survivors and secure loot. The aim is to finish the raid with minimal damage and preserve essential villagers for future defense. With careful timing and strategic placement, you can shrink a raid from chaotic to manageable in a single session.
Tip: use lighting upgrades and funnel optimization to prevent new spawns as you work to secure the area.
Post-Raid Recovery and Loot Security
After a raid ends, the first step is to assess damage and repair any structural weaknesses. Replace broken blocks, fix gates, and confirm that every villager has safe shelter. Reinforce any areas that took damage during the raid; long-term security depends on strengthening the village’s weakest points. Store loot in secure chests within protected buildings to prevent theft, and consider moving villagers to a temporary relocation area if some houses are too damaged for immediate use. A calm debrief helps you plan future defenses, including improved fortifications and more reliable fences or trap design. The village becomes a more resilient base after a raid when you convert lessons learned into actionable changes and improved resource allocation.
Pro-tip: re-check lighting, wall integrity, and gate systems within 24 hours post-raid to ensure no new spawn points exist.
Common Mistakes to Avoid During a Raid
Common errors include underestimating the raid’s pacing, placing defenses too far from central village hubs, and neglecting to shield vulnerable villagers. Another mistake is failing to maintain a steady supply of weapons, armor, food, and healing items for your team. Do not rely solely on one defender type; a mix of ranged and melee options ensures you can respond to multiple raid waves. Avoid ignoring escape routes and safe rooms; during chaos, having a properly secured evacuation path saves villagers and keeps you focused on raid management. Finally, don’t forget to rotate your defenses; raiders adapt, and so should you. A flexible design with modular defenses is easier to adapt to different raid configurations and world settings.
Important: always wear proper armor and carry healing items to survive boss-level moments—the risk of injury increases with every wave.
Case Studies: Real-Life Scenarios and Solutions
Scenario A: A Pillager Captain triggers a raid near a village with a wide, open layout. Solution: quickly collapse the outer walls to form a tight inner killing zone and bring villagers into a secure house cluster. Iron golems should be placed to maximize their reach, and you should funnel raiders toward kill corridors. The raid ends faster with fewer casualties. Scenario B: A Ravager breaches the west wall and threatens multiple villagers. Solution: use a trap or water moat to slow its advance, reposition defenders, and lure the Ravager into a corner with a high-damage, controlled kill zone. After the battle, repair the wall, improve lighting, and establish a secondary shelter for villagers. These cases illustrate the value of pre-planned defense, flexible tactics, and post-raid assessment.
Wrap-up: How to Stop a Minecraft Raid Consistently
Defending a village in Minecraft hinges on anticipation, fortified infrastructure, and disciplined, stepwise responses. Preparation—correctly placing lights, walls, bells, and residence clusters—reduces the severity of a raid. When a raid hits, a clear plan that prioritizes safety for villagers and efficient elimination of raiders is essential. The ultimate goal is to preserve your village’s vitality and maintain the ability to bounce back quickly from future raids. With practice, any player can turn raids from frightening chaos into manageable challenges.
Tools & Materials
- Iron golems(One or more to aid defense; can be spawned by villagers or built manually)
- Fortified village walls(2-3 blocks thick; surround the village with a secure gate)
- Bells and detection points(Place bells to alert and lure raiders into kill zones)
- Lighting (torches/lanterns)(Keep entire area well-lit to deter extra spawns)
- Trap design materials(Funnel corridors, water, ladders, and pistons for kill zones)
- Escape routes (doors, ladders, safe rooms)(Ensure villagers can retreat safely if needed)
Steps
Estimated time: 45-60 minutes
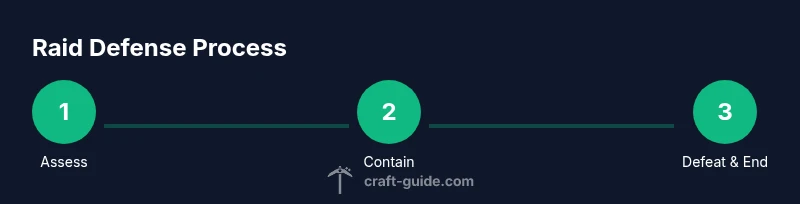
- 1
Assess the raid situation
Identify the current wave and locate the raid’s epicenter. This helps you position defenders and create a killing zone that maximizes your defensive advantages.
Tip: Take note of any breaches or open gates that need immediate attention. - 2
Contain the raid with barriers
Close exterior gates, seal off escape routes, and funnel raiders toward chokepoints. Layered defenses force raiders into predictable paths where your defenses perform best.
Tip: Use walls and fences to reduce the number of open attack angles. - 3
Rally villagers to safe zones
Guide villagers into secure buildings with solid walls and multiple doors. A contained population reduces panic and casualty risk.
Tip: Keep a mental map of safe rooms and routes; avoid crowding in a single area. - 4
Deploy iron golems and archers
Position iron golems to cover key corridors and use ranged defenders to thin waves before they reach villagers.
Tip: Keep golems near central hubs to maximize protection without trapping them. - 5
Eliminate raiders efficiently
Focus on the most dangerous raiders first, especially captains and ravagers. Use kill zones to maximize damage with minimal risk.
Tip: Avoid chasing individual raiders; control the area and let your traps do the work. - 6
End the raid and sweep
Once waves stop spawning, perform a quick sweep to locate survivors and repair damage. Re-secure all gates and reinforce weak points.
Tip: Document the damage and schedule repairs to prevent future breaches. - 7
Post-raid fortification
Upgrade lighting, reinforce walls, and place additional chests in secure houses to store loot.
Tip: Turn lessons from the raid into improved defenses for the long term.
People Also Ask
What triggers a raid in Minecraft?
A raid is triggered when a player with the Bad Omen effect enters a village. The raid then unfolds through multiple waves of raiders until cleared. Understanding this trigger helps you prepare before entering a village, reducing the risk of a chaotic start.
A raid starts when you enter a village with Bad Omen; waves follow and you can prepare by fortifying and grouping villagers first.
Can raids be stopped without iron golems?
Yes. While iron golems help, raids can be contained by fortifying the village, using traps and chokepoints, and by focusing on eliminating waves quickly. Good lighting and safe rooms for villagers also play a crucial role.
Yes. Fortifications and quick counterattacks can stop a raid even without iron golems.
How long does a raid last roughly?
Raids last as long as waves continue to spawn or until all raiders are defeated. The duration depends on your defenses, readiness, and the number of players helping in the fight.
Raid duration varies with defense quality and how quickly you eliminate waves.
What is the best layout for a raid-safe village?
A raid-safe layout uses a layered defense: a sturdy outer wall, inner kill zones, secure safe rooms for villagers, and high visibility lighting. Place bells to attract raiders into the kill zones and position iron golems strategically.
Use layered defenses, kill zones, and safe rooms to defend villagers effectively.
What should you do after a raid ends?
Assess damage, repair structural weaknesses, reinforce lighting, and store loot securely. Review what worked well and adjust your defenses for future encounters.
Assess, repair, reinforce, and learn for next time.
Watch Video
The Essentials
- Fortify the village perimeter before raids begin.
- Contain and funnel raiders into kill zones for efficient elimination.
- Protect villagers with secure safe rooms and iron golems.
- Post-raid fortifications reduce the impact of future threats.
- Learn from each raid to continuously improve defenses.