Minecraft Survival Home: Practical Guide
Learn how to design and build a sturdy survival home in Minecraft. This practical guide covers location, layout, materials, farming, storage, and step-by-step construction to help you survive nights and thrive long-term.

Build a secure, efficient survival home in Minecraft with a defensible location, solid walls, and smart storage. This guide covers layout, materials, and step-by-step construction to help you survive nights and expand later. You’ll learn how to plan, gather essentials, and structure a base that scales as you advance through ores, farms, and redstone ideas.
Why a Survival Home Matters
In vanilla Minecraft, your ability to survive long enough to progress relies on a dependable shelter. A well-designed survival home keeps you safe from night spawns, wandering mobs, and terrain threats. It also consolidates storage and workstations, saving time and avoiding constant backtracking. According to Craft Guide, a reliable base is the backbone of a successful playthrough, letting you focus on mining, farming, and exploration rather than rebuilding after each setback. A solid home isn’t just walls; it’s a planned workflow that supports growth. When you sketch a layout with dedicated sleeping, storage, crafting, and farming zones, you unlock steady progression. Even a modest starter house can become a multi-room fortress with layered defenses, quick access to resources, and room to expand. As you plan your Minecraft survival home, think about future upgrades: extra chests, a crop farm, animal pens, and a redstone-powered corridor. The goal is a sanctuary where you recover quickly, replant after night dangers, and protect valuables from creepers and accidents.
Core design principles for a safe base
Safety first: anchor your home with a defensible footprint and predictable access. A practical base uses a compact footprint to minimize exposed walls, while still leaving space for storage, crafting, and farming. Use a layered approach: a perimeter light, a sturdy main wall, and an inner secure room for valuables. Consider orientation that puts your door facing toward your most productive resources, reducing long treks at night. Build with durable blocks like stone or brick to resist explosions, and avoid excessive wood in the lower layers to limit fire risk. Accessibility matters: stairwells or ladders should connect ground-level entrances to higher floors without creating choke points. Sound, light, and air-tied design choices can reduce mob spawns indoors; a well-lit interior and well-placed windows improve visibility while remaining secure. In short, your Minecraft survival home should feel safe, logical to navigate, and expandable as you gather more resources.
Materials and aesthetics: balancing practicality and style
Practical builds favor durability and availability. Start with stone and cobblestone for outer walls because they’re resilient and easy to farm early on. Wood is faster to gather but adds fire risk and limits long-term durability, so mix it carefully with stone accents. Use glass or slabs to create natural light without compromising security, and cap roofs with slabs or stairs for weather protection. Keep a coherent color palette: a simple mix of gray stone, brown wood, and accents helps you spot different zones quickly. For late-game upgrades, replace basic blocks with brick, polished diorite, or terracotta to improve looks and durability. Always leave space for a storage room, an item forge, and a bed chamber. Finally, plan for lighting: torches near paths and in rooms deter hostile mobs and reduce the need for frequent nighttime repairs.
Common layouts and early-game basics
A strong starter base is small, well-organized, and close to essential resources. Consider a single-story, rectangular footprint with a central corridor that leads to a bed, a crafting area, and a storage wall. Place chests in labeled groups for wood, ores, food, and mob drops to minimize searching. Near the entrance, add a furnace, a crafting table, and a small bed area. Access to a mine or quarry can be kept separate from living spaces to reduce noise and hazards. Add a basic farm for crops and a couple of animals for steady food supply. Keep the roof watertight and use steps or ladders to reach an upper floor for extra storage or a lookout. This layout supports quick mornings, rapid resource gathering, and safe nights.
Expanding your base: farms, storage, and automation
Once your basic home is secure, expand with multi-purpose storage and automated or semi-automated farms. A centralized storage system with labeled chests and item sorters helps you manage valuables and resources as you collect more materials. Build a crop farm for wheat, potatoes, and carrots, plus animal pens for cows, sheep, and chickens to ensure a steady food supply. Simple redstone contraptions or water-powered farming can maximize output without complicating your base. Create designated zones for farming, storage, and smelting to streamline workflows. As you unlock new materials and techniques, you can upgrade your base with better lighting, reinforced walls, and an underground tunnel network that keeps necessary storage close to each work area. The aim is to maintain a clean, scalable Minecraft survival home that supports growing ambitions and longer explorations.
Tools & Materials
- Wood planks(For walls and crafting tables)
- Cobblestone(Durable early material; plentiful)
- Logs(Optional frame material for a timber look)
- Door(Wood or iron depending on material availability)
- Bed(Set spawn point and skip hostile nights)
- Chests(Storage blocks for organized items)
- Furnace(Smelting ore and cooking food)
- Crafting table(Create tools and blocks)
- Torches(Lighting to prevent mob spawns)
- Shovel(Quickly clear dirt and sand)
- Pickaxe(Mine stone and ores)
- Water bucket(Practical for farming and safety)
- Ladder/Steps(Access upper storage or lookout)
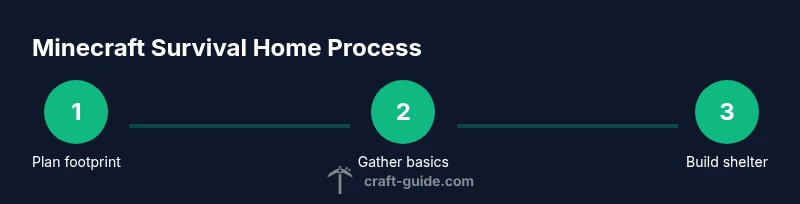
Steps
Estimated time: 2-3 hours
- 1
Choose a location and plan the footprint
Select a spot near wood, stone, and water; sketch a rough rectangle to guide room allocation. Consider terrain elevation for safety and efficient layout. A clear footprint helps you visualize future extensions as you build.
Tip: Pro tip: mark door orientation and note which sides get the most daylight. - 2
Gather resources and craft basics
Collect wood, stone, coal, and food. Craft a crafting table, sticks, a basic pickaxe, and torches to light your area. Having these ready speeds up early construction and improves safety.
Tip: Pro tip: bring a couple of stacks of torches to light the perimeter during first nights. - 3
Clear space and lay a perimeter
Clear obstacles within your footprint and outline a simple rectangle with blocks. Build a low wall to mark boundaries and prevent accidental falls or mobs from entering during setup.
Tip: Pro tip: light the outline edge to prevent early mob spawns. - 4
Build a basic shelter with door and roof
Erect a simple one-room shelter with a roof, a door, and windows. Ensure exterior walls are complete so you’re protected during the first night.
Tip: Pro tip: make the interior space feel larger by using light colors and mirror layouts. - 5
Create storage and workstation zones
Install a wall of chests, a crafting table, and a furnace in easy reach of the bed. Label storage when possible to keep a quick inventory and minimize trips.
Tip: Pro tip: group items by category to speed up crafting and smelting. - 6
Place a bed and safe spawn area
Put the bed in a secure corner with clear paths to the exit. A protected spawn reduces the chance of waking to dangerous mobs.
Tip: Pro tip: add a small fence to create a safe zone around the bed temporarily. - 7
Light and secure the interior
Spread torches evenly to reduce mob spawns indoors. Consider lamps or lanterns for durable, long-lasting lighting as you upgrade.
Tip: Pro tip: avoid placing torches directly on floors where you’ll walk, to keep paths clear. - 8
Access to mining and exploration
Create a simple staircase or ladder to a lower area for a starter mine that won’t disturb living spaces. Keep mine routes clean and well-lit.
Tip: Pro tip: map your mine access to align with storage zones for fast retrieval. - 9
Plan for expansion
Leave space for additional rooms: a farm, animal pens, and extra storage. Reserve corridors that keep frequent routes short and intuitive.
Tip: Pro tip: design corridors with clear sightlines to reduce turning around. - 10
Review and refine
Walk the base at different times of day to spot creeper threats and mob spawns. Tweak layout, lighting, and access to improve safety and efficiency.
Tip: Pro tip: sleep whenever possible to reset your spawn point and minimize night danger.
People Also Ask
What is the best starting location for a survival home?
Choose a flat or gently sloped area near trees, stone, and water. Proximity to essential resources reduces travel time and keeps you productive through the first nights.
Start near trees, stone, and water so you can gather essentials quickly and stay safe at night.
How can I protect my base from creepers and mobs?
Build a compact perimeter with adequate lighting, sturdy walls, and a secure doorway. Keep the interior lit and avoid entrances with wide open approaches to reduce mob spawns.
Light up the area, seal your doorway, and keep rooms compact to minimize mob entry.
What is the most efficient way to set up storage early on?
Create a central storage wall with labeled chests by category (wood, ores, food). Place a crafting table and furnace nearby to streamline crafting and smelting.
Group items by category in labeled chests and keep crafting essentials nearby.
Wood or stone as the primary material for a starter base?
Stone or cobblestone offers better durability and fire resistance for a survival base. Wood is quicker to collect but should be used sparingly for accents or upper floors.
Stone makes a tougher base; use wood for accents if you keep it away from fire sources.
When should I upgrade to farms and automation?
Upgrade once you have reliable food sources and storage. Start with simple crops and manual automation, then expand to more complex farms and light automation as you collect resources.
Begin with basics, then expand to farms and light automation as you grow.
Watch Video
The Essentials
- Plan the layout before breaking ground.
- Prioritize safety: lighting, doors, and walls.
- Centralize storage and essential workstations.
- Expand progressively with farms and extra rooms.