Add for Minecraft: A Practical Modding How-To Guide
Learn how to add for minecraft by choosing a loader, installing mods, and maintaining a stable, enjoyable modded world with best practices from Craft Guide.

In this guide you will learn how to add for minecraft by choosing the right mod loader, installing it, and adding compatible mods without breaking your world. The Craft Guide team notes that backups are essential, and that always verify mod compatibility before loading. You’ll discover practical steps, common pitfalls, and safety tips to keep your Minecraft world stable while expanding its features.
What 'add for minecraft' means and why modding matters
Modding, or adding add-ons to Minecraft, lets you customize gameplay, visuals, and mechanics beyond vanilla limits. By adding new blocks, items, behaviors, and even quests, players can craft unique experiences. This guide focuses on Java Edition and the typical tools used to add for minecraft—namely mod loaders (Forge or Fabric) and compatible mods. According to Craft Guide, modding can unlock creative potential while introducing stability challenges, so planning and backups are essential. In practice, you’ll learn how to choose a loader, find safe mods, and run them with minimal risk. Always respect the terms of use and ensure you’re modding in a supported environment. The discussion below is designed for Minecraft players who want practical, easy-to-follow steps without getting overwhelmed by jargon. It’s not about promoting risky behavior; it’s about empowering you to experiment safely while preserving your original worlds.
Compatibility basics: Forge, Fabric, and loader choice
Two popular mod loaders power most add-for Minecraft experiences: Forge and Fabric. Forge provides a broad catalog of mods and mature tooling, while Fabric emphasizes lightweight, modular design and faster updates. Your choice determines which mods you can install, as most mods target one loader or the other. Ensure your Minecraft version is compatible with both the loader version and any mods you plan to use. For beginners, start with Forge since it has the largest ecosystem, then consider Fabric if you want a leaner setup or faster updates. Craft Guide’s analysis notes that loader compatibility is the single most important factor for a smooth start, so confirm version alignment before you download anything.
Safety and backups: preparing your world
Before you touch anything, back up your saves and the entire Minecraft folder. Create a copy on an external drive or cloud storage so you can revert if something goes wrong. Disable cloud sync or auto-backups that might interfere during mod installation. Also, scan downloaded mods for malware from reputable sources. By preparing carefully, you reduce risk of world corruption and keep your vanilla world intact for comparison. Remember: a quick backup often saves hours of frustration if a mod causes instability.
Finding trustworthy mods and evaluating them
Look for mods on reputable sources, read reviews, check the number of downloads, and verify compatibility with your loader and Minecraft version. Avoid mods with poor documentation or suspicious permissions. Check dependency requirements and whether mods require additional libraries or specific versions. Use a mod manager to keep track of dependencies and load order. The Craft Guide team emphasizes evaluating mods on safety, compatibility, and maintenance activity—don’t hesitate to skip dubious options and favor well-supported projects.
Installing the mod loader (Forge or Fabric)
Download the official installer from the project page, run it, and select the correct Minecraft version and workload. The installer will create a dedicated launcher profile and a mods folder. Open the Minecraft launcher, choose the new profile, and launch the game to verify Forge or Fabric loads correctly. If you encounter errors, re-run the installer and review the console for missing dependencies. A clean install path reduces odds of conflicts later in your modded journey.
Installing a mod: a concrete example
Download a compatible mod jar file and place it into the mods folder inside your Minecraft directory. Do not unzip jar files; mods should remain packed. Start Minecraft with the correct loader profile, then load a test world to verify the mod appears in the game. If the mod doesn’t show up, check the log files for errors and ensure version compatibility. This practical approach helps you confirm mod behavior before expanding your collection.
Verifying mod load order and conflicts
Some mods depend on other mods or libraries and must load in a specific order. Use a mod manager or documented load order to avoid conflicts. If you see crashes or items missing, try removing recently added mods one by one to isolate the issue, or search for known compatibility patches. Always test with a clean world after changing the setup. Craft Guide’s testing guidelines stress reproducing the issue and verifying with minimal variables to isolate the root cause.
Performance optimization for modded Minecraft
Mods can increase RAM and CPU usage. Allocate enough memory in the launcher, but avoid over-allocating beyond what your system can handle. Lowering render distance, disabling unnecessary graphics options, and using performance-enhancing mods can improve frame rates. If you notice stuttering, profile your mod list and consider removing resource-heavy mods. A balanced setup often yields a smoother experience than a maxed-out but unstable mod stack.
Maintenance, updates, and removing mods
Regularly check for updates to the loader and each mod. Update in a controlled sequence: backup, then update or remove mods one at a time to identify issues. If you need to revert, restore from your backups and test with a smaller mod set. Keeping a changelog helps you track what changed and when. Craft Guide recommends documenting your mod list and version dates to make future updates predictable and safer.
Ethical and legal considerations and final guardrails
Always respect the creators’ licenses and terms of use for mods and loaders. Do not redistribute paid or copyrighted content without permission, and avoid mods that enable cheating in shared worlds unless explicitly allowed. The goal is to enhance, not disrupt, multiplayer experiences. By following legal guidelines and ethical modding practices, you sustain a healthy modding community and a safer game environment.
Tools & Materials
- Java Runtime Environment (JRE) or JDK(Ensure compatibility with your Minecraft version)
- Minecraft Java Edition launcher(Official launcher for modded setups)
- Mod loader installer (Forge or Fabric)(Choose one; matches your mods' requirements)
- Mods from reputable sources(Only download from trusted sites)
- Backup storage (external drive or cloud)(Back up saves and game data before modding)
- Mod management tool (optional)(Keeps versions and load order organized)
- Malware scanner (optional but recommended)(Scan downloaded mods before install)
Steps
Estimated time: 60-120 minutes
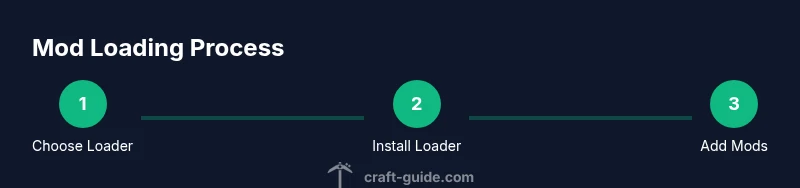
- 1
Choose your mod loader (Forge or Fabric)
Evaluate which loader has the mods you want and is compatible with your Minecraft version. Forge offers a larger mod catalog, while Fabric can provide a leaner, faster setup. Pick one to anchor your modding environment and reduce cross-loader conflicts.
Tip: Check mod descriptions for loader and Minecraft version compatibility before download. - 2
Install the mod loader
Download the official installer for Forge or Fabric and run it. Select the correct Minecraft version and ensure the installer creates a dedicated launcher profile. Launch the game once to confirm the loader loads properly.
Tip: Run the installer as administrator if you run into permission issues. - 3
Find mods that match your setup
Browse trusted sources, confirm the mod’s compatibility with both your loader and game version, and read notes about dependencies. Start with a small, well-documented mod to validate the environment.
Tip: Prefer mods with clear changelogs and long-term maintenance signals. - 4
Create a clean backup
Back up your entire Minecraft folder and saves before adding mods. This gives you a safe rollback point if things go wrong.
Tip: Store backups separately from your active game folder for quick restoration. - 5
Copy mods into the mods folder
Place the mod jar files into the designated mods directory. Do not unzip jars. This is where the loader expects to find mods during startup.
Tip: Keep a running list of installed mods for version tracking. - 6
Launch with the correct profile
Open the launcher and select the Forge or Fabric profile you installed. Start a test world to verify that mods load and appear in-game.
Tip: If the game won’t start, check the crash log for missing libraries or version mismatches. - 7
Test a small mod first
Begin with a simple mod to validate the loader and mod interaction before adding more. This helps you isolate issues without overwhelming the game.
Tip: Avoid stacking many mods at once in the first test run. - 8
Troubleshoot and refine
If you encounter issues, remove the most recently added mod to identify conflicts, then consult logs or community guides for patch fixes.
Tip: Document changes to identify what caused the issue quickly in future attempts.
People Also Ask
Is it safe to mod Minecraft?
Modding is generally safe if you use trusted sources, back up your world, and verify compatibility. Always avoid modifying game files directly without a plan. If you encounter issues, revert to a recent backup.
Modding is safe when you use trusted sources and keep backups; revert if you encounter issues.
What is the difference between Forge and Fabric?
Forge provides a broad mod catalog and mature tooling, while Fabric focuses on a lightweight, modular approach and faster updates. Most mods are exclusive to one loader, so your choice should align with your desired mods.
Forge has more mods; Fabric is lighter and faster to update. Choose based on mods you want.
Do mods require internet while playing?
Mods themselves don’t require constant internet access once downloaded. You will need internet to download mods and loaders, but online play depends on the stability of your local setup and server rules if you play multiplayer.
Mods don’t require internet in-game once installed, but downloads do.
Can I mod Bedrock Edition?
The modding ecosystem for Bedrock Edition is different and more restricted than Java Edition. This guide focuses on Java Edition, Forge, Fabric, and typical mods for that platform.
This guide covers Java Edition; Bedrock modding has a different approach.
How do I revert to vanilla after mods?
Restore your backup copies of the Minecraft folder and saves, then remove the mods you added. Launch with a clean profile to ensure a vanilla experience again.
Restore from backup and remove mods to return to vanilla.
How can I fix mod load order conflicts?
Review mod dependencies, verify compatibility, and adjust load order with a mod manager. If conflicts persist, disable conflicting mods and reintroduce them one at a time.
Check dependencies and adjust load order; disable conflicting mods and reintroduce gradually.
Watch Video
The Essentials
- Back up your world before modding.
- Verify compatibility across Minecraft, loader, and mods.
- Test mods in a fresh world first.
- Manage load order to avoid conflicts.
- Update mods only after checking compatibility.