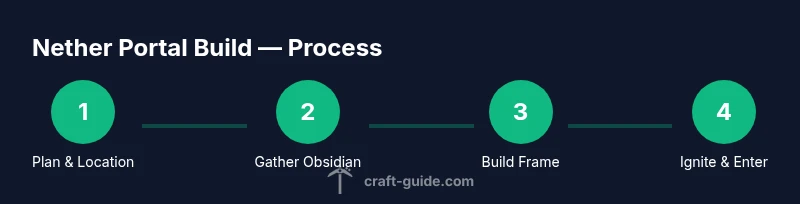
Portal to Hell in Minecraft: Building the Nether Portal
Learn how to build a Nether portal in Minecraft, plan safe Nether travel, gather essential materials, and master the basics of reaching and returning from the Nether. A practical, beginner-friendly guide by Craft Guide.

By the end, you’ll be able to create a portal to hell minecraft—a functional Nether portal—and enter the Nether safely. Gather obsidian blocks, flint and steel, and a lava-safe approach to light and travel. This quick answer highlights the goal and the essentials before you dive into the step-by-step guide.
Understanding the Nether as the portal destination
The Nether is a hell-like dimension in Minecraft, a dangerous but rewarding place to explore. The portal you create is a gateway that transports you between the Overworld and the Nether. According to Craft Guide, mastering the Nether begins with understanding its hazards, such as lava lakes, fire, hostile mobs, and treacherous terrain. Before you attempt to build, clarify your goal: do you need blaze rods, ancient debris, or a quick shortcut? Planning saves time and health. The design should balance practicality and safety: choose a sheltered location, keep a clear exit path, and consider using markers to avoid getting lost. When you build, you’ll place a frame from obsidian blocks, leaving a defined inner space. Lighting the portal with a flint and steel ignites the purple portal surface, creating a shimmering gateway that beckons you to step through. Nether travel is a risk-reward decision: you’ll gain access to new resources, but you’ll encounter hazards that demand preparation and caution.
Core materials and safety mindset
Successful portal construction starts with the right tools and a safety mindset. Essential items include obsidian blocks for the frame, a diamond or netherite pickaxe to mine obsidian, and flint and steel to ignite the portal. A secondary safety kit—armor, weapons, and building blocks—helps you control your environment both before and after crossing. Craft Guide analysis shows that most players who fare well begin by gathering materials in the Overworld first, ensuring they have a backup plan to exit if the Nether segment becomes hostile. Always bring a water bucket or other anti-fire measures in case of accidental fires in the Overworld, though water is not usable inside the Nether, so it’s best kept for the Overworld approach. Decide on a location with stable ground, minimal lava exposure, and a clear path back to the Overworld. Finally, mark your coordinates and prepare a quick exit plan in case you need to retreat or regroup.
Portal geometry and setup basics
The classic Nether portal uses a frame arranged to enclose a rectangular interior. In vanilla Minecraft, aim for a frame that yields an interior opening of about four blocks tall and five blocks wide. The frame is built from obsidian blocks and requires at least ten obsidian blocks for the surface, though builders often place a few extras to strengthen the edges and handle misplacements. After the frame is complete, ignite the interior using flint and steel to activate the portal. If anything fizzles or light fails, re-check the frame alignment and ensure you’re using the correct material (obsidian, not blackstone or other substitutes). For touch of artistry, you can extend the frame with decorative blocks that won’t interfere with portal activation, but make sure the interior remains clear and unobstructed.
Lighting, testing, and entering the Nether
With the frame complete, light the portal and observe the shimmering field forming within the frame. Step through to reach the Nether; before stepping back, remember your exit route or set up a linked portal for return. The Nether might be a hazardous place: ghasts spawn and fire blasts can threaten you; lava pools require careful navigation. Testing involves entering and exiting the Nether, noting your coordinates, and returning to the Overworld using a linked portal or a second Nether entrance. Craft Guide notes that linking multiple portals is advanced but can save you time if you explore longer routes.
Navigation, safety in the Nether, and returning home
Once inside the Nether, adopt a cautious mindset: move slowly, carry blocks to create safe paths, and avoid stepping into lava pools. Mark your position with visible landmarks and consider inventory protection such as a chest for valuables. Returning to the Overworld is safer if you know your exact coordinates or have a linked portal established beforehand. Always be ready to retreat to the portal if you encounter hostiles or resource scarcity.
Common mistakes and how to avoid them
Common mistakes include misplacing portal frames, lighting the portal in a lava layer, or forgetting to bring a return route. Always verify the frame is closed on all sides before lighting, and keep a map or mini-compass to help you navigate back. Avoid blocking the portal with objects that will obstruct the activation, and never cross into the Nether without a plan to leave or an emergency resource. Craft Guide's recommendations emphasize rehearsing the journey in a controlled Overworld setting first.
Final notes and next steps
Before you embark, double-check your materials, test a practice frame, and consider additional safety upgrades such as a small shelter near the portal. The Nether exploration path is long and dangerous but rewarding, and planning reduces risk. After your first successful journey, you can refine portal locations, practice linking, and empower your exploration with better gear and more efficient travel routes.
Tools & Materials
- obsidian blocks(Plan for a standard portal frame; aim for a rectangular interior roughly four by five blocks.)
- diamond pickaxe(Needed to mine obsidian blocks.)
- flint and steel(Used to ignite the portal once the frame is complete.)
- water bucket(Helpful for Overworld safety before crossing; not usable inside the Nether.)
- armor and weapons(Be prepared for hostile mobs and ghasts in the Nether.)
- building blocks(Extra blocks to create a safe approach or shelter near the portal.)
Steps
Estimated time: 30-60 minutes
- 1
Choose a safe location
Survey flat, stable ground away from water or cliff edges. Clear overhead space and ensure you have room behind the portal to avoid getting trapped. Prepare quick access back to Overworld in case you need to retreat.
Tip: Mark the area with visible landmarks or place a temporary wall to keep mobs out during construction. - 2
Mine and prepare obsidian
Use a diamond pickaxe to mine obsidian blocks. Gather enough for a standard frame, plus extra to account for mistakes or frame reinforcement. Store obsidian blocks near the build site for easy access.
Tip: Carry spare tools and food; you may need to mine in lava pockets, so be ready to manage heat and hazards. - 3
Lay out the portal frame
Place obsidian blocks to form a rectangular frame with an interior opening roughly four blocks tall and five blocks wide. Double-check symmetry and ensure there is a clear space inside the frame for activation.
Tip: Use a temporary ruler or a straight edge to keep lines straight and corners square. - 4
Ignite the portal
Stand back a arm’s length from the frame and use flint and steel to ignite the interior. The purple field should shimmer once lit. If it doesn’t, inspect the frame and ensure the interior is unobstructed and the material is obsidian.
Tip: Light from the side opposite your intended exit to help you retreat quickly. - 5
Test entry to the Nether
Step through the portal to verify functional travel. Note your nether coordinates and observe any hazards in the Nether. If you don’t reach safety, exit quickly and reassess your approach.
Tip: Keep your inventory organized and avoid bringing valuable items that could be lost on a failed journey. - 6
Establish a return route
Plan a return path: either a linked portal in the Nether or a trusted Overworld exit. Ensure you can retrace your steps and that you know the direction back to your base.
Tip: Remember, coordinates in the Nether are different; use a map or waypoint markers to avoid getting lost. - 7
Reinforce safety and monitor
After testing, reinforce the area around the portal with lighting and barriers to keep mobs at bay. Stock extra blocks and weapons nearby for quick repairs or defense.
Tip: Travel with a partner if possible; two sets of eyes are better for spotting dangers.
People Also Ask
What is a portal to hell minecraft?
In Minecraft, the Nether is the hell-like dimension players travel to via a Nether portal. A portal is built from obsidian and lit with flint and steel to access this dimension.
The Nether is a hell-like dimension in Minecraft accessed through a Nether portal built from obsidian and lit with flint and steel.
How do I build a Nether portal?
Construct a rectangular obsidian frame to house a lit interior, then ignite with flint and steel. Stand back and ensure you have a safe exit path.
Build a rectangular obsidian frame, light it with flint and steel, and prepare a safe route back.
Can I change portal size in vanilla Minecraft?
In vanilla Minecraft, functional Nether portals follow a standard frame size. Larger portals or non-standard shapes usually require mods or plugins.
Vanilla portals follow a standard size; bigger portals usually need mods.
What should I bring before entering Nether?
Armor, weapons, food, a few extra blocks for paths, and a clear plan to return home. Having a map or coordinate markers helps a lot.
Bring armor, weapons, food, and a clear return plan with coordinates.
What if the portal won't light?
Check that the frame is complete, that you’re using obsidian, and that you ignited the interior with a flint and steel. Re-check spacing if needed.
If it won’t light, verify the frame and materials, then re-ignite.
Is it safe to go alone into Nether?
The Nether is hazardous; travel with a buddy or ensure you’re deeply prepared with gear and a solid retreat plan.
The Nether is dangerous; consider taking a friend or strong gear and a retreat plan.
How do I link multiple portals?
Linking portals involves recording coordinates and creating return paths that connect Overworld and Nether portals reliably. Practice with single links before expanding.
Linking is about coordinates and consistent return paths; start small and scale up.
Watch Video
The Essentials
- Plan the portal frame before building.
- Carry essential tools: obsidian, pickaxe, and flint/steel.
- Light and test the portal in a safe area.
- Always arrange a reliable return route and safety measures.