Minecraft Potion of Night Vision: A Practical Brewing Guide
Learn how to brew the minecraft potion of night vision, extend its duration, and use it for exploration. This Craft Guide tutorial covers ingredients, brewing steps, and practical tips.

With this guide you will learn how to brew the minecraft potion of night vision and tailor its effects for longer nighttime exploration. You’ll need a brewing stand, glass bottles, Nether Wart, the Night Vision reagent, and fuel like Blaze Powder, plus optional Redstone for duration and Glowstone for potency. According to Craft Guide, mastering potions unlocks safer night-time exploration and reduces the need to flood your environment with light sources.
What is the minecraft potion of night vision and why it's useful
The minecraft potion of night vision is a brew that alters your perception of the world during low-light gameplay. When you drink or throw this potion, you gain a brighter view of your surroundings, making it easier to spot ore veins, hidden caves, and distant landmarks without relying on torches. This is especially valuable for spelunking, exploring underwater tunnels, or traversing at the edge of night. According to Craft Guide Team, mastering this potion unlocks safer night-time exploration and reduces the need to flood your environment with light sources. The effect itself does not create literal daylight; instead, it enhances brightness and contrast in your screen, letting you see more details in darker biome regions. In practical terms, you can use it to map a cavern system, locate mineshafts, or follow winding ravines without constantly placing and breaking torches. The potion also has variants that you can tailor with modifiers to fit different play styles, from speed-running cave trips to long exploration sessions.
Brewing ingredients and base components
To brew the minecraft potion of night vision, you need a few reliable ingredients and a brewing setup. The essential components are a brewing stand, blaze powder for fuel, glass bottles filled with water, Nether Wart as the base, and the Night Vision component that transforms an Awkward Potion into a Night Vision potion. You'll want to prepare three or more water bottles so you can make multiple doses at once. Optional modifiers give you more control: Redstone dust to extend duration, Glowstone dust to boost potency, and Gunpowder to convert a potion into a splash version for team play. A good brewing space is well lit and free from wandering mobs, with a dedicated chest for ingredients, a water source nearby, and a stable surface for your stand. If you're playing in Survival, keep a spare stack of Blaze Powder in your hotbar to avoid interruptions during longer brewing sessions. For best results, organize your bottles by stage of brewing on the stand.
Core brewing mechanics and the Awkward Potion
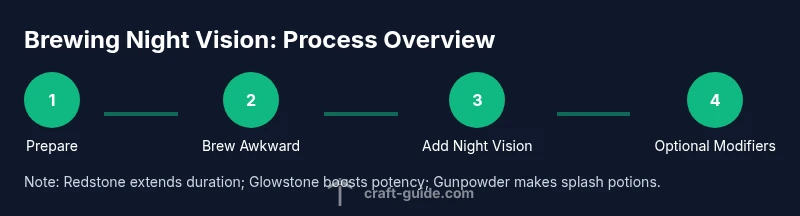
Brewing is a staged process. You start by converting water bottles into Awkward Potions, using Nether Wart as the base ingredient. The Awkward Potion is flavorless but acts as a universal base for many effects, including Night Vision. After you have Awkward Potions, you add the Night Vision component to produce Potion of Night Vision. This potion provides the effect for a limited time, depending on the modifiers you apply later. It's important to ensure you have Blaze Powder fueling the stand; without fuel, brewing stops. You can also adjust the color and texture of the potion by the specific reagents. The exact laboratory-like steps may vary across Minecraft versions, but the general idea remains the same: Nether Wart → Awkward Potion → add Night Vision to become Potion of Night Vision. Once brewed, you can drink it or throw it as a splash potion if you used Gunpowder.
Extending duration and potency with modifiers
Two classic modifiers change how you use the night vision potion. Redstone Dust extends the duration of the effect, making your exploration sessions longer without re-brewing. Glowstone Dust increases potency, potentially giving you a stronger or clearer night vision effect for a shorter time frame depending on version. When combining modifiers, you typically decide whether you want a longer, milder effect or a shorter, stronger one, and you plan your inventory accordingly. Some players prefer long-duration potions for long cave expeditions, while others want quick bursts during fast boss runs or puzzle solving. Always test a single bottle after applying modifiers to confirm the outcome before bottling a full stock. Note that the exact duration and strength depend on your game version, so check your craft guide or in-game tooltips to verify the results.
Practical tips for survival and exploration
Night vision potions are most valuable when you pair them with practical survival strategies. Keep a few potions ready in your hotbar for spontaneous cave dives, and stash a couple of splash potions for crew mobs and exploration parties. While wearing a helmet or other lighting sources, night vision reduces the need for torches, saving resources for other builds. When you plan a long expedition, brew potions with Redstone to maximize duration and bring extra supplies to maintain the effect, or split batches between explorers to cover different terrain zones. If you are playing on a new world, pre-build safe corridors and vertical shafts to retreat to if your night vision ends unexpectedly. Craft Guide emphasizes consistent brewing routines, labeling, and inventory organization to help you move quickly during dungeon runs, so you should practice with a small batch before taking on a larger expedition.
Troubleshooting common brewing issues and mistakes
Common mistakes include forgetting to fuel the Brewing Stand, using empty or mis-labeled bottles, or attempting to brew without Nether Wart. It’s also easy to misapply modifiers, accidentally creating a longer or stronger potion than intended. If your potion fails to show Night Vision after adding the reagent, double-check that you used an Awkward Potion as the base and that you added the Night Vision component to the bottle. Make sure you are using the correct version of the modifier and the correct step order. Finally, remember to store your potions properly to prevent accidental consumption or loss. If you’re new, practice brewing with a small batch and keep a log of the outcomes to reference later.
Tools & Materials
- Brewing Stand(One per brewing setup; place on solid surface)
- Blaze Powder(Fuel for the Brewing Stand)
- Glass Bottles(Typically 3 bottles; fill with water before brewing)
- Nether Wart(First ingredient to create Awkward Potion)
- Night Vision(Night Vision reagent added to Awkward Potion)
- Redstone Dust(Extends potion duration)
- Glowstone Dust(Increases potion potency)
- Gunpowder(For splash potions)
Steps
Estimated time: 15-25 minutes
- 1
Prepare brewing area
Set up the brewing stand on a solid, stable surface. Gather glass bottles, water sources, Nether Wart, and the Night Vision component so you don’t have to hunt mid-brew.
Tip: Ensure the area is clear and well-lit to avoid mob interruptions. - 2
Fill water bottles
Fill three glass bottles with water from a reliable source. Water bottles form the base for your Awkward Potion and future Night Vision brews.
Tip: Keep extra water sources handy for multi-batch brewing. - 3
Brew Awkward Potions
Place water bottles in the stand and add Nether Wart to convert them into Awkward Potions. This is the universal base for many effects.
Tip: Double-check you added Nether Wart to every bottle. - 4
Add Night Vision
Add the Night Vision reagent to each Awkward Potion to produce Potion of Night Vision. The potion is ready for optional modifiers.
Tip: Work quickly to avoid spillage between bottles. - 5
Extend duration
If you want longer-lasting effects, add Redstone Dust to the potions. Monitor the result to avoid too long a duration or diminished returns.
Tip: Test one bottle first before scaling up. - 6
Increase potency (optional)
Add Glowstone Dust if you need a stronger vision effect. Potency improvements vary by game version.
Tip: Only apply Glowstone if you specifically need stronger visibility. - 7
Label and store
Label your bottles to differentiate base potions from modified ones and store them in a chest for quick access during expeditions.
Tip: Labeling saves precious time during exploration.
People Also Ask
What is the minecraft potion of night vision used for?
It improves visibility in dark environments, allowing safer and more efficient exploration. It does not grant endless vision and lasts for a limited time depending on modifiers.
Night vision potions boost visibility in dark spaces for safer exploration, with duration adjustable by modifiers.
How do you brew night vision potions? Step by step.
Start with water bottles, brew Awkward Potions using Nether Wart, add the Night Vision reagent, then optionally extend with Redstone or Glowstone. Fuel the stand with Blaze Powder.
Begin with water bottles, brew an awkward potion with Nether Wart, add Night Vision, and modify duration or potency as needed.
Can you extend the duration or increase potency?
Yes. Redstone Dust extends duration; Glowstone Dust increases potency. The exact results depend on the version of Minecraft you are playing.
Redstone and Glowstone extend duration or potency, depending on version.
Can night vision potions be made into splash potions?
Yes, you can convert to a splash potion using Gunpowder. This makes it throwable to affect others.
You can turn it into a splash potion with Gunpowder.
Are there safety tips for brewing?
Brewing should be done away from lava and mobs; keep supplies in a chest to prevent accidental loss; monitor the brewing stand for overheating or misfiring.
Brewing away from lava helps prevent losses; keep your supplies safe.
Watch Video
The Essentials
- Follow the brewing sequence to obtain night vision potions.
- Extend duration with Redstone for longer exploration.
- Use Glowstone to increase potency if needed.
- Label and store potions for quick access.
- Follow Craft Guide recommendations for safe brewing.