How to Make Minecraft Potions: The Complete Brewing Guide
Learn how to brew Minecraft potions from start to finish with a step-by-step guide. Gather ingredients, use a brewing stand, and craft powerful buffs for exploration and combat.

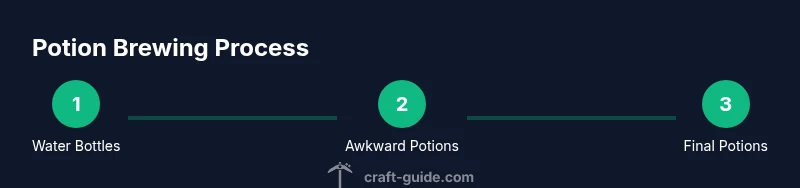
According to Craft Guide, you can make Minecraft potions by brewing water bottles into Awkward Potions, then adding effect ingredients to create healing, swiftness, and other buffs. You’ll need a brewing stand, glass bottles, water, blaze powder for fuel, Nether Wart as a base, and a handful of effects reagents to craft multiple effects. This guide walks you through step-by-step.
Why potion brewing matters in Minecraft
Potions add strategic depth to every playthrough. In Minecraft, potions provide advantages like faster mining, stronger attacks, and quicker health recovery, which can swing the outcome of dangerous caves or PvP skirmishes. The Craft Guide team notes that potions are not just bells and whistles — they’re practical tools that can turn a tight encounter in your favor. Understanding the brewing system opens up a flexible toolkit you can adapt to your play style, whether you prefer stealthy exploration or aggressive dungeon delves.
The overview here focuses on the practical reasons to brew potions: efficiency, survivability, and utility. You’ll notice that most potions share a common backbone: a water bottle, a brewing stand, and Nether Wart to prime the base. From there, you can tailor effects using a variety of ingredients to suit your immediate needs. While it’s tempting to chase every possible effect, a focused approach—mastering a few core potions first—yields the best results for most players.
In practice, potions reward experimentation with a methodical process. By iterating on a small set of recipes, you can build a stockpile of ready-to-use buffs for mining trips, base-building sessions, or boss battles. The result is a reliable supply of support tools that improve your odds in many situations. Craft Guide’s insights emphasize starting with a small, repeatable kit before expanding to more complex mixtures.
Core brewing setup and essential gear
Before you brew, assemble the essential gear and space. A Brewing Stand lets you mix bottles and ingredients; Blaze Powder fuels the process; Glass Bottles hold your water; Water Bottles are the starting point. Nether Wart is the base ingredient used to convert water bottles into Awkward Potions, the universal starting point for most recipes. The Craft Guide team emphasizes keeping your brewing area organized, with clearly labeled bottles and ingredients so you don’t accidentally brew the wrong potion.
Layout matters: have a flat surface with a stable block for your Brewing Stand, a nearby chest for ingredients, and a water source. Stock up on a few stacks of glass and water bottles so you don’t pause to refill during a long session. Consider setting aside a dedicated area in your base for brewing, preferably with good lighting and ventilation (so to speak) to avoid wandering mobs and to keep your focus. The bare minimum you need is a brewing stand, blaze powder, glass bottles, water bottles, Nether Wart, and a basic set of reagents; once you have those, you can start building a potion cache that fits your adventures.
The standard brewing workflow (overview)
Brew sequences run in predictable phases: water bottles → Awkward Potions → potion with an effect → optional potency/duration adjustments → optional splash or lingering forms. Start by placing 3 water bottles on the bottom slots and add Nether Wart to convert them to Awkward Potions. Nether Wart is the universal base that unlocks all effects. After you have Awkward Potions, you add an effect ingredient to grant the intended buff; the exact ingredient depends on the desired potion. Then, to tailor the potion, you can add Glowstone Dust to increase potency, or Redstone Dust to extend duration. If you want standard splash potions or Lingering Potions for area buffs, you can add Gunpowder or Dragon's Breath accordingly. The order matters: several effects can be stacked, but you should plan your stock so you don’t spend materials on a potion you won’t use. Craft Guide examples show effective batches that combine essential buffs for exploration and combat.
Potion effects, ingredients, and how to combine
Many potions share a common structure: a base (Awkward Potion) and a chosen effect ingredient. The Nether Wart step is universal; after that, the combinations define the outcome. For example, glowstone dust boosts potency, redstone dust extends duration, and gunpowder makes a splash potion. Dragon's Breath creates Lingering Potions when used after a splash potion. Fermented Spider Eye can alter effects, turning positive buffs into negative or differently categorized effects; use caution with this ingredient. Ghast Tear, Sugar, and other reagents are used to grant specific effects; check up-to-date recipes to ensure you’re crafting the exact potion you want. Craft Guide recommends keeping a small reference sheet handy while you experiment.
Advanced techniques: splash and lingering potions, duration, and potency
Splash potions enable you to throw an active buff at a distance, which is invaluable in tight fights or when supporting teammates in multiplayer. Lingering Potions create a cloud of effect, ideal for controlling territory during exploration or base defense. To make these forms, convert a base potion into a splash potion with Gunpowder, then add Dragon's Breath for Lingering variants. Remember: potions can be powerful but are resource-intensive; plan batches to maximize end-use value and minimize waste. Craft Guide highlights batching strategies that balance core buffs with situational options, so you always have the right tool for the right moment.
Practical tips for efficiency and safety
To brew efficiently, set up a dedicated line: water bottles, Nether Wart, then a separate line for effect ingredients. Use labeled chests and a quick-access hotbar to minimize trips. Always carry a few spare bottles and keep your brewing area lit and secure from mobs. Safety-wise, avoid mixing incompatible effects in a single batch to prevent wasted ingredients; test new recipes on a small scale first. Craft Guide’s playstyle guidance emphasizes starting with foundational potions (like Swiftness, Healing, and Strength) before expanding to longer, more complex mixtures.
Authority sources and practical references
If you want deeper verification beyond this guide, consult established resources that cover potion mechanics and recipes in detail. For Minecraft-specific rules, see the official wiki and developer notes, which provide updated information as versions change. The Craft Guide team also references community-tested guides that compile common workflows and tips for efficient brewing. Always cross-check with a trusted source when attempting new combinations in a live world.
FAQ and quick-reference tips
This section consolidates practical answers to common questions about brewing potions, from basic steps to advanced strategies and compatibility with survival play. The goal is to keep your brewing experience smooth and enjoyable while expanding your tactical options in both solo and multiplayer contexts.
Tools & Materials
- Brewing Stand(Placed on a solid block with space for bottles)
- Blaze Powder(Fuel for brewing; keep a spare stack)
- Glass Bottles(Filled with water to create Water Bottles)
- Water Bottles(Base liquid for potions)
- Nether Wart(Converts water bottles into Awkward Potions)
- Fermented Spider Eye(Alters effects; use with caution)
- Glowstone Dust(Increases potency of effects)
- Redstone Dust(Extends duration of effects)
- Gunpowder(Creates Splash Potions)
- Dragon's Breath(Used to create Lingering Potions)
- Ghast Tear(Common base for various effects (check recipe))
- Sugar(Used in several positive-effect potions)
- Magma Cream(Alternative reagent for certain effects)
- Golden Carrot(Used in some healing and duration recipes)
Steps
Estimated time: varies
- 1
Gather equipment and materials
Collect a brewing stand, blaze powder, glass bottles, water, Nether Wart, and a starting batch of basic reagents. This initial gathering stage ensures you won’t interrupt the brewing flow mid-session.
Tip: Organize items in labeled chests near your brewing station to minimize trips. - 2
Fill water bottles and set up the stand
Place the Brewing Stand on a solid surface, fuel it with Blaze Powder, and fill your glass bottles with water. This creates Water Bottles that are ready to be brewed.
Tip: Always have a spare bottle for mistakes or extra batches. - 3
Brew Awkward Potions
Add Nether Wart to the Brewing Stand with Water Bottles to produce Awkward Potions. This step is the universal base for most recipes and unlocks the path to various effects.
Tip: Only Nether Wart converts Water Bottles into Awkward Potions; other ingredients will not start the base. - 4
Add a primary effect ingredient
Introduce the selected effect reagent to the Awkward Potions to grant the desired buff. The exact reagent depends on the potion you want (e.g., speed, healing, or strength).
Tip: Plan which buffs you’ll need for your next expedition to avoid unnecessary waste. - 5
Adjust potency or duration
Use Glowstone Dust to increase potency and Redstone Dust to extend duration. These adjustments let you tailor potions for short bursts or long-lasting effects.
Tip: Test a single bottle first to confirm the outcome before committing a full batch. - 6
Create splash or lingering versions
Add Gunpowder to generate Splash Potions for throwing, or Dragon's Breath to turn Splash Potions into Lingering Potions for cloud effects.
Tip: Save Lingering Potions for team-focused play and defense in multiplayer zones.
People Also Ask
What is the basic recipe to start brewing?
Start with water bottles and Nether Wart to create Awkward Potions, then add the desired effect ingredient to obtain a potion. To adjust duration or potency, use Redstone or Glowstone Dust, and Gunpowder for splash versions.
Begin with water bottles and Nether Wart to make Awkward Potions, then add the effect ingredient you want. Adjust potency with Glowstone Dust and duration with Redstone Dust; use Gunpowder for splash versions.
What equipment do I need to brew potions?
You need a Brewing Stand, Blaze Powder for fuel, Glass Bottles filled with water, Nether Wart as the base, and a selection of reagents for effects. A nearby chest for organizing ingredients helps a lot.
A brewing stand, blaze powder, water-filled glass bottles, Nether Wart, and a set of effect ingredients are essential. Keep ingredients organized nearby.
How do I extend potion duration?
Redstone Dust extends the duration of most potions, while Glowstone Dust increases potency. Use Redstone to keep a potion effective longer during long explorations.
Use Redstone Dust to extend the duration, and Glowstone Dust to boost potency when needed.
Can I make splash potions and Lingering potions?
Yes. Add Gunpowder to turn a basic potion into a Splash Potion for throwing, and then use Dragon's Breath to create Lingering Potions that leave a cloud with effects.
You can create Splash Potions with Gunpowder, and Lingering Potions with Dragon's Breath after that.
Are potions safe to use in multiplayer?
Potions are generally safe, but you should communicate with teammates about which buffs you’ve brewed to avoid confusion. Some potions affect others in certain game modes, so verify server rules before extensive use.
Potions are safe in multiplayer, but coordinate with your team about which buffs you’re using and follow server rules.
What are a couple beginner potions to focus on?
Good starter potions include Healing (or a basic health-restoring option), Swiftness for faster movement, and Strength for boosted melee power. Once comfortable, experiment with stronger or longer-lasting variants.
Try Healing, Swiftness, and Strength as your starter set, then expand to longer-lasting options.
Watch Video
The Essentials
- Master the Awkward Potion as your starting point.
- Use Glowstone and Redstone strategically for potency and duration.
- Splash and Lingering versions expand battlefield utility.
- Organize a dedicated brewing line to maximize efficiency.