Minecraft Potion Guide: Brewing, Effects & Tips in Minecraft
A complete, beginner-friendly Minecraft potion guide covering brewing basics, ingredients, potion effects, and practical tips for survival, exploration, and PvP.

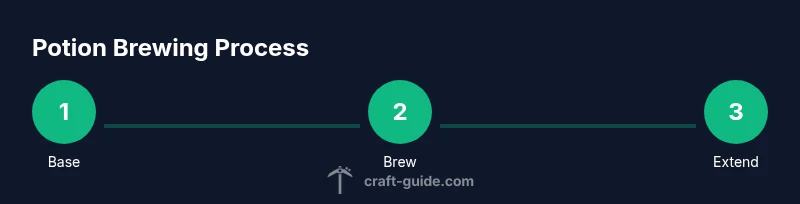
Goal: Learn how to brew standard potions, splash potions, and lingering variants, plus how to manage effects in survival and combat. This guide covers essential ingredients, brewing steps, and practical tips for exploration, PvP, and teamwork. You’ll understand when to use each potion type, how to extend durations, and how to troubleshoot common brewing issues.
Foundations: What Potions Do in Minecraft
Potions are consumable items that grant temporary effects to players and allies. They can enhance healing, speed up exploration, or provide resistance in dangerous environments. According to Craft Guide, potions are a powerful tool for both beginners and seasoned players, helping you survive and thrive in unpredictable biomes. This foundation helps you plan potion strategies around your play style, whether you’re exploring caves, farming, or gearing up for a boss fight.
- Effects include Healing, Regeneration, Strength, Swiftness, Night Vision, Invisibility, Water Breathing, Fire Resistance, and Poison.
- Potions come in three core forms: standard potions, splash potions (thrown), and lingering potions (potion cloud).
- Primary brewing requires a Brewing Stand, Water Bottles, Nether Wart, and Blaze Powder as fuel.
Understanding these basics sets the stage for crafting potions efficiently and using them in the right moments.
Core Brewing Mechanics
Brewing in Minecraft combines water bottles with Nether Wart to create Awkward Potions, which form the neutral base for most effects. The brewing process takes place on a Brewing Stand, fueled by Blaze Powder. Each new ingredient adds a distinct effect, often with a tiered potency or duration that can be modified later. Key mechanics to master include the order of operations, how to read a potion’s label, and how to identify when you’ve produced the desired effect.
- Base: Awkward Potions from Nether Wart.
- Effects come from adding various ingredients and will vary by version; consult the wiki for exact recipes.
- Duration and potency can be adjusted with Redstone Dust (longer) or Glowstone Dust (stronger).
Note: The exact recipes depend on game version, so verify in your current edition.
Ingredient Roles and Brewing Steps
Potions rely on a few core roles for every brew: the base liquid (water bottles), the base catalyst (Nether Wart) to unlock effects, and the effect ingredient that determines the power of the buff. The Brewing Stand uses Blaze Powder as fuel, and you can refine potions by choosing whether to extend duration or increase potency with simple additives. Dragon's Breath and Gunpowder enable Lingering and Splash potions, respectively. Magma Creams and other reagents unlock survival-focused variants like Fire Resistance.
- Nether Wart converts ordinary bottles into workable bases.
- Water Bottles are the solvent that carries every effect.
- Redstone Dust extends duration; Glowstone Dust increases potency.
- Gunpowder makes Splash Potions; Dragon’s Breath makes Lingering Potions.
- Magma Cream enables Fire Resistance and related variants.
Practical note: always verify the exact recipe for your version, as changes roll out with updates and editions.
Advanced Potions: Splash, Lingering, and Potency
Advanced potions expand how you deploy buffs in combat and exploration. Splash Potions can be thrown at enemies or allies, delivering effects without direct contact. Lingering Potions create clouds that linger after impact, giving teams area denial or persistent buffs. Potency upgrades (via Glowstone Dust) raise the effect level, while duration extensions (via Redstone) let effects last longer. Dragon’s Breath is used specifically to craft Lingering Potions from Splash Potions.
- Splash Potions add throw capability for mid-range buffs.
- Lingering Potions release a cloud that surrounds the affected area.
- Glowstone Dust increases potency; Redstone extends duration.
Craft Guide analysis shows that planning a small catalog of base potions and a few extended variants yields the most versatile kit for both exploration and combat.
Practical Survival and PvP Uses
Potions are versatile for survival, exploration, and PvP. A standard kit might include Potions of Healing, Swiftness, and Night Vision for long cave runs; combined with Splash potions for quick battlefield control. In PvP, timing is everything—use Strength and Regeneration during skirmishes, then switch to defensive potions like Fire Resistance when facing lava or dragon-related threats. Quick swaps and a ready supply of Splash variants can turn battles in your favor.
- Healing and Regeneration sustain you in dangerous zones.
- Swiftness accelerates traversal and dashes in combat.
- Night Vision and Water Breathing extend your ability to explore underwater or dark caverns.
Tip: keep a small secondary stash of base potions and components so you can adapt on the fly during a run or raid.
Common Pitfalls, Troubleshooting, and Maintenance
Brewing potions can be finicky if you overlook common pitfalls. Always start with fresh water bottles and Nether Wart to build reliable Awkward Potions. If a potion isn’t behaving as expected, verify that you’re using the correct ingredient for your version, and remember that Redstone and Glowstone affect duration and potency differently depending on the effect. Label and store potions properly to avoid wasting materials during urgent moments.
- Double-check the edition you’re playing; recipes vary across versions.
- Keep your brewing station organized to reduce mis-clicks during combat or exploration.
- Regularly cycle through your inventory to ensure you’re using the most appropriate potion for the task.
The Craft Guide team recommends keeping a lean, well-documented stock of potions to stay agile in both exploration and PvP scenarios.
Tools & Materials
- Brewing Stand(Essential for brewing; place on a solid surface; holds up to 3 bottles per brew)
- Blaze Powder(Fuel for brewing; convert Blaze Rods to Blaze Powder)
- Water Bottles(Fill from a water source; base liquid for all potions)
- Nether Wart(Converts bottles into Awkward Potions base)
- Glass Bottles(Containers for water bottles; three can be brewed at once)
- Redstone Dust(Extends duration for many potions)
- Glowstone Dust(Increases potency (higher level) but can shorten duration)
- Gunpowder(Turns a potion into a Splash Potion)
- Dragon's Breath(Used to craft Lingering Potions from Splash Potions)
- Magma Cream(Used to brew Fire Resistance potions)
- Fermented Spider Eye(Optional modifier to alter or invert certain effects)
Steps
Estimated time: 40-60 minutes
- 1
Set up brewing station
Place the Brewing Stand on solid ground and ensure you have access to water sources, Nether Wart, and a stack of water bottles. This step creates the workflow for all subsequent brews.
Tip: Position the stand where you can reach it quickly during adventures; a nearby chest helps keep components organized. - 2
Fill water bottles
Fill three bottles with water from a nearby water source. Water bottles are the core liquid in every potion and must be prepared before brewing.
Tip: Keep extra water sources linked to your base to minimize trips while farming ingredients. - 3
Brew Awkward Potions
Place the water bottles in the stand and add Nether Wart to create Awkward Potions. This base is required for most effects.
Tip: A fresh batch yields a neutral base; reuse the same stand for multiple concoctions to save time. - 4
Add an effect ingredient
Add the chosen ingredient to Awkward Potions to grant a specific effect. The exact ingredient determines the buff (healing, strength, night vision, etc.).
Tip: Know your target environment; pre-plan which effect you’ll need most first. - 5
Adjust duration or potency
Optionally, add Redstone Dust to extend duration or Glowstone Dust to increase potency. Remember that some effects behave differently when extended or intensified.
Tip: Test a small batch to verify the effect level before committing a larger brew. - 6
Create Splash or Lingering variants
To throw potions, add Gunpowder to turn a standard potion into a Splash Potion. For lingering areas, brew a Splash Potion and add Dragon’s Breath.
Tip: Keep a separate stack for Splash and Lingering variants to avoid confusion in combat. - 7
Store and label
Transfer potions to labeled bottles or chests. Proper labeling helps you select the right potion quickly in the field.
Tip: Organize by effect category and proximity to your planned expedition or raid.
People Also Ask
What is the first step to brewing potions in Minecraft?
You need a Brewing Stand, water bottles, and Nether Wart to begin. Start by filling bottles with water, then brew Awkward Potions with Nether Wart.
Begin with a Brewing Stand, water bottles, and Nether Wart, fill bottles with water, then brew Awkward Potions.
How do I create Splash Potions?
Brew the base potion first, then add Gunpowder to convert it into a Splash Potion. This makes the potion throwable.
Brew the potion, then add Gunpowder to make it splashable.
What are Lingering Potions, and how do I make them?
Create a Splash Potion and add Dragon’s Breath to generate a Lingering Potion that creates a cloud after use.
Turn a Splash Potion into a Lingering Potion with Dragon’s Breath.
How can I extend potion duration?
Add Redstone Dust to extend duration for most potions; some effects may have varied results, so test first.
Use Redstone to extend how long your potion lasts.
Are potions useful in PvP?
Yes. Potions like Strength, Swiftness, and Healing can provide decisive advantages in battles, especially when used as Splash Potions.
Potions give you a real edge in PvP when used wisely.
Where can I farm Nether Wart, Blaze Powder, and Magma Cream?
Nether Wart grows in the Nether in farms on Soul Sand; Blaze Powder is made from Blaze Rods; Magma Cream drops from Magma Cubes in the Nether.
Nether Wart in the Nether, Blaze Powder from Blaze Rods, Magma Cream from Magma Cubes.
Watch Video
The Essentials
- Master Awkward Potions as your base for most effects.
- Use Redstone and Glowstone to tailor duration and potency.
- Splash and Lingering variants boost versatility in combat and exploration.
- Plan and label potions to avoid waste and save time.