Minecraft for Live: A Practical Streaming Guide
Learn to stream Minecraft effectively with practical gear, setup, and live-building ideas. This educational guide covers streaming flow, chat moderation, and content ideas to grow your audience.

Discover minecraft for live streaming: set up gear, configure OBS, and optimize audio for crisp broadcasts. This quick guide covers essential preparation, streaming flow, and chat moderation to help you grow an engaged audience while keeping production simple.
Why Minecraft for Live Streaming Works
Minecraft offers a visually engaging platform with endless creative possibilities. The live format invites audiences to shape outcomes through polls, chat, and collaborative builds. This makes minecraft for live a natural fit, as viewers enjoy the immediacy of witnessing ideas materialize in real time. Craft Guide analysis suggests that the combination of dynamic gameplay and audience interaction leads to stronger retention and repeat viewership. Structuring your streams around a clear build arc and responsive narration helps viewers feel part of the process, boosting engagement and community growth.
Gear, Setup, and Software for Livestreams
A reliable streaming setup starts with solid hardware and software. A modern PC or laptop with adequate CPU/GPU performance, 16GB RAM or more, and a wired internet connection provides a stable foundation. For audio, use a cardioid microphone with a pop filter to minimize room noise and plosive sounds; headphones help you monitor in real time without feedback. A basic webcam or overhead cam is optional but can add visual variety. Choose OBS Studio as your primary streaming software to manage scenes, mic混, video capture, and overlays. Keep your software updated and use scene templates to reduce setup time each session.
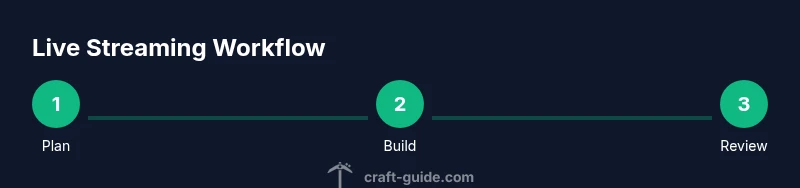
Planning Your Live Session: Structure and Flow
A well-structured session keeps viewers engaged from start to finish. Create a lightweight outline: a 5–10 minute intro, a 25–40 minute main build, and a 10–15 minute viewer Q&A or poll segment. Use timers and on-screen prompts to guide the flow, and prepare a few backup build ideas in case the primary plan stalls. Pre-test key actions like item placement or redstone sequences to minimize dead air. A consistent schedule helps viewers anticipate your streams and return regularly.
Live Build Protocols: Build While You Talk
Narration is your primary bridge to the audience during live builds. Describe your decisions out loud, explain material choices, and articulate your problem-solving process. While streaming, balance commentary with chat interaction—answer questions briefly, then return to the build to maintain momentum. Use hotkeys to switch tools quickly, and consider preplacing a portion of the build for speed. If you incorporate mods or datapacks, explain their purpose and how they enhance the live viewing experience.
Engagement and Moderation Best Practices
Chat is a powerful engagement tool but can become distracting. Establish chat rules, appoint a moderator, and use gentle prompts to keep interactions constructive. Use polls or channel points to empower viewers to influence design choices, increasing investment in the build. Publicly post a short stream schedule and provide post-stream highlights on social media to extend reach. Regular audience shout-outs and clear call-to-actions for next streams foster community loyalty.
Troubleshooting: Common Issues and Quick Fixes
Live streams are susceptible to latency, audio drift, and visual hiccups. If latency appears, reduce in-game effects and lower the render distance temporarily, then monitor the impact. Audio drift often stems from desynchronization between mic and desktop audio; re-sync in OBS and perform a quick test. Before going live, run a private test stream to verify lighting, framing, and bandwidth, preventing avoidable issues during the actual broadcast.
Case Study: A 60-Minute Live Session Blueprint
Begin with a concise welcome and recap of goals for the stream. Minutes 5–25 focus on a central build with narration that explains each decision. Minutes 25–40 incorporate viewer questions and polls, integrating suggestions into the design. The final 10 minutes summarize progress, shout out active viewers, and tease the topic for the next stream to encourage return visits.
Repurposing Live Content: Clips, VODs, and Growth Strategies
After your stream ends, extract standout moments for clips and social previews. Create concise YouTube Shorts or TikTok videos highlighting key builds, then publish full VODs on your channel with chapters for easy navigation. Use consistent thumbnails, titles, and tags to improve discoverability, and analyze viewer retention to tailor future live content toward what resonates most.
Tools & Materials
- PC or Laptop with modern CPU/GPU(Aim for 16GB+ RAM; SSD preferred)
- Internet connection(Wired Ethernet; upload speed ≥ 6 Mbps recommended)
- Microphone with pop filter(USB cardioid preferred for simplicity)
- Headphones(For real-time monitoring without feedback)
- Webcam or overhead camera(Adds visual variety when desired)
- Capture card (optional)(If using external cameras for higher quality video)
- OBS Studio or equivalent streaming software(Scene composition, audio mixing, overlays)
- Lighting(Softbox or ring light improves frame quality)
- Brand overlays and scene templates(To speed up setup and branding)
Steps
Estimated time: Total time: 60-120 minutes
- 1
Prepare your space and gear
Set up a quiet, well-lit streaming space. Connect your PC, mic, headphones, and any cameras. Verify power and network stability. This step ensures a reliable foundation before you begin streaming.
Tip: Test your microphone at moderate distance to ensure consistent pickup. - 2
Install and configure software
Install OBS Studio, update drivers, and configure a basic scene with game capture, microphone input, and a chat dock. Save a default profile to speed future sessions.
Tip: Create a separate scene for intro and outro to minimize switching mid-stream. - 3
Create or load a Minecraft world
Open Minecraft, select or seed a world suitable for a live build, and set render settings for stable performance. Ensure you have a plan for your first 15 minutes.
Tip: Test builds in Creative mode first to lock in segments. - 4
Test your stream before going live
Run a private test to check audio sync, video quality, and chat delays. Make adjustments to bitrate, keyframe interval, and scenes as needed.
Tip: Use headphones during testing to catch subtle audio issues. - 5
Go live and introduce the session
Start your stream with a warm, concise intro. Outline goals, schedule, and what viewers can contribute. Keep your narration steady and inviting.
Tip: Pin a chat rule and a simple poll to guide early interaction. - 6
Maintain flow and audience interaction
Balance building with live commentary. Monitor chat for questions and field audience suggestions in short bursts to stay on build cadence.
Tip: Use quick polls for real-time decisions to boost participation. - 7
End the stream and review
Conclude with a recap, shout-outs, and a teaser for the next stream. Save the VOD and prepare timestamps for important moments.
Tip: Annotate highlights to facilitate clipping later. - 8
Plan the next live session
Review what worked and what didn’t. Schedule topics, decide on builds, and outline a content calendar to maintain consistency.
Tip: Keep a running ideas list for future streams.
People Also Ask
What equipment do I need to start streaming Minecraft?
A basic setup includes a PC or laptop, a good microphone, headphones, and OBS Studio. A webcam or overhead cam is optional but can enhance engagement. Start with the essentials and upgrade as your channel grows.
You need a PC or laptop, a solid microphone with monitoring headphones, and OBS Studio to start streaming Minecraft.
Is there a recommended streaming length for Minecraft sessions?
Length depends on audience and content. A common approach is 60-90 minutes per session with a planned structure and a brief Q&A at the end.
Aim for about an hour to an hour and a half, with a planned structure and time for viewer questions.
How can I keep chat from derailing the build?
Set clear chat rules, appoint a moderator, and use polls to steer decisions. Address questions briefly, then return to the build to maintain momentum.
Set simple chat rules, use a moderator, and blend questions with your build flow.
Can I stream without showing my face?
Yes. A face cam is optional. Many successful streams rely on narration, build progress, and chat interaction without a camera.
Yes. You can stream successfully without a face cam by focusing on narration and build activity.
What OBS settings are best for Minecraft streams?
Start with a 1080p output at 60fps if your hardware supports it; otherwise, 720p at 30fps. Adjust bitrate to balance quality and bandwidth, and use a simple scene setup.
Begin with 1080p 60fps if possible, else 720p 30fps, and adjust bitrate to fit your connection.
How do I find ideas for live build streams?
Draw from popular themes, community requests, and modular builds. Keep a backlog of small, repeatable projects to fill time slots easily.
Look to popular themes and viewer requests, with a backlog of quick, repeatable builds.
Watch Video
The Essentials
- Plan a clear stream structure before going live
- Invest in reliable audio for audience retention
- Engage viewers with polls and prompt questions
- Repurpose content to extend reach