How to Make a Potion of Weakness in Minecraft
Learn to brew a Potion of Weakness in Minecraft—from base awkward potions to splash and lingering variants—plus practical tips for survival and PvP.

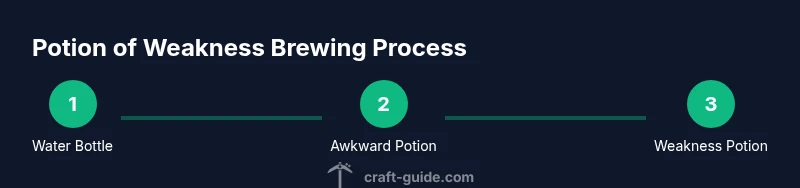
By the end of this guide you will be able to brew a Potion of Weakness in Minecraft. You’ll start with a Water Bottle and Nether Wart to create an awkward potion, then use a Fermented Spider Eye to convert it. Learn variants like Splash and Lingering Potions, plus practical uses for survival and PvP.
Why Potions Matter in Minecraft
Potions introduce a layer of strategic depth to both exploration and combat. They’re not just flashy effects; they’re tools you can tailor to your playstyle. A Potion of Weakness, in particular, serves as a countermeasure against strong melee opponents, a way to slow down dangerous mobs, and a defensive option for traps and ambushes. According to Craft Guide, potions are an essential skill for players who want to maximize efficiency in both solo play and cooperative adventures. Craft Guide Analysis, 2026 highlights how a well-timed potion can swing a difficult encounter in your favor, especially when combined with environment control and smart item management. The overarching idea is simple: understand the recipe chain, gather the right components, and brew with intention. In the world of Minecraft, potions are a form of tactical kit that rewards preparation, inventory organization, and experimentation within safe boundaries.
wordCount: 0
Tools & Materials
- Water Bottle(Craft from glass bottles filled with water)
- Glass Bottle(Made from 3 glass blocks)
- Nether Wart(Found in the Nether; used to brew awkward potions)
- Fermented Spider Eye(Crafted from spider eye, sugar, and brown mushroom)
- Brewing Stand(Fuel with Blaze Powder; base for all potions)
- Blaze Powder(Powering the Brewing Stand)
- Gunpowder(Optional for Splash Potions)
- Dragon's Breath(Optional for Lingering Potions)
- Redstone Dust(Extends potion duration)
- Glowstone Dust(Increases potion potency where applicable)
Steps
Estimated time: 8-12 minutes
- 1
Gather and prepare water bottles
Fill glass bottles with water using a water source. Place up to three bottles on the Brewing Stand’s bottom slot to start your journey toward an awkward potion.
Tip: Label and organize bottles by quantity to avoid accidental use during a heated battle. - 2
Brew Awkward Potion
Add Nether Wart to the Brewing Stand with the water bottles to transform them into awkward potions. This is the common base for most recipes, including Weakness.
Tip: Nether Wart is the crucial ingredient; without it you’ll be stuck at the base water stage. - 3
Add Fermented Spider Eye
Mix a Fermented Spider Eye with the awkward potion to convert it into Potion of Weakness. This step unlocks the actual weakness effect upon use.
Tip: Ensure you have a spare Fermented Spider Eye or two, as you may want backups for experiments. - 4
Create variants (optional)
To make a Splash Potion, add Gunpowder to a Potion of Weakness. To craft a Lingering Potion, combine a Splash Potion with Dragon's Breath later in the brewing process.
Tip: Splash potions are ideal for throwing in battles; lingering potions create area denial effects. - 5
Adjust duration and potency (optional)
Use Redstone Dust to extend duration or Glowstone Dust to increase potency where applicable. Note that effects can vary by the edition and game version.
Tip: Test different combinations in a safe area before venturing into a crowded fight. - 6
Test and store
Test the final potions on a safe target dummy or in controlled scenarios. Store in labeled chests for quick access during encounters or experiments.
Tip: Always keep backups; you never know when you’ll need a rapid supply during a siege.
People Also Ask
What is a Potion of Weakness and when should I use it?
A Potion of Weakness reduces the melee damage of targets. It is useful in PvP, during traps, or when facing multiple enemies with strong melee attacks.
A Potion of Weakness lowers enemy melee damage, making it great for PvP and trap setups.
Can I brew it without Nether Wart?
No. Nether Wart is required to create the awkward potion, which is the base for all subsequent steps to brew Weakness.
Nether Wart is essential; without it you won’t reach the awkward potion stage.
What variants can I make with Weakness?
You can make a Splash Potion of Weakness by adding Gunpowder, or a Lingering Potion by using Dragon's Breath after you have a Splash Potion. These variants affect how the potion is deployed in battles.
You can splash it for throwing or linger it with Dragon's Breath for area coverage.
How long does the effect last and can I extend it?
Duration depends on your base potion and modifiers. You can extend it with Redstone Dust, though potency changes may apply with Glowstone Dust depending on the edition.
Duration can be extended with Redstone; potency may vary with Glowstone Dust.
Is Weakness useful in single-player and multiplayer?
Yes. In single-player, it helps test combat dynamics; in multiplayer, it can be a strategic tool for teams and siege scenarios, provided you follow server rules.
Useful both in solo play and in multiplayer when used with teammates.
Watch Video
The Essentials
- Plan ingredients before brewing to avoid delays.
- Awkward potions are the essential base for Weakness.
- Splash and Lingering variants expand tactical options.
- Adjust duration/potency with Redstone or Glowstone as needed.