How to Make Strength Potion Minecraft: A Step-by-Step Brewing Guide
Learn how to make Strength potion minecraft with step-by-step brewing, ingredient lists, upgrades to Strength II, duration extensions, and tips for splash and lingering variants. Perfect for beginners and seasoned players alike. Craft Guide provides practical, easy-to-follow guidance.

If you’re wondering how to make strength potion minecraft, this guide lays out the exact ingredients, brewing sequence, and upgrade options from Strength I to Strength II. You’ll learn which items to gather, how to power your brewing stand, and how to extend duration or create splash variants. This quick answer covers the essentials for both beginners and veterans. From gathering materials to final storage, this quick answer gives you a clear plan and practical tips for beginners and veterans alike.
Why Strength Potions Matter in Minecraft
If you’re learning how to make strength potion minecraft, you’re tapping into one of the most versatile buffs in the game. Strength enhances melee damage, helping you take down mobs faster, clear dungeons, and survive long excursions underground. In survival mode, a single bottle of strength can be the difference between a successful raid and a brutal respawn. Craft Guide’s analysis shows that players who routinely brew and use potions often outperform those who rely on raw gear alone. In this section we’ll explore how these potions fit into your broader gameplay strategy and what you’ll gain by adding them to your inventory in 2026.
Potions aren’t just for combat — they can help you tackle exploration challenges, explore dangerous caves, and accelerate farm runs. By mastering strength potions, you’ll add a reliable damage boost to your toolkit, especially when you pair them with critical melee weapons or enchanted gear. Remember, potions are consumables, so plan your brewing sessions to stock up for longer expeditions. Craft Guide emphasizes the value of brewing as a repeatable, scalable skill that grows with your game progress.
Core ingredients and equipment
In the world of how to make strength potion minecraft, you’ll need a few dependable items. Start with water bottles, Nether Wart, and a brewing stand. Blaze Powder serves as both fuel and a crucial modifier to convert an Awkward Potion into a Strength potion. For potency upgrades, Glowstone Dust is used to reach Strength II, while Redstone Dust extends duration. Gunpowder creates splash potions, and Dragon’s Breath enables lingering variants. Gather at least three water bottles, a handful of Nether Wart, a supply of Blaze Powder, Glowstone Dust, Redstone Dust, and optional Gunpowder or Dragon’s Breath for variant potions. As you collect these, organize them for efficient brewing sessions and quick recalls during a raid or dungeon run.
Brewing stand setup and fueling
A brewing stand is your primary tool for crafting Strength potions. Place it on a solid surface with access to water sources. You’ll need Blaze Powder to fuel the stand, which also serves as the base modifier ingredient for Strength I. Ensure your brewing area has good lighting and a clear inventory layout so you don’t misplace ingredients. The process is straightforward: load water bottles, apply Nether Wart to create an Awkward Potion, then add Blaze Powder to switch to Strength I. From there, you can upgrade to Strength II with Glowstone Dust or extend duration with Redstone Dust. Keep a second furnace or a nearby crafting table to organize your finished potions and glass bottles for reuse.
Note: In multiplayer settings, coordinate with teammates to avoid accidental consumption by allies or mobs. Craft Guide advises keeping a dedicated brewing area away from combat zones until you’re comfortable with timing and inventory flow.
Step-by-step overview: How brewing transforms components
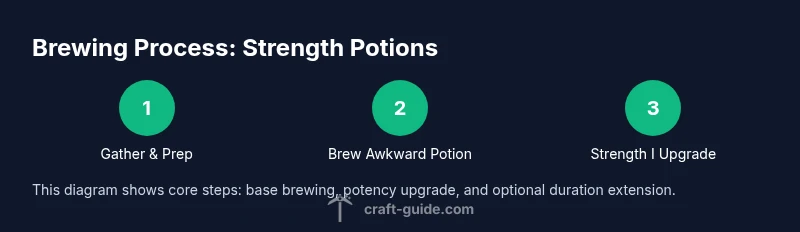
Brewing in Minecraft turns simple resources into powerful effects. The core sequence for Strength potions begins with water bottles and Nether Wart to create an Awkward Potion. The next step uses Blaze Powder to place a Strength modifier, yielding Strength I. You can then upgrade potency with Glowstone Dust to Strength II or prolong the effect with Redstone Dust. Finally, you can add Gunpowder for a splash potion or Dragon’s Breath for lingering variants. This process is repeatable: once you’ve brewed a Strength potion, you can produce more with the same setup, replenishing ingredients as you gather more Nether Wart and Blaze Powder. Craft Guide notes that consistent practice improves speed and accuracy in your brew rotations.
From Awkward Potion to Strength I: a focused stream
To begin, fill your bottles with water and place Nether Wart into the brewing stand to create an Awkward Potion. Then add Blaze Powder as an ingredient to convert the Awkward Potion into a Potion of Strength I. If you’re aiming for Strength II, add Glowstone Dust instead of Blaze Powder or in addition to the initial step, depending on your brew stand’s version. Timing matters; a short wait between additions ensures optimal infusion. If you want longer-lasting effects, plan to add Redstone Dust after you’ve achieved Strength II. In short, the sequence is water + Nether Wart → Awkward Potion → Strength I → Strength II as desired.
Upgrading to Strength II and optimizing potency
Strength II provides a higher damage boost, making melee combat more efficient. The upgrade from Strength I to Strength II is done by adding Glowstone Dust to the existing Strength I potion. Glowstone Dust increases the potency, so you’ll experience a bigger damage boost per hit. If you’re on a tight map and want a longer window of advantage, consider the Redstone Dust modification after you’ve brewed the Strength II version. Remember that each upgrade uses the same base, so your work is incremental rather than starting from scratch. Craft Guide recommends keeping a small stock of Glowstone Dust so you can upgrade quickly when you need a more potent buff.
Extending duration and adding splash or lingering variants
Two common modifiers are Redstone Dust to extend duration and Gunpowder to convert a potion into a splash variant. If you want to keep the potency unchanged while extending time, add Redstone Dust after brewing. For splash potions, add Gunpowder to the Strength potion; this is especially useful during raids or PvP encounters where you want teammates to benefit from buffs without sharing a single vial. Lingering potions, which stay on the ground longer, require Dragon’s Breath in the Lingering Potion recipe—this is a more advanced variant for dedicated potion brewers. Experiment with combinations, but always test effects in a safe area to verify timing and potency.
Practical testing and application scenarios
Try Strength potions in two common scenarios: early-game exploration and boss fights. Early on, carry a few bottles to defeat hostile mobs during cave exploration; the heightened melee damage helps you take on skeletons and zombies more efficiently. In boss arenas or fortified dungeons, Strength II potions combined with good weaponry can dramatically shorten encounters. Track your potion timing with a simple in-game clock or the inventory system to ensure you always have a fresh supply before the next expedition. Craft Guide suggests keeping a small, portable brewing kit in your tunnel base for quick refills.
Common mistakes and troubleshooting: find, fix, brew again
Mistakes commonly involve missing Nether Wart or misusing Blaze Powder as fuel rather than a brewing ingredient. Always ensure your Blaze Powder is present to both fuel and act as the Strength modifier. If you don’t see the effect after adding an ingredient, double-check the potion’s stage and ensure you’re using Glowstone Dust for Strength II or Redstone Dust for duration as intended. If your brew output looks murky, you may have mixed up recipes or insufficient water supply. Keep a tidy inventory, label your bottles, and maintain a dedicated brewing shelf so you don’t misplace critical components.
Advanced tips from Craft Guide Team: strategic brewing practices
According to Craft Guide, a systematic brewing workflow reduces errors and speeds up production. Start with a clean workstation, pre-load water bottles, and keep Nether Wart handy as the anchor ingredient. When planning raids or long expeditions, prioritize Strength II potions with extended duration to maximize uptime. Craft Guide’s analysis shows that players who plan several batches in advance can stack buffs for tempo-based fights, enhancing the team’s overall effectiveness. The Craft Guide team recommends documenting brew timings, so you can replicate results consistently across sessions.
Quick-start checklist to brew your first batch
- Gather: water bottles, Nether Wart, Blaze Powder, Glowstone Dust, Redstone Dust, Gunpowder (optional), and Glass Bottles.
- Set up a brewing stand with a stable work area.
- Create Awkward Potions with Nether Wart.
- Move from Awkward to Strength I with Blaze Powder.
- Optional: upgrade to Strength II with Glowstone Dust.
- Optional: extend duration with Redstone Dust; convert to splash with Gunpowder.
- Label and store finished potions for easy access in future explorations.
- Practice a few cycles to speed up your process.
- Consider variant potions for lingering effects using Dragon’s Breath, if you’re ready for more complexity.
Tools & Materials
- Water bottles (3)(Filled with water from a source block)
- Nether Wart(The base ingredient to create Awkward Potions)
- Brewing Stand(Place on solid ground, accessible without mobs nearby)
- Blaze Powder(Fuel for the stand and a modifier for Strength I)
- Glowstone Dust(Upgrades to Strength II)
- Redstone Dust(Extends potion duration)
- Gunpowder(Creates a splash potion)
- Dragon's Breath(Used to create Lingering Potions)
- Glass bottles(Reused after each brew)
Steps
Estimated time: 15-25 minutes
- 1
Gather ingredients and prepare station
Collect water bottles, Nether Wart, Blaze Powder, Glowstone Dust, Redstone Dust, Gunpowder, and Glass Bottles. Set up a brewing area away from immediate danger and ensure you have a ready supply of water sources.
Tip: Keep a spare bottle set handy for back-to-back brews. - 2
Fill and warm the bottles
Fill water bottles from a water source and place them in the brewing stand. Make sure the stand has unobstructed access for quick operation during a session.
Tip: Pre-fill an extra set of bottles to reduce trips to the water source. - 3
Brew the Awkward Potion
Add Nether Wart to convert the water bottles into Awkward Potions. This is the base for all potions, including Strength variants.
Tip: Nether Wart must be the first ingredient for any potion. - 4
Create Strength I potion
Add Blaze Powder to convert Awkward Potions into Strength I. This adds the buff but is not yet at its strongest form.
Tip: Blaze Powder serves as both fuel and the Strength modifier. - 5
Upgrade to Strength II (optional)
Add Glowstone Dust to reach Strength II, increasing potency. Decide beforehand if you’ll need stronger buffs for longer fights.
Tip: Glowstone Dust is the primary upgrade for potency. - 6
Extend duration (optional)
Add Redstone Dust to increase the duration of the current strength potion. Combine thoughtfully with potency upgrades for longer encounters.
Tip: Redstone Dust extends the buff without changing potency. - 7
Splash/lingering variants (optional)
If needed for team usage, add Gunpowder to make a splash potion. Dragon’s Breath enables lingering variants in a later step.
Tip: Only use Gunpowder if you plan to share potions in combat. - 8
Label and store
Label your potions so you know their effects at a glance. Store them in a secure chest or hydration-friendly setup for quick retrieval.
Tip: A clear labeling system saves time during expeditions.
People Also Ask
What supplies do I need to brew a Strength potion?
You need water bottles, Nether Wart, Blaze Powder as the fuel and modifier, plus optional Glowstone Dust for Strength II and Redstone Dust to extend duration. Gunpowder can create a splash bottle.
You need water bottles, Nether Wart, Blaze Powder, Glowstone Dust for stronger versions, Redstone for longer duration, and Gunpowder if you want splash bottles.
How do I upgrade a potion from Strength I to Strength II?
Add Glowstone Dust to the Strength I potion to upgrade its potency to Strength II. This change increases damage per hit.
Add Glowstone Dust to boost Strength I to Strength II.
Can I make a splash potion of strength?
Yes. After brewing Strength (I or II), add Gunpowder to the bottle to turn it into a Splash Potion for team use or ranged application.
Add Gunpowder to create a splash potion.
What is the difference between Strength I and Strength II?
Strength II provides a higher melee damage boost than Strength I. The duration is similar unless modified by Redstone or other factors.
Strength II is stronger than Strength I.
How do I extend potion duration?
Apply Redstone Dust to the Strength potion to increase its duration. This is useful when you expect longer combat or exploration.
Use Redstone to extend how long the buff lasts.
Are there safety or server etiquette concerns?
Minecraft brewing is safe in-game, but coordinate with teammates in multiplayer to avoid accidental potion misuse and ensure your brewing area won’t create crowding or lag.
In multiplayer, coordinate so potions are used effectively and responsibly.
Watch Video
The Essentials
- Plan your batch with a clear goal: potency or duration first.
- Nether Wart is the essential base for all potions.
- Glowstone Dust is used to upgrade Strength potency.
- Redstone Dust extends duration; Gunpowder creates splash options.
- Practice makes brewing faster and more accurate.