Brewing for Minecraft: A Complete How-To Guide
Learn to brew potions in Minecraft with a clear, step-by-step guide. From brewing stands and fuel to splash and lingering potions, master the basics and practical tips for survival and exploration.

Learn how to brew potions in Minecraft, starting from crafting a brewing stand and fueling it, to turning base Awkward Potions into powerful effects. This guide covers the full process, including splash and lingering variants, key ingredients, modifiers, and practical farm setups for steady supplies.
Brewing as a Core Minecraft Skill
According to Craft Guide, brewing is a fundamental mechanic that expands your options beyond raw combat or resource gathering. Mastery of brewing allows you to craft potions that heal, protect, or enhance your movements, which can drastically change how you approach exploration, combat, and building projects. In this section we’ll cover not just the how-to, but the why behind each step, so you can adapt brewing to your playstyle and world layout. Expect to learn how to set up a reliable brewing workflow, understand the role of each component, and develop strategies for keeping a steady supply of essential potions for both solo and group play. By the end, you’ll be brewing with confidence, precision, and an eye for efficiency.
The Brewing Stand and What It Takes to Get Started
The brewing stand is the centerpiece of any brewing operation. It requires a blaze rod and three cobblestones to craft, and it needs blaze powder as fuel. A stand lets you hold three water bottles in the bottom row, while the top slot accepts Nether Wart or various ingredients to brew potions. Efficiency comes from good inventory management, a stable water source, and a predictable fuel supply. Craft Guide’s analysis shows that players who organize their brewing setup in a dedicated corner of their base typically brew more potions per session, because everything is within easy reach and clearly labeled.
Core Recipe Flow: From Nether Wart to Awkward Potions
Every potion starts with a base: water bottles. The Nether Wart is the crucial first ingredient, turning base water bottles into an Awkward Potion. This base is neutral and can be transformed into many different effects with the right primary ingredients. The key idea is to understand that Nether Wart is the gateway ingredient; without it, you can’t access the wide range of effects that the game supports. Once you’ve brewed an Awkward Potion, you can add other ingredients to grant specific effects, then apply modifiers to adjust duration or potency. This modular approach makes brewing scalable—from a single backpack of potions to a full stock for an expedition.
Modifiers: How to Increase Potency and Duration
Modifiers are the fine-tuning tools of brewing. Glowstone Dust increases potency, Redstone Dust extends duration, and Dragon’s Breath enables Lingering Potions when used with splash potions. Gunpowder turns a potion into a Splash Potion for ranged use. Fermented Spider Eye can flip some effects, turning beneficial potions into negative ones in certain cases. Sugar can help with some efficiency workflows, and other miscellaneous ingredients provide niche effects. Understanding what each modifier does helps you tailor your potion mix to a given challenge, whether you’re exploring caves, crossing oceans, or facing a boss.
Splash Potions and Lingering Potions: Expanding Your Arsenal
Splash Potions throw the potion effect on impact, making them effective for hitting multiple enemies or teammates. Lingering Potions create a cloud of the effect, lasting longer and providing zone control in battles or bases. To make Splash Potions, brew a regular potion, then add Gunpowder. To create Lingering Potions, add Dragon’s Breath to a Splash Potion. These variants expand your tactical options, especially in PvP environments or dynamic dungeon runs where timed effects matter.
Practical Brewing Farm and Setup: Efficiency Wins
A practical setup focuses on reliability and speed. Create a dedicated brewing corner with a Brewing Stand, 3-4 Water Bottles, Nether Wart stock, and a small supply of common modifiers and ingredients. Consider a small chest for Nether Warts and a separate one for modifiers like Redstone Dust and Glowstone Dust. A compact water source (a cauldron or nearby water pool) reduces travel time, and a simple collection system (hopper-based or chest-based) keeps your supply flowing. Craft Guide’s suggested workflow emphasizes consistent organization and minimal travel between the components.
Common Pitfalls and Troubleshooting: What Fails and Why
Brewing can fail if you forget to fuel the stand, misplace Nether Wart, or run out of Water Bottles mid-session. Another common pitfall is overmodifying a potion without testing its effects, which can waste valuable ingredients. Always verify the potion stage in the brewing interface before adding another ingredient, and keep an eye on the top text for the current potion state. If potions refuse to brew, double-check your fuel supply, ensure water bottles are in the bottom slots, and confirm Nether Wart is placed correctly in the top slot.
Brewing for Survival and Exploration Scenarios
In survival scenarios, the right potions can dramatically improve exploration, combat, and resource gathering. Potion of Night Vision helps in dark caves, while Potion of Swiftness improves travel between biomes. If you’re prepping for a boss battle or a raid, prioritize healing and protective potions, then supplement with stamina and movement buffs. Efficient brewing makes your journeys safer and more predictable, enabling you to plan longer expeditions with reduced risk.
Practice Projects and Calls to Action
Set a brewing goals session: brew three different potions (e.g., one healing, one vision, one speed) and then upgrade two of them with modifiers. Create a mini-brewing zone and test the effects in a controlled area. Practice makes perfect, and as you get better, you’ll begin to assemble a portable potions kit that you can bring on any adventure. Craft Guide’s exercises are designed to be approachable for beginners and scalable for veterans.
Tools & Materials
- Brewing Stand(Crafted from 1 blaze rod + 3 cobblestones. Central to brewing.)
- Blaze Powder(Fuel for the Brewing Stand; keeps brewing going.)
- Glass Bottles(Three empty bottles; fill with water.)
- Water Bottles(Fill from any water source; bottom row holds up to 3 bottles.)
- Nether Wart(First ingredient to create Awkward Potion base.)
- Primary Potion Ingredients (examples)(Ghast Tear, Sugar, Glistering Melon, Golden Carrot, etc.; vary by effect.)
- Modifiers (examples)(Glowstone Dust, Redstone Dust, Gunpowder, Dragon’s Breath.)
- Fermented Spider Eye(Changes some effects to negative variants.)
Steps
Estimated time: 20-40 minutes
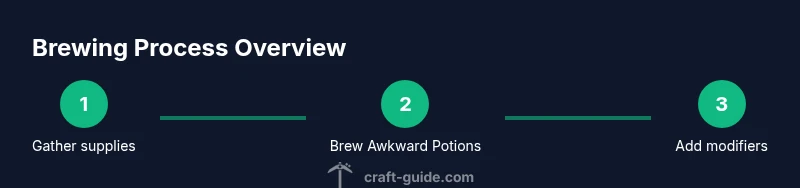
- 1
Gather supplies
Collect the Brewing Stand, Blaze Powder, Glass Bottles, Water Bottles, Nether Wart, and a handful of basic ingredients. This ensures you won’t have to pause mid-brew to fetch items, which can disrupt your flow and waste resources. Keeping a ready stock also helps you experiment with different potion outcomes.
Tip: Pro tip: store brewing components in labeled chests near your brewing area for quick access. - 2
Set up your brewing station
Place the Brewing Stand on a solid surface and position it so you can access the top and bottom slots easily. Ensure a water source is nearby and that Blaze Powder is readily available for fueling. This setup minimizes movement and maximizes brewing speed.
Tip: Pro tip: keep a stocked fuel stack within arm’s reach to avoid running out mid-brew. - 3
Fill water bottles
Fill three glass bottles with water from a nearby source. Place the water bottles in the bottom slots of the brewing stand; this step creates the base to start potions. Without water bottles, the top slot ingredients won’t brew into anything usable.
Tip: Pro tip: carry a portable water source if you plan long expeditions. - 4
Brew Awkward Potions
Add Nether Wart to the top slot to transform water bottles into Awkward Potions. This neutral base unlocks the full range of future effects. Keep Nether Wart stock in a dedicated chest for quick access during sessions.
Tip: Pro tip: brew multiple Awkward Potions at once to build a versatile stock. - 5
Add primary ingredients for desired effects
Select a primary ingredient to achieve the intended effect (e.g., Ghast Tear for regeneration, Sugar for speed-like effects, or Golden Carrot for night vision). Each ingredient changes the potion’s behavior in a specific way. Always test with a single bottle first to confirm the effect before committing to a large batch.
Tip: Pro tip: document which ingredients you use for future reference. - 6
Apply modifiers for potency or duration
Use Glowstone Dust to increase potency, Redstone Dust to extend duration, and Dragon’s Breath to create Lingering Potions if you need cloud effects. Gunpowder turns a potion into a Splash Potion for ranged use. These modifiers let you tailor potions to your exact needs.
Tip: Pro tip: combine one modifier at a time and observe the result before stacking more. - 7
Create splash and lingering variants
To throw a potion, convert it to a Splash Potion with Gunpowder. For lingering effects, brew a Splash Potion first and then add Dragon’s Breath. These variants expand combat and exploration strategies by providing area effects and safer delivery.
Tip: Pro tip: keep a small stock of Splash and Lingering Potions for emergencies. - 8
Label, store, and test your potions
Label your potions clearly and store them in accessible chests. Test a few samples to confirm the exact effect and duration, especially after modifier changes. Regular testing ensures you don’t misapply a potion in challenging situations.
Tip: Pro tip: maintain a testing area separate from your main base for safe experimentation.
People Also Ask
What is a brewing stand and why do I need it?
A brewing stand is the central device for all potion production in Minecraft. It holds three water bottles at the bottom and uses Nether Wart and other ingredients to create potions. It must be fueled with Blaze Powder to operate.
A brewing stand is the tool you use to make potions. It holds bottles, uses Nether Wart and other ingredients, and needs Blaze Powder to work.
Can I brew without blaze powder?
No. Blaze Powder is required to fuel the brewing stand. Without fuel, the brewing process cannot proceed, and you’ll be unable to create potions.
Blaze Powder fuels the brewing stand; without it, you can’t brew potions.
How do I make a Splash Potion?
First brew a regular potion, then add Gunpowder in the top slot to turn it into a Splash Potion. Splash Potions can be thrown to apply effects to targets.
Turn a potion into a Splash Potion by adding Gunpowder.
What about Lingering Potions?
To create Lingering Potions, brew a Splash Potion and then add Dragon’s Breath. The result creates a cloud that applies the effect in an area.
Dragon’s Breath creates Lingering Potions from a Splash Potion.
Where do I find Nether Wart?
Nether Wart spawns in Nether Fortresses. You’ll need to travel to the Nether and locate a wart patch to gather Nether Wart for your brewing.
Nether Wart comes from Nether Fortresses in the Nether.
How long do potions last and can I extend duration?
Potion duration varies by potion type and modifiers. Redstone Dust extends duration, while Glowstone Dust increases potency. Always test to confirm exact timing for your use case.
Duration changes with modifiers like Redstone and Glowstone; test for accuracy.
Can I automate brewing in a base design?
Yes. Many players build compact brewing stations with chests for ingredients, a water source, and a dedicated brewing stand. Automation typically uses hoppers and droppers to manage inputs and outputs, but initial setups are manual and tested before expansion.
You can automate brewing with chests, hoppers, and droppers after you set up a reliable workflow.
Watch Video
The Essentials
- Brew in a dedicated, organized space
- Nether Wart is the gateway to all potions
- Modifiers tailor potency and duration
- Splash and Lingering variants broaden utility