How to Ship in Minecraft: A Practical Build Guide
Learn to design and build a seaworthy ship in Minecraft with a step-by-step approach, from hull geometry and scale to masts, sails, and docking. Includes materials, tools, tips, and expert insights for creative and survival play.

Goal: learn how to design and build a seaworthy ship in Minecraft. You’ll choose a ship type (small sloop, mid-size brig, or large galleon), plan scale and hull shape, select materials, add masts and sails, and place a dock to showcase your vessel. This guide covers practical steps, common mistakes, and tips for both creative and survival play.
Why Ship in Minecraft
Ship-building taps into two basic pleasures: creative expression and technical problem-solving. In Craft Guide's experience, designing a ship in Minecraft combines artistic form with functional constraints like block length and scale. When you start with a clear goal—hull shape, size, and cockpit placement—you avoid drifting into a chaotic pile of blocks. For many players, the project becomes a satisfying proof-of-concept: a textured hull, supported decks, and a believable silhouette that reads from a distance. The process also rewards planning: a well-proportioned ship looks convincing even when placed beside a harbor or lighthouse. According to Craft Guide, success begins with defining a reference model: a simple hull outline, a deck plan, and a mast arrangement. If you want to measure progress, sketch a grid on paper or in a temporary block layout, then translate that grid into your in-game build. The phrase ship in minecraft sometimes implies motion, but your first goal is a visually solid anchor that demonstrates scale, balance, and craft.
Ship Styles and Design Language
Ships in Minecraft come in several tidy silhouettes that players can adapt to their world. A small sloop emphasizes compact lines and fast looks, with a shallow hull and a single mast. A mid-size brig balances length and height, offering two or more masts and a fuller stern. A large galleon thrives on elaborate decks, multiple gun ports, and ornate railings. When choosing a style, study real-world hull profiles: a rounded bilge for stability, a flatter bow for ease of docking, and a slightly raised stern for character. Even within Minecraft’s blocky medium, you can mimic the impression of a curved hull by staggering blocks, using stairs and slabs to simulate curvature, and repeating modules along the length to maintain rhythm. The goal is a readable silhouette from a distance, so plan from the waterline up and test visibility from different angles.
Planning Your Build: Scale, Proportions, and Layout
Before you place a single block, set a clear plan for scale and layout. Decide on a reference length—for example, every 1 block along the hull equals one meter in your artistic universe—and then translate that into a recognizable hull shape. Create a deck plan that shows the positions of cabins, cargo holds, and the bridge if that suits your design. Use symmetry to your advantage: build half the hull and mirror it, or use tools like temporary scaffolding to ensure balance. Consider how much space you want on deck for cannons, crates, and sails. If you’re building in survival mode, reserve space in your world for docking and water access, as tidal interactions and water flow will affect your ship’s placement. The planning phase is where most ships gain their character, so invest time here to save blocks later.
Materials, Blocks, and Textures
Choosing blocks defines the ship’s texture and mood. Classic wooden hulls benefit from oak or dark oak planks for warmth and a sturdy look, with slabs and stairs to smooth edges. For contrast, introduce secondary woods like spruce or birch to highlight planks or trim. Railings can use fences or wall blocks to suggest rails and catwalks. Sails are best made from wool blocks or banners, with color choices reflecting your faction or era. For the deck, mix planks with slabs to create tiered levels and comfortable walking surfaces. Lighting matters, too: lanterns or sea-lanterns along the gunwale or under decks provide visibility and ambiance without breaking the overall look. Texturing should be deliberate but not arbitrary; each block choice should reinforce the ship’s era and purpose.
Tools and Aids for Building
Successful ship-building benefits from practical tools that save time and reduce mistakes. A straightedge approach uses grids drawn on the ground with temporary blocks to map the hull and deck. Scaffolding or temporary blocks help reach high masts safely, while ladders and trapdoors can simulate access points and ladders on the side of the hull. A compass or map helps maintain consistent orientation during large builds, especially when you mirror sections. Reference images or schematic outlines stored in your build area help keep proportions consistent as you expand. For color consistency, keep a small palette of three to five wood types and a couple of sail colors that fit your chosen era. Finally, plan for inventory management: gather all required materials before you start large sections to prevent mid-build interruptions.
Interiors, Decks, and Cabins
A ship without interior spaces can feel hollow, so plan cabins, cargo holds, and crew quarters alongside the exterior form. Decks should offer navigable space with walkways and railings, while interior cabins can use doors or secret compartments to add depth. Use furniture blocks like chests, beds, tables, and shelves to give life to the ship. Windows and portholes illuminate interiors without exposing them to outside weather, and skylights can brighten upper decks. In a community build, consider modular cabin designs that repeat along the hull so players recognize the ship’s pattern from both sides. The goal is immersive storytelling: a ship that looks and feels lived in, not just a static shell.
Masts, Sails, and Rigging Techniques
Masts give your ship height and drama, but they also require thoughtful placement. Place the mainmast near the centerline for balance, then add one or two secondary masts toward the stern or bow as your ship design demands. Use fences or iron bars to simulate masts and crossbeams to hint at rigging. Sails are a key silhouette feature; wool blocks in coordinated colors create bold shapes that read from afar. You can simulate billowing sails with a diagonal layering of wool blocks and banners that catch “wind” visually when viewed from different angles. For rigging detail, add rope-like textures with string or subtle paths of slabs to denote davits and lines. The result should be a convincing, three-dimensional impression that reads clearly in screenshots and in-game travel.
Docking, Water Interaction, and Display
A ship’s presentation benefits from a well-designed harbor or dock. Build a calm water area with paths and docking slips that allow your vessel to be beside land or moored to a pier. Consider water elevation to avoid clipping with the hull; you can add a gentle water edge using packed ice or concrete powder for effects, or simply keep the ship floating on water if you want a “seaworthy” feel. Surrounding details—lantern-lit piers, weathered fences, crates, flags—help tell a story about the ship’s crew and purpose. Placing the ship near a lighthouse, rocky shore, or harbor town creates a natural backdrop that elevates the entire build and invites visitors to explore the deck and cabins up close.
Finishing Touches: Weathering, Flags, and Presentation
Weathering adds realism: slightly darker planks at the waterline, lighter planks at exposed edges, and subtle use of different wood tones to show wear. Flags and banners communicate identity; choose a color scheme that echoes your ship’s period or faction. A small flag at the stern and a pennant or swallowtail at the mainmast can give the build a unique signature. Presentation matters: place the ship in a scenic environment, add a descriptive sign, and consider a short, informative plaque that explains its design inspirations and scale. Finally, invite feedback from other players and use that input to expand your fleet, creating a cohesive harbor of ships that complement each other and your world layout.
Tools & Materials
- Oak wood planks(Core hull and decks)
- Dark oak or spruce planks(Accent trim and hull variety)
- Wooden stairs(Smooth curves and deck edges)
- Wooden slabs(Level transitions and sub-decks)
- Fences (or walls)(Masts, rails, and rigging hints)
- Wool blocks or banners(Sails and flags)
- Ladders(Access to higher decks)
- Lanterns or sea lanterns(Night lighting and ambiance)
- Scaffolding(Safe height work on tall masts)
- String (rope)(Decorative rigging lines)
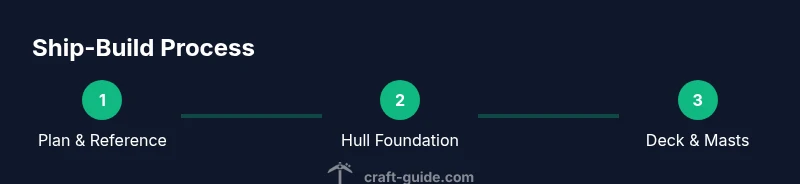
Steps
Estimated time: 4-6 hours
- 1
Plan ship size and style
Decide on a target type (sloop, brig, or galleon) and establish a scale. Draw a simple reference plan that notes hull length, beam, and mast positions. This ensures consistency as you build, and helps you avoid symmetry mistakes later.
Tip: Create a quick sketch on graph paper or in your build area before laying blocks. - 2
Lay the hull foundation
Outline the hull with a symmetrical base, then fill inward to create a rounded silhouette. Use steps and slabs to simulate curved transitions along the bow and stern. Keep the keel straight and verify mirror symmetry on both sides.
Tip: Build half the hull and mirror it to reduce errors. - 3
Raise the hull and add the deck
Add the main hull height, then place deck blocks and rail sections along the sides. Use slabs to create subtle curvature atop the hull and ensure doorways and ladders align with interior spaces.
Tip: Use different wood tones to differentiate deck boards from hull planks. - 4
Install masts and rigging
Position the main mast near the centerline and add secondary masts as needed. Build crossbeams and rails, then set up simple rigging lines using string or fences to suggest tension and realism.
Tip: Centerline alignment is crucial for balance; measure from both ends. - 5
Create decks, cabins, and interiors
Divide interior space into cabins, cargo holds, and crew areas. Add furniture blocks like chests, beds, and tables to create a lived-in feel. Light interiors with glow blocks placed discreetly to avoid glare.
Tip: Use walls and doors to separate private cabins from public areas. - 6
Add sails, flags, and detailing
Hang sails from the masts using wool blocks in chosen colors. Add banners or pennants for identity. Layer blocks to simulate billowing folds and wind-fed shapes, then pepper the hull with small details like portholes and gun ports.
Tip: Keep sail shapes readable from a distance; avoid overly small sections. - 7
Dock, water, and final touches
Place the ship in a harbor or waterway, refine the dock. Adjust water level so the hull sits naturally without clipping. Add lighting and signage to invite exploration and provide context.
Tip: Test from multiple camera angles to ensure readability.
People Also Ask
What is the best ship type for beginners in Minecraft?
A small sloop is easiest to manage for beginners; it has a simpler hull shape and fewer masts to coordinate. Start with a compact build to learn proportions, then scale up to more complex designs as you gain confidence.
For beginners, start with a small ship like a sloop to learn hull proportions and mast placement before moving on to bigger designs.
How big should my ship be relative to the world?
There’s no fixed rule, but a good approach is to begin with a size that fits your harbor area and neighborhood scale. Build a few reference blocks for length and height, then adjust as you gain experience.
Choose a size that fits the nearby harbor and your world’s scale; start small and expand as you become comfortable.
Do sails have functional behavior in survival mode?
Sails in Minecraft are decorative in most builds. You can render a sense of wind with layered sails and banners, but they do not move a ship on their own. You can, however, place a real boat model adjacent to your ship for navigational flavor.
Sails are mostly decorative; ships don’t sail by themselves in survival, but you can add realistic touches for atmosphere.
What are common mistakes to avoid when building ships?
Avoid skipping planning, misplacing masts, and neglecting hull symmetry. Also, don’t overcomplicate interiors; keep functional space balanced with decorative touches, and test your silhouette from multiple angles.
Common mistakes include poor symmetry, ill-placed masts, and rushing interior layouts; plan, test, and adjust as needed.
Can I use redstone to simulate sailing features?
Redstone can simulate moving doors or docks, but it won’t enable actual sailing physics. Use it for launch gates or controlled features, while the ship remains a static centerpiece.
Redstone can add dynamic dock features, but ships generally stay static; things like doors and gates are the practical uses.
How should I display my ship in a world for best effect?
Place the ship near water with a dock and lighting. Add a small sign or plaque describing the build, and consider surrounding scenery like a lighthouse or harbor town to tell a story.
Display the ship by water with a dock and ambient lighting; add a plaque to explain the build.
Watch Video
The Essentials
- Plan scale before placing blocks
- Aim for readable hull silhouettes with curved edges
- Detail with masts, sails, and railings
- Display near water to enhance realism