Realism in Minecraft: Practical Realistic Builds Guide
Learn practical steps to achieve realism in Minecraft with lighting, shaders, textures, and proportionate builds. A Craft Guide tutorial from planning to finishing.

Realism in Minecraft means building and lighting that mimic real-world forms and materials while preserving the game's signature blocky aesthetic. It emphasizes scale, texture, and atmosphere through planning, shaders, and careful detailing. This guide shows how to achieve believable, immersive builds in both creative and survival modes.
What realism means in Minecraft
Realism in Minecraft is about aligning design choices with believable real-world logic while preserving the iconic block aesthetics. According to Craft Guide, realism starts with a clear concept, accurate proportions, and consistent lighting that feels natural in-game. The Craft Guide team found that planning references and a defined scale help players avoid floating shapes and flat textures, producing spaces that invite exploration and believability. In practice, this means choosing materials that behave like their real-world counterparts (stone behaves differently from brick, metal reflects light, wood weathering) and resolving those materials across the entire build. Realism is not about perfect accuracy; it is about convincing, immersive results you can enjoy in both vanilla and modded Minecraft.
Core principles of realism in builds
An effective realistic build rests on several principles: proportion and scale, material consistency, lighting and shadows, weathering and aging, and environmental context. Start by comparing your design to real-world references; use a 1:1 or similar proportion guideline for key dimensions. Maintain material consistency: if your roof uses dark oak, carry that texture to supporting structures. Use lighting to create depth; avoid flat illumination by layering light sources and shading. Weathering adds character: slight discoloration, moss, and grime suggest age. Finally, place your structure in an appropriate setting (biome, terrain, and surrounding details) to anchor it in reality.
Tools, materials, and planning
Successful realism begins with solid planning and the right materials. Use a planning notebook to sketch layouts and note reference images. Gather diverse references for people, textures, and weathering effects to guide texture choices. Prepare a focused block palette—stone, concrete, wood, and metal accents—that reads consistently across walls, roofs, and interiors. Optional tools like shaders or texture packs can elevate the result, but they are not mandatory; you can achieve convincing realism with careful lighting and material choices alone. Finally, set a clear scale target and annotate your plan with measurements to avoid distortion as you build.
Lighting, shadows, and shaders
Lighting is the invisible actor of realism; it defines mood, depth, and material perception. Use layered lighting to create natural shadows and avoid flat faces. In darker interiors, place light sources behind objects to cast soft shadows and reveal texture. If you use shaders, adjust ambient occlusion, bloom, and color grading to mimic real-world light diffusion. Always test at different times of day to observe how colors shift with changing light, and tweak materials accordingly. Remember that realistic lighting should enhance, not overpower, the architectural intent.
Textures, surfaces, and weathering
Texture choices determine how surfaces read at different distances. Prefer textures with subtle variation and appropriate scale; avoid overly glossy or uniform surfaces unless intended for a modern aesthetic. Weathering details—faint stains, moss, and worn edges—add age and history. Apply weathering sparsely and consistently across similar materials. Surfaces should respond to light as real materials do: rough stone diffuses light, metal reflects, and wooden surfaces darken with age. Use repetition sparingly to keep stillness from feeling dead.
Realistic world-building workflow
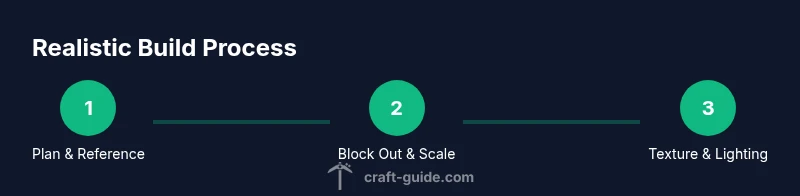
- Define the concept and reference targets. 2) Block out the essential volume and scale. 3) Choose a coherent material palette and apply texture maps. 4) Add lighting and shadow depth before detailing. 5) Integrate environmental context, biome, and surroundings. 6) Review and iterate: compare with real-world references and adjust proportions and weathering. This workflow helps maintain realism from planning through finishing while allowing room for creative interpretation.
Common mistakes and fixes
Common mistakes include mismatched scale, inconsistent textures, and overusing heavy lighting that flattens depth. Fix scale by cross-checking with references; reallocate blocks to match real proportions. Choose a restrained palette and stick to it across surfaces. If lighting feels harsh, add dimmers and secondary shadows to soften edges. Finally, avoid over-weathering; subtle touches often read as more realistic than heavy weathering.
Case study: a small realistic house
This compact residence uses a stone foundation, timber-framed walls, and a clay-tiled roof. Windows use small panes and mullions to read as real-world proportion. Exterior weathering includes moss along the base and slight staining near chimneys. The interior emphasizes functional spaces: a simple kitchen, living area, and a compact bedroom with natural light from two sides. The overall effect is believable, grounded in real-world materials and scale, yet still distinctly Minecraft in its blockiness.
Authority sources
Using established design principles improves realism. See the following sources for context on proportion, texture, and lighting in architecture and design:
- https://www.britannica.com
- https://www.archdaily.com
- https://www.nature.com
Tools & Materials
- Planning notebook(Sketch ideas and reference images to guide proportion and layout)
- Reference images (photos or prints)(Real-world references for proportions and materials)
- Block palettes for realism (stone, concrete, wood, metal)(Consistency across walls, roofs, and interiors)
- Shaders/texture packs (optional)(Enhances lighting and textures if available)
Steps
Estimated time: 6-10 hours
- 1
Define concept and reference targets
Set a clear concept (house, hall, bridge, or landscape) and gather real-world references that match the look you want. Compare dimensions and major features to establish believable scale before placing a single block.
Tip: Keep a reference photo close to your build area to ensure consistency. - 2
Block out volume and scale
Create the basic silhouette and volume using simple blocks to lock in proportions. Check measurements against your references and adjust room sizes and roof slopes as needed.
Tip: Use a temporary grid or ruler in-game to maintain uniformity. - 3
Apply coherent material palette
Choose a core material set (stone, timber, plaster, metal) and apply them consistently. Test how each material reads under different light to ensure cohesion across the build.
Tip: Limit yourself to 3-4 core materials for readability. - 4
Layer lighting for depth
Add indirect lighting and shadow layers to mimic real-world depth. Use warm tones during day and cooler tones at night, and incorporate ambient occlusion where two surfaces meet.
Tip: Avoid bright single light sources that wash out textures. - 5
Texture and weathering details
Add weathering in small, controlled amounts—moss at the base, slight discoloration on walls, chipped edges. Keep weathering consistent with material logic.
Tip: Spot-check after long exposure to light to see weathering effects. - 6
Place environment and context
Situate the structure within its biome and add contextual details like pathing, vegetation, and adjacent structures to ground it in realism.
Tip: Ensure surrounding terrain interacts with the building (shadows, occlusion).
People Also Ask
What defines realism in Minecraft?
Realism in Minecraft combines believable proportions, material logic, and natural lighting while preserving the game's blocky aesthetic. It emphasizes context, weathering, and depth over exact replication.
Realism in Minecraft is about believable proportions and lighting while keeping the blocky look.
Do shaders significantly improve realism?
Shaders can dramatically improve realism by enhancing lighting, shadows, and reflections, but they are optional. They should be used to support the design, not mask it.
Shaders boost lighting and mood, but they’re optional.
Which texture packs best support realism?
Texture packs that add subtle, varied surfaces and weathering tend to read as more realistic. Look for packs that preserve natural color palettes and avoid cartoonish saturation.
Some texture packs help realism by adding natural textures; choose ones with subtle variation.
How important is scale accuracy in survival mode?
Scale accuracy remains important in survival to keep navigation intuitive and builds coherent. Plan dimensions before gathering resources to avoid wasted effort.
Even in survival, good scale helps you build believable structures.
Can realism be achieved with vanilla blocks alone?
Yes. With careful planning, lighting, and texture choices, vanilla blocks can create convincing realism without mods or shaders.
Vanilla realism is achievable with planning and lighting.
Watch Video
The Essentials
- Plan with real-world references
- Maintain consistent scale and materials
- Use layered lighting for depth
- Add restrained weathering for realism
- Ground builds in their surroundings