Minecraft Street Light: A Practical Build Guide
Learn how to craft authentic Minecraft street lights for villages and towns. Step-by-step builds, common materials, redstone tips, and beacons for nighttime glow.

By the end, you will be able to craft functional Minecraft street lights for villages and towns, using a repeatable build that fits different aesthetics. You’ll learn about material choices (cobblestone, concrete, glowstone, lanterns), light sources, placement spacing, and optional redstone tweaks for timed lighting. This guide covers both decorative and practical layouts suitable for beginners and seasoned builders.
Why Minecraft Street Light Design Matters
Lighting shapes how players experience streets and settlements in Minecraft. A well-lit road not only helps navigation after sunset but also enhances the mood of your town. According to Craft Guide, thoughtful lighting design can elevate a simple street into a welcoming, immersive area that invites exploration. Good lights deter mobs and provide visual cues for paths, crossings, and entrances. When planning street lights, consider height, materials, and color tone to match your build—often a mix of stone, wood, and metal frames works best. In addition, placing lights at consistent intervals creates rhythm and cohesion, even when every block of terrain looks blocky by design. Craft Guide's analysis shows that consistency and contrast between light sources and surrounding textures make streets feel intentional rather than accidental.
Tools & Materials
- Post blocks (stone brick or cobblestone)(Vertical posts; 1-2 blocks tall depending on scale.)
- Light sources (lanterns or glowstone/sea lanterns)(Choose one primary source; lanterns for aesthetics, glowstone/sea lanterns for brightness.)
- Slabs or stairs for caps(Top cap to soften silhouette and provide a neat finish.)
- Daylight sensor (optional)(For automatic day-night lighting control.)
- Redstone dust and basic wiring (optional)(If you want timed or automated lighting.)
- Beacons (optional)(Decorative and high-visibility accents for grand avenues.)
Steps
Estimated time: 60-90 minutes
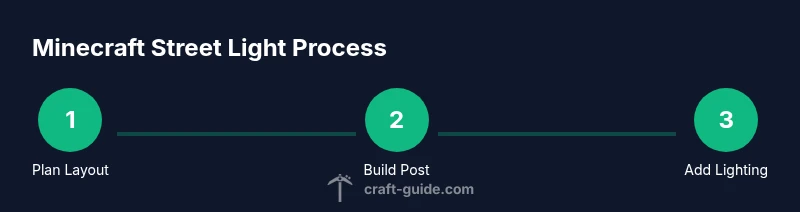
- 1
Plan the layout
Map the street length and identify key anchor points (intersections, sidewalks, and crosswalks). Decide on lamp density—keep a regular rhythm to guide players and keep the night path legible. A quick sketch helps ensure you don’t overbuild or underlight certain areas.
Tip: Create a simple diagram or use builder’s grid references to avoid reworking spacing later. - 2
Choose light sources
Decide whether you want warm lanterns for a traditional look or brighter blocks for a modern vibe. Lanterns read organically at street level, while glowstone or sea lanterns offer stronger visibility from distance. If automating, plan where daylight sensors will drive the lights.
Tip: Test brightness at night in a quiet test lane to see how it reads from multiple angles. - 3
Build the base posts
Construct vertical posts using your chosen post blocks. Keep them straight and sturdy, and align with your planned spacing. The post height should balance visibility with sidewalks and doors nearby.
Tip: Use a simple repeating pattern for multiple posts to speed up future builds. - 4
Attach the lamp head
Place the lantern (or glowstone block) at the top of each post, ensuring it faces the street. If using slabs for a cap, add them to finish the silhouette and reduce top-edge fragility.
Tip: Ensure the light isn’t directly blocked by adjacent blocks that could cast a shadow. - 5
Introduce variations
Add height variety with taller posts in busier sections or near intersections. Alternate lamp styles (lanterns, glowstone, beacons) to create visual interest while keeping a cohesive look.
Tip: Variation helps avoid a sterile, repetitive feel across long roads. - 6
Add automation (optional)
Wire a daylight sensor to power lamps for automatic/on-off behavior tied to day-night cycles. Start with a simple circuit and expand later if you want per-block control or timers.
Tip: Test the sensor in full daylight and at night to confirm transitions are smooth. - 7
Test and refine
Walk the street at night, observe lighting coverage, and adjust spacing or lamp height as needed. Make sure pathways stay visible and the overall aesthetic fits your town’s theme.
Tip: Document changes in a quick checklist to ensure consistency as you scale up.
People Also Ask
How far apart should street lights be placed for even coverage?
Aim for even spacing that minimizes dark gaps along your street. Start with a consistent rhythm and adjust based on sightlines and nearby structures. Test at night to ensure the glow reaches the entire sidewalk.
Place lights in a steady rhythm with a few blocks between them, then check at night to ensure there are no dark spots.
Can I automate street lights with a daylight sensor?
Yes. A daylight sensor can power lamps as daylight fades and turn them off when the sun rises. This adds realism and conserves resources in your build.
Yes, you can use a daylight sensor to automate the lights so they turn on at dusk and off at dawn.
What materials work best for a realistic post?
Stone bricks, cobblestone, or wood with a cap provide varied looks. Match the post material to your village theme; use decorative blocks for bases to add depth.
Choose stone or wood posts that fit your village style, with a cap to finish the top.
Are lanterns or beacons better for street lights?
Lanterns are more realistic for most streets and simpler to place. Beacons give dramatic effects and are best for grand avenues or special districts.
Lanterns are the go-to for typical streets; beacons work well for standout avenues.
How can I prevent mobs from spawning nearby?
Keep lights on and avoid dark corners. Well-lit sidewalks deter hostile mobs and improve navigation for players.
Bright, evenly spaced lights make mobs less likely to spawn nearby.
Can I adapt street lights for different biomes or towns?
Yes. Adjust post height, materials, and light color to match biomes and town themes. A coastal town might use glass accents, while a forest village leans toward wood and stone blends.
You can customize posts and lighting to fit each biome or town style.
Watch Video
The Essentials
- Plan spaces first to ensure even lighting
- Mix light sources for aesthetics and function
- Automate lighting to bring your town to life
- Test at night and adjust for realistic glow
- Keep a consistent palette across the street lighting