Minecraft Houses Tutorials: Practical Builds for Every Skill Level
Master practical minecraft houses tutorials with step-by-step guides, starter huts, and stylish designs. From foundations to finishes, learn to build efficient homes in vanilla Minecraft with clear, repeatable steps.

With this guide, you will master minecraft houses tutorials that cover planning, gathering, and building practical homes in vanilla Minecraft. Starting from a compact starter hut, you’ll learn efficient layouts, material choices, and scalable designs that expand into village-style homes. The steps focus on reliable workflows, smart storage, and aesthetic touches you can apply to any world.
Why Minecraft Houses Tutorials Matter
In Minecraft, a well-built house does more than provide shelter; it anchors your world, sets a workflow, and inspires creativity. For many players, the challenge is translating ideas into a structure that is both functional and beautiful. According to Craft Guide, structured minecraft houses tutorials help players translate ideas into playable builds while teaching practical tricks for space, lighting, and aesthetics. A good tutorial reduces trial-and-error wandering and speeds up your progress, especially for beginners. You will learn to plan in phases: start small, then expand, and finally connect multiple structures into a cohesive settlement. By following a method, you gain confidence to experiment with different materials, colors, and shapes without losing your overall sense of balance. This section lays the groundwork for every project, from a tiny starter hut to a sprawling village compound. Regardless of your map size or survival difficulty, having a clear blueprint makes building less overwhelming and more enjoyable. Craft Guide’s approach emphasizes clarity, repeatability, and adaptability, which helps you grow from a novice to a capable builder.
Core Principles Behind Successful Builds
Successful minecraft houses tutorials share a few core principles: proportion, practicality, and personality. Proportion means choosing a consistent scale for doors, windows, and rooflines so the house feels cohesive in the landscape. Practicality means designing with real-world needs in mind—lighting to prevent mob spawns, insulation (slab floors, carpet for warmth in colder biomes), and accessible storage. Personality is the fun part: accents like trapdoors as shutters, dark oak vs spruce for mood, or glass panes to frame a view. In a good tutorial, each principle is demonstrated with a material list and a rough layout. You’ll see how a single room can be repurposed as a workshop, a smithy, or a cozy library, then how to link rooms with corridors or arcades. The aim is to build something you can adapt, not a rigid template. With these fundamentals, you can evaluate any design before you place a single block, saving time and resources. Craft Guide’s guidance helps players visualize how a plan translates into blocks and space, which is essential for long-term projects.
Starter House Blueprint: A Simple, Efficient Hut
Begin with a compact footprint: a 7x9 block base gives you space for a single room and a small entry. Choose weather-resistant materials for your climate—spruce or dark oak for the walls, cobblestone for a sturdy base, and a cobblestone roof that is easy to craft. Place a door on the short side for easy access, with a single window on each side to let light in while keeping visibility. The interior should include a bed, a crafting table, a furnace, and a chest for essentials, arranged for quick pathing. Add a small loft above the main room if you need extra storage or a bed niche. Lighting is critical: place torches on walls at even intervals to prevent dark spots. This starter hut can be completed in under an hour and serves as a reliable home base from which you can branch out into more complex builds. The modular design makes it easy to replicate in other biomes, so you can quickly establish multiple safe homes as you expand your world.
Expanding: From Starter to Village-Style Homes
Once you’re comfortable with a starter, you can scale up by adding second floors, balconies, and connected outbuildings. A village-style layout works well when you organize modules around a central plaza or courtyard. Use consistent materials for walls, roofs, and foundations to maintain a cohesive look across several houses. Consider a modular plan: a core living space, a kitchen/work area, and a bedroom cluster. Elevations matter; alternating roof heights create visual rhythm. Add pathing with gravel or cobblestone, and light the lanes with lanterns to guide players at night. Storage rooms can link several houses through a shared corridor, making long-term survival easier. Outdoor features like a fenced yard, garden plots, and a small stable for crops or horses add depth without complicating construction. This section shows how to preserve a consistent aesthetic while expanding your footprint across a Minecraft world. Craft Guide recommends testing each module on a small scale before building a full village to keep projects manageable and cohesive.
Materials, Redstone, and Aesthetics: Practical Tips
Material selection determines mood and durability. For rustic looks, blend logs or planks with stone accents; for modern vibes, use concrete and glass with minimal trim. Lighting should be evenly spaced and layered—no dark corners. Redstone isn’t essential for a house, but simple contraptions like a hidden door or light sensor can enhance usability. Windows expand your view; optimizing viewlines reduces bulk and helps you appreciate landscape. Use contrast to highlight architectural features: dark planks against lighter stone bricks, or white terracotta with a bold roof color. Plan your interior layout before you mine: sketch a rough floor plan on paper, then translate it block by block. Finally, consider accessibility: place chests near the entrance and keep heavy items near the storage room. These tips help you craft homes that are not only durable but also enjoyable to live in. The right material mix can transform a simple hut into a signature building in your world, so test combinations and iterate until it feels right.
Common Mistakes and How to Fix Them
Many players fall into the trap of overcomplicating a simple design or underestimating lighting. Underlighting creates mobs inside your living space; fix it by adding torches or lanterns at even intervals. Another frequent error is inconsistent scale—doors that feel too small or roofs that look out of proportion. Correct by measuring against a standard module (for example, door width and window sizes), then adjust roof slopes accordingly. Neglecting entryways makes movement awkward; ensure there is a clear, direct path from door to essential rooms. Finally, ignoring biomes can lead to mismatched materials that look out of place. Choose a palette that complements your surroundings, even if it means swapping one material for another. By anticipating these pitfalls, you’ll finish builds faster and with results that look intentional rather than accidental. Craft Guide emphasizes testing your design in-game and iterating on visuals before committing to large-scale builds.
Tools & Materials
- Wood planks(For walls and floors; pick a consistent wood type)
- Logs(For decorative beams and accents)
- Cobblestone(Solid foundation base and trim)
- Stone bricks(Decorative corners and doorway frames)
- Glass panes(Window lighting without mobs)
- Door(Front and interior doors)
- Crafting table(Core workstation)
- Furnace(Smelting and cooking)
- Bed(Set spawn point)
- Chests(Storage for essentials)
- Torches(Mob protection and lighting)
- Lanterns(Ambient light)
- Stairs(Interior access and roof detail)
- Slabs(Roof and floor partial blocks)
Steps
Estimated time: 90-120 minutes
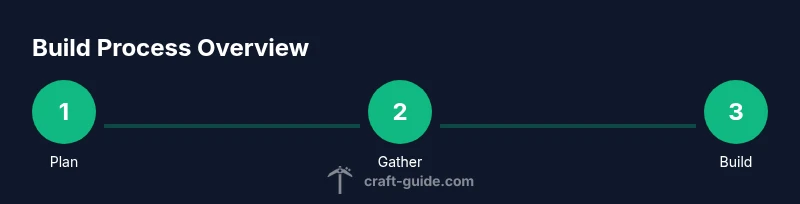
- 1
Plan your base layout
Define the footprint, pick a suitable site, and mark the door orientation. Sketch a rough map of rooms and corridors to avoid wasted space. Decide whether you’ll add a loft or separate storage later. This upfront planning saves rework when you start placing blocks.
Tip: Use gentle symmetry and a central hallway to keep future expansions smooth. - 2
Gather your materials
Inventory the essential blocks from the toolsMaterials list and collect them in a portable chest near your build site. If you’re in a fresh biome, gather local materials first, then diversify for texture. Consider batching similar blocks to reduce trips back to storage.
Tip: Pre-create a small stock of torches and chests so you don’t pause mid-construction. - 3
Lay the foundation and walls
Place the footprint outline with cobblestone or wood planks, then raise walls to chest height. Keep door alignment consistent on the shorter wall to optimize interior flow. Leave space for windows and entrances as planned in step 1.
Tip: Double-check door width against your planned interior layout before sealing corners. - 4
Add the roof and doors
Create a simple gable or hip roof using slabs and stairs to achieve clean lines. Install doors at all exterior entrances and ensure interior doors align with room shapes. Roof overhangs protect walls from weathering in-game and look more finished.
Tip: Test two roof angles on a small section to pick the most pleasing silhouette. - 5
Install interior components
Place the bed, crafting table, furnace, and storage chests in logical proximity to minimize walking distance. Create a dedicated lighting axis so mobs don’t spawn inside. Add a small crafting wall or workbench nook if space allows.
Tip: Organize chests by category (tools, resources, food) to speed up gameplay. - 6
Finish with lighting and exterior touches
Light exterior paths with lanterns or torches, connect buildings with walkways, and add simple landscaping or fences. Ensure every space is accessible and visually cohesive with the rest of your world. Do a quick test night run to verify visibility and safety.
Tip: Use lanterns on higher posts for broader light distribution and a welcoming vibe.
People Also Ask
What is the best starter house design for beginners?
A compact, single-room hut with a simple roof, essential storage, and ready access to a bed and crafting area is ideal for beginners. This design minimizes wasted space and lets you practice layout and lighting before expanding.
For beginners, start with a compact hut with a simple layout and ready access to beds and storage.
How can I make a house look good without wasting materials?
Use a limited material palette and repeat architectural motifs across rooms. Focus on proportion, lighting, and clean rooflines. Small decorative touches out of a single material can tie the design together without extra blocks.
Keep a limited palette and repeat motifs to save resources while still looking polished.
Can I build multi-story houses in survival mode?
Yes. Start with a sturdy foundation and ensure stairs or ladders are safe and accessible. Plan storage and room layout across floors to avoid backtracking. Upgrade gradually as you collect more resources.
Yes, but build tall houses step by step, ensuring safe access and thoughtful storage.
What are common lighting mistakes to avoid?
Avoid dark corners by evenly spacing torches or lanterns. Don’t rely on a single light source; use layered lighting to deter mobs and create ambience. Update lighting as you expand rooms.
Avoid dark corners; use layered lighting for safety and mood.
Which biomes are best for starter houses?
Starter houses work well in plains or forests where wood and stone textures suit the landscape. In snowy or desert biomes, adapt the palette to avoid clashes with the environment and ensure durability against weather in-game.
Plains or forests are great for starters; adapt colors to fit the biome.
Should I plan an entire village at once or build module by module?
Module-by-module expansion is usually wiser. Start with a central hub and small houses, then add connectors, lanes, and shared storage as you gather resources.
Build a central hub first, then expand housing modules as you collect resources.
Watch Video
The Essentials
- Plan your layout before you place blocks.
- Use a consistent material palette for cohesion.
- Light everywhere to prevent mob spawns.
- Expand your base modularly to build a village.
- Prioritize practical interiors for faster survival.