Lego Minecraft Creeper: A Complete Build Guide for Bricks
Learn to build a pixel-perfect lego minecraft creeper with standard LEGO bricks. This guide covers planning, color choices, brick sizing, display ideas, and common fixes.

In this guide you will learn how to construct a lego minecraft creeper using standard LEGO bricks and Minecraft-inspired colors. You’ll plan the model, assemble modular sections, and display your finished piece with protective dust covers. Follow the step-by-step process to achieve a pixel-perfect creeper figure suitable for display or gifting.
What is a LEGO Minecraft Creeper Build?
A LEGO Minecraft creeper build is a pixel-art-inspired sculpture that mimics the iconic creeper from the game Minecraft using LEGO bricks. The design focuses on a square, blocky silhouette and a pixelated face achieved with contrasting black and lime green bricks. For many builders, the charm lies in translating 8-bit game sprites into a tangible brick model you can display on a shelf or desk. According to Craft Guide, the lego minecraft creeper aesthetic benefits from a strict grid mapping so the face reads clearly from a distance. Craft Guide's analysis also notes that planning with a grid improves symmetry and stability, making the model easier to build in stages. The phrase lego minecraft creeper is frequently used by fans when sharing photos or tutorials, helping others find step-by-step ideas, color layouts, and display tips.
To keep the project approachable, most creators start with a compact, 8x8 or 8x12 grid, then scale up if they want a bigger model. The repeated use of the keyword shows up here to reinforce what the reader will learn in this guide. You’ll discover how to map every stud to a pixel, choose the right lime green tones, and decide whether to add shoulders or a base plate for stability. By the end, you’ll understand both the aesthetic choices and practical steps that convert a simple pile of bricks into a recognizable lego minecraft creeper.
The Design Principles behind LEGO Minecraft Creepers
When you translate a Minecraft creeper into LEGO form, you rely on four core design principles: pixel accuracy, stability, modularity, and displayability. Pixel accuracy means choosing a grid-based size and sticking to square pixels so the face reads clearly from a distance. Stability comes from building on a solid base, layering bricks securely, and avoiding long, fragile overhangs. Modularity helps you plan sections (head, body, base) that can be assembled or reconfigured without disassembling the entire model. Displayability means thoughtful lighting, a stable stand, and a finish that lasts.
Craft Guide analysis shows that successful lego minecraft creeper builds use a consistent color palette—lime greens, with black for eyes and mouth. If a perfect lime green brick isn’t available, builders often mix in slightly different greens to create shading. The article discusses the balance between toy brick constraints and architectural intent; you don’t need perfect 1:1 accuracy to convey the character. The goal is a visually striking, stable, and durable model that captures the character’s essence while staying within typical LEGO systems.
Additionally, you’ll learn how to plan for scale, how to map each stud to a pixel, and how to anticipate common alignment challenges. This section lays the groundwork for a clean, repeatable process you can reuse for other Minecraft mobs or pixel-art figures.
Materials, Colors, and Brick Sizing
A great lego minecraft creeper starts with the right bricks and color choices. The most common approach uses lime green bricks as the primary color, with black bricks for the eyes and mouth. White or light gray bricks can add highlights or a bright shine on tricky faces. Plan to include a mix of 1x1, 1x2, and 2x2 bricks for the blocky, pixel-like look, plus flat plates or tiles to smooth edges. For a sturdier model, include a solid base plate and several horizontal plates to lock rows together. The brick size matters: smaller bricks allow finer details, while larger bricks build volume quickly.
Organizing by color and size speeds up assembly. Group all lime green bricks together, then blacks, whites, and any accent colors. If you have limited colors, you can approximate shading with two or three lime tones. The key is to maintain sharp edges at the face; rounded corners can soften the pixel effect, which may be desirable for a stylized version. Finally, consider a base frame or soft pins to improve stability if you plan to display the creeper on a shelf or in a display case.
In this guide you’ll find recommended color palettes, stocking tips, and layout strategies to minimize brick searches. Craft Guide’s input emphasizes deliberate planning and practical, repeatable steps so builders can quickly go from idea to display-ready lego minecraft creeper.
Design process overview: concept to display
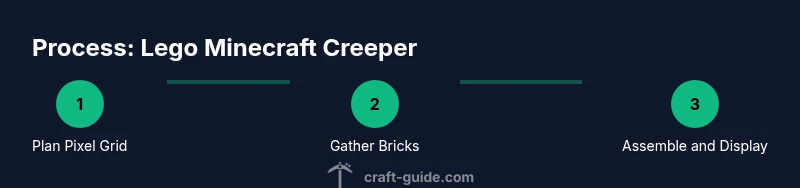
To turn a concept into a ready-to-show lego minecraft creeper, you’ll follow a simple, repeatable process: sketch the grid, gather bricks, build the head, add the body, attach the base, and finalize the face. Start with a small thumbnail plan on graph paper, then translate that plan into a brick grid on your work surface. As you assemble, check alignment frequently and use a ruler or straight edge to maintain even rows. This section gives a practical, stepwise framework to move any pixel-art idea into brick form while keeping the concept cohesive.
A strong plan reduces rework and helps you visualize the final piece before you touch bricks. If you’re new, begin with a tiny 6x6 or 8x8 grid, then scale to 8x8 or 8x12 once you’re confident in your mapping. The payoff is a lego minecraft creeper that looks intentionally blocky, reads clearly from afar, and remains stable after long display sessions.
Display ideas and maintenance
Once your lego minecraft creeper is complete, choose display options that protect the build and showcase its angles. A clear acrylic display case or a dust-cover shelf keeps debris away while maintaining visibility. Lighting matters: a small LED light or a warm desk lamp can bring out the lime color and the contrast in the eyes. To keep the bricks in good condition, handle the model gently, avoid excessive exposure to sunlight that can fade colors, and periodically dust with a soft brush. If you plan to move it often, consider a low-profile base with anti-slip pads for stability.
Regular checks of joints and seams help catch loose bricks before they cascade. Remember to rotate the creeper occasionally so every face receives similar light exposure, preserving color balance over time.
Troubleshooting common issues
Stability problems are common in chunky lego minecraft creeper builds. If panels wobble, reinforce the joints with hidden internal plates or bracing. Misaligned eyes or mouth usually come from a skewed grid; undo a few rows and re-seat the bricks, checking with a level or ruler. Color variation can affect cohesion; if your lime greens differ too much, swap to closer shades and rebuild the affected sections. For heavy models, distribute weight evenly across the base and consider adding a core support that isn’t visible from the outside.
If you’re short on lime green bricks, you can substitute with two lighter greens and a pinch of yellow for shading. Craft Guide notes that returning to the original plan and rebuilding from a verified grid helps reset mistakes quickly. A stable, well-planned build is both satisfying to assemble and durable for long-term display.
Tools & Materials
- Lego bricks in lime green(Assorted sizes for pixel blocks (2x2, 1x1, 1x2))
- Black LEGO bricks(1x1 and 1x2 bricks for eyes/mouth)
- White LEGO bricks(Optional highlights or eye accents)
- Base plate(Large enough to support footprint)
- Flat plates or tiles(For smooth edges and steps)
- Brick separator(Helpful for disassembly)
- Sorting trays(Organize bricks by color/size)
- Ruler or grid paper(Plan the pixel grid)
- Soft brush(Dusting and light cleaning)
- Display case or stand(Protect and present the model)
- Storage bins(Bricks kept organized between builds)
Steps
Estimated time: 2-3 hours
- 1
Define the pixel grid
Plan the creeper shape on graph paper using a grid that matches the intended brick grid. Decide height, width, and the exact pixel coordinates for facial features.
Tip: Use a simple 8x8 or 8x12 grid to start; this keeps proportions readable. - 2
Sort bricks by color and size
Group lime green bricks by shade and size (2x2, 1x1, 1x2). Do the same for the eyes (black) and any highlights (white).
Tip: Label containers to speed up grabs during assembly. - 3
Build the head frame
Lay out the head as a cube-like mass following the grid. Ensure the top and sides stay square for a clean silhouette.
Tip: Check corners with a ruler to avoid drift. - 4
Add the body and base
Attach the main body to a stable base, reinforcing joints with plates to prevent wobble.
Tip: Keep a light hand when joining to avoid shifting edges. - 5
Create eyes and mouth
Place black bricks precisely at the planned coordinates. Use symmetry to ensure a recognizable face.
Tip: Double-check alignment from a distance to verify readability. - 6
Finalize edges and shading
Fill in gaps and consider subtle shading with a second lime shade if available. Avoid over-detailing to preserve the pixel look.
Tip: Use flats plates to soften joints without breaking the pixel aesthetic. - 7
Test stability
Push gently on different sides to ensure the model holds together. Address any loose sections with extra plates.
Tip: Reinforce critical joints early to save time later. - 8
Prepare for display
Clear dust, mount on the base, and place in a chosen display area with gentle lighting.
Tip: Keep away from direct sunlight to preserve color fidelity.
People Also Ask
Can I use real LEGO bricks to recreate a Minecraft Creeper?
Yes, you can use real LEGO bricks. Keep in mind brick availability may affect color choices; plan ahead to maintain the pixel look.
Yes, you can use real LEGO bricks, just plan color choices in advance.
What scale should I use for a lego minecraft creeper?
Common scales range from 8x8 to 16x16 studs. Pick a scale that balances detail with build time and stick to it for consistency.
Choose a scale that fits your space and stick with it for consistency.
How can I make the model more stable?
Reinforce joints with internal plates, build on a solid base, and avoid long overhangs. Layer bricks in interlocking patterns for strength.
Strengthen joints with internal plates and a solid base.
Which colors are best for the Creeper body?
Lime green is ideal for the body, with black for eyes and mouth. White can be used sparingly for highlights if available.
Lime green with black facial features works best.
Can I add arms to the Creeper?
Minecraft Creepers traditionally don’t have arms, but you can add small offset blocks to suggest a stylized arm-like silhouette if you prefer.
Arms aren’t necessary, but you can stylize the build if you want.
How long does it take to complete a mid-size Creeper build?
Time varies with scale and detail; expect longer builds for larger grids and quicker ones for smaller pixel-art versions.
Depends on the size; larger grids take more time.
Watch Video
The Essentials
- Plan your pixel art before building.
- Maintain a strict lime-green/black color palette.
- Build on a sturdy base for long-term display.
- Document progress with photos to simplify revisions.