How to Make Minecraft Look Like the Trailers
Learn practical, step-by-step methods to transform Minecraft into cinematic trailer-quality visuals using lighting, shaders, textures, and camera work.

To make Minecraft look like the trailers, you combine lighting, shaders, textures, and cinematic camera work. Start with a shader pack or shader-like post-processing, then improve textures and adjust render distance. Add subtle weather, gradual lighting shifts, and planned camera angles to achieve a cinematic feel.
Why cinematic Minecraft visuals matter
In the world of Minecraft, visuals are your storytelling engine. If you are exploring how to make minecraft look like the trailers, you’ll immediately notice that lighting, color grading, and camera motion shape the audience's perception. A trailer-grade look elevates mood, clarity, and immersion, helping players interpret landscapes, builds, and character moments as cinematic. According to Craft Guide, thoughtful visual setup yields stronger storytelling results than scattershot effects. The Craft Guide team found that consistent lighting, believable fog, and purposeful camera motion consistently improve viewer engagement. This article explains why investing time in visuals pays off in practice and how you can structure your workflow from the first session.
Core elements that recreate the trailer look
To emulate trailer aesthetics, focus on four pillars: lighting, fog, color grading, and camera control. Lighting defines mood; soft, directional light with subtle shadows creates depth. Fog adds atmospheric scale, especially in outdoor scenes. Color grading ties everything together—cool blues in night scenes, warm tones at sunset. Camera control introduces storytelling: gradual pans, follow shots, and deliberate framing. The keyword appears here again as you plan each scene: how to make minecraft look like the trailers benefits from a consistent visual language across all shots.
Shader and texture fundamentals
Shader packs simulate realistic lighting, shadows, and bloom, while texture packs sharpen details and surface textures. Start with a basic shader framework and a high-resolution texture pack; ensure compatibility with your Minecraft edition. The goal is to achieve a cohesive look where lighting reacts to blocks, weather, and time of day. If you are unsure where to begin, try a mid-range shader setup before moving to more aggressive post-processing. Remember, the quality of the shader and textures directly affects perceived realism and cinematic polish.
Lighting setup and post-processing
Set up ambient lighting to avoid blown-out highlights, then layer bloom and motion blur sparingly. Enable soft shadows to enhance depth without making the scene feel flat. Use post-processing effects like color grading, vignette, and subtle bloom, but limit intensity to preserve texture detail. A stable frame rate is crucial; test across different scenes to balance visual fidelity with performance. The trailer look often hinges on how lighting transitions between frames, so plan gradual changes rather than abrupt shifts.
Texture packs and resource management
High-resolution textures give surfaces a tactile feel, from stone to foliage. Balance resolution with performance by using a mix of medium and high textures in different biome contexts. If possible, create a custom resource pack tailored to your builds; this helps maintain consistency when lighting and shading change. Ensure you back up textures and keep versions aligned with your Minecraft build. Texture consistency across scenes is essential for the trailer-grade effect.
Camera work and shot composition
Cinematic shots rely on planning: establish leading lines, rule of thirds, and depth to guide the viewer’s eye. Use slow, deliberate camera movements; avoid rapid jerks that break immersion. For Minecraft, simulate camera moves with travel paths or controlled screenshots, then stitch them into a sequence. Plan your shots in advance, write a shot list, and map transitions to keep pacing steady.
Environments and atmosphere
Atmosphere is more than weather; it’s how distant mountains fade, how fog interacts with trees, and how particles shimmer in light. Use environmental props like vines, fog layers, and ambient particles to add depth. Weather variations—mist at dawn or a light fog at dusk—enhance realism without overpowering textures. Crafting a consistent atmosphere makes scenes resemble cinematic trailers rather than gameplay footage.
Performance tuning and testing
Shaders and high-res textures demand GPU power. Start with a baseline FPS, then gradually enable more effects while monitoring frame times. Use in-game benchmarks or external tools to track stability. If you notice stuttering, reduce texture resolution or shader complexity and re-test. Aim for a smooth experience that preserves the cinematic vibe without sacrificing playability.
Final polish and common pitfalls
Avoid overdoing glow, bloom, or chromatic aberration; these elements quickly become distracting. Keep color grading consistent across shots, and ensure transitions are smooth. Save iteration snapshots and compare them side-by-side to judge improvements. By focusing on cohesion and careful balancing of light, texture, and camera, you’ll achieve a trailer-like Minecraft look that’s reproducible across builds and worlds.
Authority sources you can consult
For color science, lighting, and rendering principles that underpin cinematic visuals, refer to credible sources such as government and university research sites and major publications. These resources help you understand why certain lighting and color decisions read well on screens and how to translate that into Minecraft. See authoritative guidelines from NIST (color and measurement standards), MIT (graphics and visualization research), and Science Magazine for fundamentals that inform practical in-game techniques.
Tips on planning and iteration
Consistency is the key. Start with a core visual language (a chosen shader style and texture set), then build scenes around it. Regularly test on different biome types and lighting conditions to ensure cohesion. Keep a changelog of settings so you can reproduce successful results in future maps and worlds.
Tools & Materials
- Shader pack (generic)(Choose a shader pack with dynamic lighting and bloom; ensure compatibility with your Minecraft edition.)
- HD texture/resource pack(Aim for 512x or higher; test texture cohesion across biomes.)
- Shader/mod loader or compatible launcher(Used to install shaders and manage resource packs.)
- Graphics settings profile(Save a preset to quickly apply lighting, render distance, and shader settings.)
- Video capture software(Optional for recording sequences to edit into a trailer.)
- Backup storage(Keep copies of textures and worlds before major changes.)
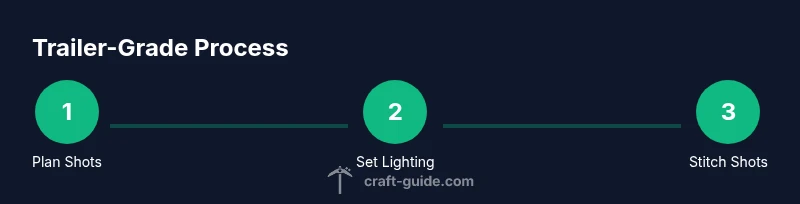
Steps
Estimated time: 120-180 minutes
- 1
Prepare your game environment
Launch Minecraft with a clean profile and enable basic graphics to ensure stability. Create a test world with varied biomes to contrast lighting and textures. This step sets a reliable baseline for subsequent shader and texture adjustments.
Tip: Document baseline FPS and visual quality before changing any settings. - 2
Choose shader pack
Select a shader pack that emphasizes natural lighting and depth. Install it through your mod loader and verify it loads without errors in the test world.
Tip: Start with a mid-range shader and avoid ultra-dense foliage shaders on low-end PCs. - 3
Install texture pack
Apply an HD texture pack that complements your shader’s lighting. Check that block textures align with lighting changes across day and night cycles.
Tip: Keep texture pack versions matched with your Minecraft build for stability. - 4
Enable post-processing effects
Turn on bloom, color grading, and subtle depth of field. Tweak strength so textures remain sharp while the scene gains cinematic mood.
Tip: Use gradual adjustments; avoid overpowering effects that wash out detail. - 5
Plan camera shots
Create a shot list focused on leading lines, depth, and pacing. Use slow pans and controlled movements to guide the viewer's eye.
Tip: Sketch storyboard frames to keep sequences coherent. - 6
Build or stage cinematic scenes
Assemble scenes that highlight lighting interactions: sun rays through trees, fog layers near cliffs, and reflective surfaces.
Tip: Prefer simpler environments with strong silhouettes for clarity. - 7
Record sequences
Capture multiple takes from planned angles, then mix them in post to form a cohesive trailer sequence.
Tip: Keep footage organized by scene and camera angle to speed editing. - 8
Optimize for performance
Profile frame times, reduce texture resolution if needed, and simplify shader effects in busy scenes.
Tip: Aim for a stable 60 FPS if possible; smooth motion sells the trailer vibe. - 9
Polish and review
Apply final color grading, adjust transitions, and compare iterations. Ensure the overall look remains consistent across shots.
Tip: Keep a changelog and use side-by-side comparisons to judge progress.
People Also Ask
What is the easiest way to start achieving trailer looks in Minecraft?
Begin with a mid-range shader, a compatible texture pack, and a simple lighting setup. Build confidence with a single scene before expanding to multiple shots.
Start with a shader and texture pack that work well together, and practice one cinematic scene at a time.
Do shaders work on all Minecraft editions?
Shaders require a compatible edition and launcher. Check version support and install guides before enabling shaders.
Not all editions support shaders; verify compatibility first.
Will high-resolution textures crash my game?
High-res textures can impact performance on weaker machines. Balance texture quality with frame times and test across scenes.
Yes, texture quality can affect performance; adjust resolution to keep frame rates steady.
Can I achieve trailer visuals without mods?
A base game with careful lighting and vanilla textures can still look cinematic, but shaders and texture packs dramatically improve the effect.
It's possible with careful lighting, but mods help reach trailer-grade visuals faster.
How long does it take to create trailer-like scenes?
Expect to invest several hours for planning, testing, and polishing, especially if you’re new to shaders and textures.
Plan for multiple sessions to refine lighting, textures, and camera work.
Watch Video
The Essentials
- Plan lighting and mood before textures.
- Choose compatible shader and texture packs.
- Use deliberate camera movements and shot planning.
- Test performance early and iterate on visuals.
- Polish with consistent color grading and transitions.