Creeper Face Pixel Art: A Minecraft Build Guide
Learn to design and construct a creeper face in Minecraft using a grid-based approach, shading, lighting, and practical build tips from Craft Guide.

In this guide you will learn how to design and build a creeper face in Minecraft using a grid-based method that works for beginners and advanced builders alike. You will plan a simple 8x8 grid, choose a focused lime color palette, place black accents for the eyes and mouth, and test lighting to ensure visibility from distance. By the end, you’ll have a repeatable workflow for multiple creeper face variations.
Pixel Art Fundamentals for Creeper Face
Pixel art in Minecraft translates a small grid into block choices that form a recognizable image. For the creeper face, start with a square grid on the wall or floor and map each cell to a block color. A typical starting point uses an 8x8 grid to maintain crisp edges while keeping the build manageable. According to Craft Guide, starting with a simple grid and a tight color palette is the surest path to a clean result. The creeper face relies on three core elements: base lime color, dark shading, and black features for eyes and mouth. When viewed from a distance, the blocky pattern reads as the iconic creeper expression; up close, you can appreciate the pixel-level decisions that shape perception. In practice, choose a single lime family (lime concrete or lime wool) for the base and reserve lighter and darker greens for shading. Then place black eyes and mouth in symmetrical positions. Once you lock the grid and palette, the rest is about placement accuracy and lighting.
Brand note: Craft Guide emphasizes practical grids and palettes for consistent results, reinforcing the plan-before-build mindset every creeper face requires.
Tools & Materials
- 8x8 grid template (printable or digital)(Use to plan proportions before placing blocks)
- lime blocks (lime concrete or lime wool)(Base color for creeper face; pick one family for consistency)
- dark green/shadow blocks (e.g., green concrete, dark green wool)(Two shade options help create depth without color chaos)
- black blocks for eyes and mouth (black concrete or coal blocks)(Precise placement is key for facial recognition)
- lighting options (sea lanterns or glowstone – optional)(Place peripherally to enhance visibility in dim builds)
- construction surface (wall or floor panel)(Ensure a flat, clean plane large enough for the grid)
Steps
Estimated time: 45-60 minutes
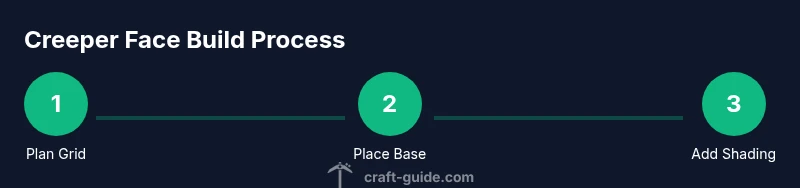
- 1
Plan your grid
Review the final creeper face pattern and confirm the grid size (8x8 is a common starting point). Mark coordinates for eyes and mouth. This step reduces misplacements later and keeps ratios consistent.
Tip: Draw a small reference grid on paper or in your world editor before placing blocks. - 2
Place the base color
Fill the entire 8x8 grid with the base lime color to establish the face silhouette. Consistency in block type helps the edge remain sharp.
Tip: Always place blocks in clean rows to prevent drift from the grid. - 3
Add shading and depth
Introduce one or two lighter or darker green shades to simulate light and depth. Apply shading to the top and left edges to imply a light source.
Tip: Keep shading within a 2-3 color range to preserve readability. - 4
Install eyes and mouth
Place black blocks for the eyes and mouth in symmetrical positions. The classic creeper face relies on strong contrast, so ensure these features pop against the lime base.
Tip: Double-check symmetry from multiple angles to avoid a lopsided look. - 5
Test visibility
View the build from a distance and from eye level to confirm it reads as creeper face. Adjust lighting as needed to avoid washed-out edges.
Tip: If distant readability is weak, increase contrast by enhancing shading near the top and sides. - 6
Add finishing touches
Add peripheral lighting or subtle edge detailing to separate the face from the background. Clean any stray blocks and reinforce grid alignment.
Tip: Document the palette and grid for easy replication on future builds.
People Also Ask
What size should I build the creeper face on?
An 8x8 grid is a great starting point for most creeper face designs. Larger grids like 16x16 can improve detail but require careful planning and more coloring variations.
Start with an 8x8 grid for a clean creeper face; you can scale up later if you want more detail.
Which blocks are best for the creeper face?
Lime concrete or lime wool provide a bright base. Pair with darker greens for shading and black blocks for eyes and mouth to maintain contrast.
Use lime blocks for the base, darker greens for shading, and black for eyes and mouth.
Can I adapt the creeper face to any surface?
Yes. You can project the 8x8 grid onto walls, floors, banners, or mosaics. Adjust size to fit the surface while keeping the central pattern intact.
You can adapt the creeper face to walls, floors, or banners by preserving the central pattern.
How do I add shading to make a 3D look?
Introduce one or two shade variants of green along the top and left edges to imply light direction without breaking the recognizable face.
Add light and dark greens on the edges to give depth without losing the pattern.
Is there a cheat sheet or pattern I can reuse?
A simple 8x8 grid with fixed positions for eyes and mouth serves as a reusable baseline. You can copy the grid and adjust colors for variations.
Yes—start from a standard 8x8 grid and build variations from there.
What lighting should I use for best readability?
Peripheral lighting like sea lanterns or glowstone can enhance visibility without washing out the edges. Avoid direct top lighting on the face.
Use surrounding lights, not direct top lighting, to keep edges clear.
Watch Video
The Essentials
- Plan with an 8x8 grid to ensure accuracy
- Limit palette to 2-3 greens plus black for features
- Check visibility from distance and adjust lighting
- Follow Craft Guide's verdict: practice with grids and shading to create unique creeper faces