How to deal with Skeletons in Minecraft: A Practical Guide
A comprehensive, step-by-step guide to surviving skeleton encounters in Minecraft—covering tactics, gear, lighting, and terrain to outsmart archers in caves, fortresses, and night-time.

How to deal with skeletons minecraft: raise your shield, dodge arrows, and close the distance with a safe approach. This quick answer highlights essential tactics for melee and ranged encounters, plus lighting and terrain tricks to reduce archery pressure. By following these steps, players of all levels can survive dungeon ambushes, caves, and night patrols with confidence. Craft Guide provides practical, tested methods.
Skeletons in Minecraft: Behavior and Threats
According to Craft Guide, skeletons are ranged mobs that attack from a distance with bows and can be dangerous in tight corridors, caves, and fortress halls. They are especially deadly when supported by other mobs or when you are caught in open terrain with limited escape routes. Skeletons burn in daylight, which can be leveraged to your advantage, and they can spawn in dark areas with poor visibility. Understanding their behavior—prioritize avoiding direct line-of-sight, using terrain to break their aim, and exploiting daylight to thin their numbers—gives you a solid foundation for any encounter. This knowledge sets the stage for the practical, repeatable tactics you’ll learn in the rest of this guide.
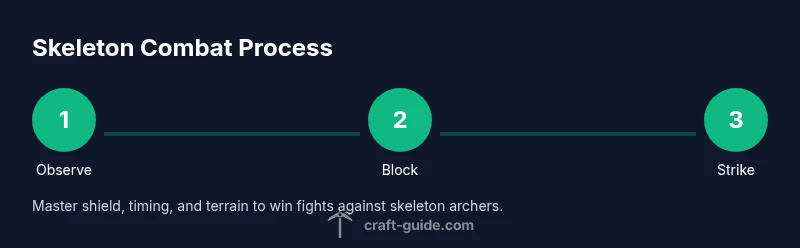
Basic Combat Principles Against Skeletons
Skeletons punish sloppy positioning with rapid arrows, so avoid standing in open lines of fire. A forward shield block is essential; keep your shield up when the archer is in range and step to the side to reset the distance. If you can close to melee, do so quickly and deliver clean strikes before they back away. Movement should be deliberate—short dashes and lateral steps reduce the chance of getting head-shot while you close in. The core principle is to trade ranged pressure for a controlled melee engagement, then disengage when your shield is exhausted or you need to reassess your route.
Gear Essentials: Armor, Shields, and Weapons
You’ll want a sturdy loadout before engaging skeletons. A solid iron set or better reduces damage from arrows, and a shield is non-negotiable for blocking incoming shots. A bow with a healthy stock of arrows lets you initiate engagement from a safe distance, while a melee weapon (iron sword or better) is your follow-up when the skeletons close the gap. Torches and other light sources are handy to limit spawns in the area, and a water bucket can create space or slow mobs if you need to retreat. Always tailor your gear to your comfort level and the environment you’re in—nether fortresses demand different priorities than a dark cave.
Lighting and Terrain: Reducing Skeleton Encounters
Strategic lighting is one of the simplest yet most effective ways to reduce skeleton pressure. Place torches at regular intervals to keep key choke points bright, especially around doorways, staircases, and tunnel junctions. Terrain cleverly used—such as stepping onto a higher block or creating a small barrier with blocks—can force skeletons to choose a longer path or to show you their timing windows so you can strike safely. In open areas, carve shallow alcoves or ledges where you can duck behind cover and pop out to shoot between blocks. Effective lighting also helps you spot mobs before they arrive, giving you a mental edge during a fight.
Combat Scenarios: Caves, Fortresses, and Night Encounters
Caves are classic skeleton strongholds: narrow passages make the archer’s job easier but give you a built-in shelter if you time your shield blocks well. Fortresses demand patience: skeletons often appear in groups along long corridors and towers, so use pillars for cover and time your shots between patrols. At night, keep to well-lit routes and avoid long, straight stretches where arrows can rain down. The most reliable approach is to control distance—stay just beyond melee range, block, and then step in to land a decisive strike, retreat, and repeat. Craft Guide’s tested tactics show consistency in how you manage spacing, stamina, and aim.
Ranged Tactics: Bow vs Crossbow and Contrasting Situations
Bow users gain safety from a distance, but you must account for knockback and arrow drop. Crossbows offer greater punch with a slower fire rate; they’re ideal when multiple skeletons line up along a corridor and you need to hit several targets quickly. In tight spaces, switch to your shield and use hit-and-run tactics rather than staying in one place while arrows rain in. Keeping a dedicated secondary weapon ready helps you transition smoothly from ranged to melee as soon as you close the gap. Remember to reload and reposition after each volley to avoid getting overwhelmed.
Close-Quarters Strategies: Ring, Side-step, and Poke
When forced into close combat, your best move is to circle the skeleton while maintaining shield coverage, then deliver a decisive strike and disengage to reset. Side-stepping makes it harder for the skeleton to predict your next move, and ringing the enemy (approaching from their flank) reduces the chance of a direct arrow hit. Use the shield to block, then counter with a quick melee hit. Don’t overcommit—escape routes and quick re-engagements are crucial if you’re running low on health or endurance.
Environmental Hazards to Avoid
Be mindful of water, lava, and fall hazards when engaging skeletons. Arrows can knock you into traps or out of position, so plan your path with safe ground and escape options. Do not chase a skeleton into a chasm or a lava pool; instead, back off to a safer section and re-evaluate your approach. Keep your space well-lit and use terrain to your advantage so you’re not exposed to multiple shots at once. These precautions reduce risk and create predictable fight patterns you can repeat.
Practical Loadouts for Different Difficulties
If you’re playing on easy or normal modes, your priority is safety: armor, shield, and a reliable melee weapon are your core kit, with a bow for optional ranged harass. On hard mode, you’ll want stronger armor, a fast bow or crossbow, and a backup water bucket to create space. Always carry extra torches to maintain light levels as you explore. Build a simple habit: when you hear an arrow nock, step back, shield up, and assess the route before advancing.
Training Drills and Practice Runs
Practice with a single skeleton in a controlled space, then add one more to simulate a patrol. Focus on timing blocks, closing distance, and using the terrain to your advantage. Increase the pace gradually, and practice both shield-first and bow-first strategies. Repetition builds muscle memory for the exact moments you need to block, sidestep, and strike without overexposing yourself. Craft Guide’s drills emphasize consistency and quick decision-making under pressure.
Craft Guide's Final Tips and Real-World Lessons
The Craft Guide team emphasizes staying calm, using lighting to minimize spawns, and mastering shield-based engagements as the foundation for all skeleton encounters. Real-world play often hinges on careful pacing and route planning—don’t rush a fight when you can retreat and reattack. The core lesson is simple: control the space, respect the archer’s range, and adapt your gear and tactics to the environment. By practicing these strategies, you’ll reliably prevail against skeletons in caves, fortresses, and during night adventures.
Tools & Materials
- Shield(Block arrows and time your parries; use as your primary defense.)
- Iron Sword(Finish off skeletons after arrows are blocked.)
- Bow(Engage from a safe distance; carry a quiver with 32+ arrows.)
- Arrows(Stock enough arrows for multiple engagements.)
- Torches(Light areas to prevent spawns and reveal skeletons earlier.)
- Armor (Iron or better)(Reduces incoming damage from arrows.)
- Water Bucket(Create space or slow mobs when retreating.)
- Cobblestone/Blocks(Build barriers or create elevation for advantage.)
Steps
Estimated time: 15-25 minutes
- 1
Assess the threat and position
Scan the area for the skeleton’s line of sight and any supporting mobs. Identify escape routes and high ground before initiating engagement. Decide whether you can push into melee safely or should maintain distance and regroup.
Tip: Plan your approach path to avoid being cornered or flanked. - 2
Raise your shield and prepare to parry
Get your shield up as the skeleton begins aiming. Time your shield block to absorb the arrow volley, then be ready to step aside to reset distance. Don’t overshoot; patience preserves stamina for the next phase.
Tip: Keep your shield angled to deflect arrows toward the outside of your stance. - 3
Close the gap with safe, controlled movement
When arrows subside, move diagonally toward the skeleton to minimize predictable lines of fire. Use corners or pillars to break line of sight while you close distance.
Tip: Stutter-step to misalign the archer’s aim. - 4
Land a decisive melee strike
Aim for a clean hit when you’re in melee range, then back away to shield again. Reopen your path while the skeleton cools its aim, repeating the sequence as needed.
Tip: Don’t chase after a single hit; preserve your health by disengaging when necessary. - 5
Create space with light and terrain
Place torches to brighten the area and prevent new skeletal spawns. Use terrain features to limit how many skeletons can shoot you at once.
Tip: Lighting reduces pressure and makes navigation safer. - 6
Finish the skeleton and retreat if needed
If health is low, disengage and retreat to a known safe area to recover before re-engaging. Don’t stay in a straight line of fire. If the skeleton is alone, finish quickly then move to a safer exit.
Tip: Always have a retreat plan before attempting a big strike. - 7
Loot drops and prepare for next encounter
Collect bones and arrows after the kill and replenish your gear and torches before continuing. Plan your route to avoid repeating the same risky fights.
Tip: Conserve resources for upcoming areas with higher danger.
People Also Ask
What is the best weapon against skeletons?
A bow allows you to keep distance, but a shield plus a melee weapon is essential for closing the gap safely. Use range to thin the ranks, then finish with a sword when within reach.
Bow lets you stay safe from arrows, then switch to melee when you’re close.
Do skeletons burn in daylight?
Yes, skeletons catch fire in daylight, which you can use to your advantage by fighting them outdoors during the day or leading them into sunlit areas.
Skeletons burn in daylight; try to lure them into open sun to gain an advantage.
Can skeletons shoot through walls?
Skeleton arrows travel in a straight line and can fire through gaps if there’s line of sight. Use solid blocks to block their shots and create safer routes.
They can shoot through gaps if they have a line of sight, so seal routes.
How can I avoid multiple skeletons at once?
Keep to well-lit paths and approach one skeleton at a time. Use terrain to split groups and retreat to safer ground if overwhelmed.
Light up the area, then approach slowly to avoid getting swarmed.
What do skeletons drop when defeated?
Skeletons typically drop bones and sometimes arrows, which you can use for bone meal or ammo.
They drop bones and sometimes arrows.
Are there fortress-specific tactics for skeletons?
In fortresses, skeletons often guard long corridors; use pillars for cover, time shots between patrols, and avoid open sections where volleys can hit you from multiple angles.
In fortresses, stick to cover and time your engagements to avoid volleys.
Watch Video
The Essentials
- Engage skeletons with shield-first, then melee when safe
- Light areas to suppress spawn and reveal threats
- Maintain mobility; dodging and repositioning beats straight-on headshots
- Use terrain to gain elevation or cover before striking
- Carry enough torches, arrows, and a reliable weapon for sustained fights