Using a Game Controller with Minecraft Java Edition: A Practical Guide
Explore using a game controller with Minecraft Java Edition, covering setup options, mapping tools, and practical tips for smooth, responsive input across PC and Mac.

Yes—Minecraft Java supports controllers, but you’ll need mapping software or a mod. Expect variation by OS and version. See our detailed setup guide for reliable button mappings.
Understanding Controller Support in Minecraft Java Edition
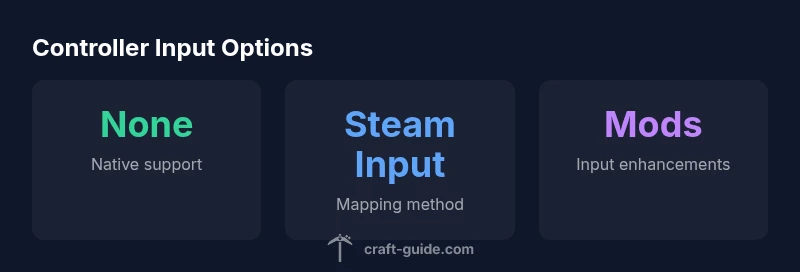
Controller input in Minecraft Java Edition is not officially supported by Mojang, which means there is no built-in, universal mapping for buttons and sticks within the vanilla game. However, players can use a controller by leveraging mapping software, operating system features, or community-driven approaches. The Craft Guide team notes that the practical reality is: with the right hardware and setup, a controller can be a viable input device for exploration, building, and combat in Minecraft Java. This section explains what you can expect and how to plan your setup. The core idea is to separate native support from supported workflows: native support means no extra tools; mapping workflows rely on external software to translate controller input into keyboard and mouse signals.
First, identify your controller type (Xbox, PlayStation, or generic USB) and your platform (Windows, macOS, Linux). Some controllers are recognized immediately by the OS, while others require additional drivers. The difference between console-style controllers and PC controllers matters because button layouts respond differently, and camera controls may map to different axes. For many players, Steam Input offers a robust bridge by exposing a common set of mappings that Minecraft can interpret as keyboard and mouse input. In practice, you should plan to test multiple configurations to avoid input lag and drift. The goal is to create a consistent in-game feel that matches your play style, whether you're building intricate redstone machines or exploring biomes.
Native vs Mapping: What Works Best
In the absence of official native support, most players rely on mapping layers to convert controller actions into keyboard and mouse signals. This approach has advantages: it preserves the familiar controller ergonomics while enabling precise movement and camera control. The main drawback is calibration: button mappings can drift, triggers may require long presses, and some keys may overlap with in-game actions like sprint, interact, or inventory. If you are playing on Windows, Steam Input is a popular starting point because it can emulate keyboard/mouse inputs across a wide range of controllers without modifying Minecraft's code. On macOS and Linux, options exist but can be less polished; you may need extra tools or manual configuration. For a clean experience, you should pick a mapping method early and stick to it so you don’t confuse muscle memory across different setups.
How to Get Started: Quick Setup Guide
To get a controller working in Minecraft Java Edition, you’ll typically follow these steps:
- Connect your controller to the PC or Mac.
- Choose a mapping route: Steam Input is a widely supported option; other tools like AntiMicro or platform-specific utilities can work too.
- Configure the mapping so the controller buttons emit keyboard/mouse signals (WASD for movement, mouse for view, and actions bound to common keys).
- Open Minecraft and go to Controls to verify and adjust bindings as needed (e.g., Jump, Sneak, Use, Inventory).
- Test in a safe area; adjust dead zones, stick sensitivity, and button mappings for comfort and accuracy.
- Consider accessibility options such as controller profiles or smaller dead zones if you play for long sessions.
Mod-based Controller Support: Pros and Cons
Beyond mapping tools, some players turn to mods that extend input options or improve compatibility with controllers. On Forge or Fabric-based setups, you may find mods that enhance input handling or unify control schemes. The advantage is deeper integration and fewer keystrokes to achieve actions. The drawback is version dependency: mods must match your Minecraft version and your mod loader (Forge or Fabric). Always back up worlds before adding mods and verify that the mod is actively maintained and compatible with your setup.
Common Pitfalls and How to Fix Them
A frequent issue is input lag and drift, often caused by aggressive dead zones or misconfigured mappings. Start with modest dead zones (e.g., 10–20%) and gradually dial them in. Another common problem is inconsistent camera control; ensure that the right axis (look) is mapped to your mouse movement, not a conflicting button. On some systems, certain controllers may be recognized as multiple devices; disable any duplicate mappings in Steam or your OS utility. If you run into issues after a game update, revisit your mapping profile and rebind as needed to align with the new key layout.
Quick Setup Checklist for a Smooth Experience
- Confirm your controller is recognized by the OS and by Steam (if using Steam Input).
- Pick one mapping method and stick with it for consistency.
- Map movement to WASD and camera to the mouse, with commonly used actions bound to easy-access buttons.
- Adjust dead zones and sensitivity for comfort and accuracy.
- Test in-game in safe environments before venturing into survival or creative builds.
Platform-Specific Tips and Final Recommendations
Windows users often report the most seamless experiences when using Steam Input, given its broad controller support and ease of configuration. macOS users may need additional tools or manual configurations, while Linux users should expect similar but sometimes patchier support depending on the distribution. The bottom line is that controller input in Minecraft Java works best when you commit to a single, well-tuned setup and stay aware of version changes. The Craft Guide team recommends starting with Steam Input and a clean, consistent mapping scheme to minimize surprises during long sessions.
Controller input methods for Minecraft Java Edition
| Method | Native Support | Setup Notes |
|---|---|---|
| Native gamepad support (official) | none official | No built-in controller support; rely on mapping tools |
| Steam Input mapping | partial | Map buttons to keyboard/mouse via Steam's config |
| Third-party mappers (AntiMicro, etc.) | partial | Custom keybinds; OS-specific tweaks may be needed |
| Mods for input (Forge/Fabric) | partial | Install compatible mods; version alignment required |
People Also Ask
Is there official controller support in Minecraft Java Edition?
No, there is no built-in official controller support in Minecraft Java Edition. Players rely on mapping tools or mods to translate controller input into keyboard and mouse signals.
There isn’t official controller support; you’ll use mapping tools or mods to get controller input working.
Can I use an Xbox or PlayStation controller on PC for Minecraft Java?
Yes, you can, usually by using mapping software like Steam Input or a third-party mapper. Behavior may vary by OS and Minecraft version.
Yes—usually through mapping software that translates controller input to keyboard/mouse signals.
Do I need mods to use a controller?
Not strictly. For many players, mapping software suffices. Mods can offer tighter integration but require version compatibility.
Usually you don’t need mods, but they can help with deeper integration.
Which tools are best for mapping controllers?
Steam Input is widely used and well-supported. Other options include AntiMicro and platform-specific utilities; choose one and stay consistent.
Steam Input is a great starting point, with alternatives if you need something lighter.
Will controller support improve in future updates?
There are no official announcements about native controller support; improvements are likely to come from community tooling and mods as game updates occur.
There’s no official plan announced yet; expect community-driven improvements.
“Controller support in Minecraft Java Edition isn’t official, but a stable mapping workflow unlocks comfortable play without sacrificing control precision.”
The Essentials
- Start with mapping tools, not mods, for most setups
- Pick one consistent mapping method and stick to it
- Calibrate dead zones and sensitivity for comfort
- Expect platform and version variability; test after updates
- The Craft Guide team recommends practice with a single setup to reduce fatigue