How Minecraft Sounds Are Made: A Practical Guide
Explore how Minecraft sounds are made, from field recording to synthesis and in-game implementation. A practical, step-by-step guide by Craft Guide that reveals the workflow behind every ambient, mob, and UI sound.

In this guide you’ll learn how minecraft sounds are made by blending field recordings, Foley, and synthesized textures with in-game implementation. The workflow covers capturing real textures, shaping timbres in a DAW, layering for depth, and adapting sounds for mobs, blocks, and UI. Crafted by the Craft Guide team to demystify game audio.
The Philosophy of Minecraft Sound Design
In the world of Minecraft, sound design blends realism with whimsy to create an immersive yet approachable audio experience. According to Craft Guide, the craft hinges on a pragmatic balance: capture authentic textures where possible, then simplify, stylize, and layer to fit the game's iconic aesthetic. The question how minecraft sounds are made captures the core idea: real-world textures are transformed through Foley, field recordings, and smart synthesis to serve gameplay. Craft Guide's approach emphasizes economy and consistency, so every sound feels cohesive with the blocky world. From ambient forest hush to the impact of a wooden pick, every audio event follows the same guiding principles: clarity at small frequencies, predictable behavior under dynamic changes, and a stress on responsive feedback. By understanding these fundamentals, players can appreciate why Minecraft sounds read as both alive and approachable, even when the studio techniques are complex. According to Craft Guide, the sound design process also prioritizes accessibility and readability across devices and platforms.
Core Sound Categories in Minecraft
Minecraft’s soundscape is organized into categories that map to in-game contexts: ambient textures, environmental effects, mob vocalizations, block interactions, and user interface cues. This organization helps designers reuse core timbres with context-specific variations, ensuring consistency while allowing for creative expansion. How minecraft sounds are made hinges on flexible layering: a single base tone can become a rain shower, a cavern hum, or a menu click with only minor edits. The Craft Guide team emphasizes that each category has a distinct dynamic range, spatial footprint, and frequency emphasis. Understanding these distinctions makes it easier to plan and communicate sound design goals with developers and players alike. Throughout the process, the focus remains on clarity, legibility, and emotional resonance that matches Minecraft’s playful yet textured world.
Field Recording and Foley: Capturing Realistic Elements
A core pillar of Minecraft sound design is combining field recordings with Foley to capture authentic textures. In practice, designers visit natural environments or constructed spaces to record textures like wind through leaves, water ripples, or stone surfaces. Foley work then adds precise contact sounds—the scrape of a tool on stone, the thump of a block being placed, or the soft sigh of a doorway. These raw materials are then cleaned, analyzed, and cataloged so they can be retrieved quickly during production. The Craft Guide approach stresses documenting capture conditions, such as mic placement and environmental noise, to preserve intended character. After capture, these textures are sculpted in a DAW, transformed with EQ and compression, and prepared for layering with synthetic elements to fit Minecraft’s aesthetic and performance requirements. Research into acoustics and sound perception informs decisions about which frequencies to emphasize for clarity on small speakers and headphones.
Synthesis and Procedural Techniques: Creating Unique Sounds
Beyond field recordings, Minecraft sound design relies heavily on synthesis and procedural audio techniques to create new textures. Subtractive, granular, and FM synthesis offer a palette of timbres that can be adapted to different blocks, mobs, and UI interactions. Procedural methods allow designers to generate variations programmatically, so a single sound can morph over time or respond to in-game variables like motion or scale. This approach reduces library bloat while increasing replay value. The Craft Guide team emphasizes maintaining a coherent sonic vocabulary across all sources, so synthetic sounds feel like they belong to the same universe as field-recorded textures. Integration with game engines often uses parameterized controls—pitch, rate, amplitude, and filter cutoffs—that respond to player actions and environmental changes without sounding mechanical.
Layering and Spatialization: Building Depth
Depth in Minecraft sounds comes from deliberate layering and spatial placement. A typical layering strategy includes a base texture, a mid-layer to define body and form, and a top layer for air, sparkle, or percussive bite. Spatialization uses panning, early reflections, and reverb choices calibrated for the game’s scale and performance. This layering approach creates a sense of distance and environment without overwhelming the core audio cues players rely on for gameplay. The Craft Guide methodology emphasizes testing each layer in isolation and in combination, ensuring that no single element masks important feedback like footsteps or tool sounds. Consistency across biomes and lighting conditions helps preserve the experience as players explore diverse environments.
In-Game Implementation: Triggers, Mobs, and UI
Implementation is where design meets engineering. Sounds are mapped to specific triggers—block placement, entity interactions, and UI events—so they play at the right moment and volume. Designers use randomized pitch variation, subtle volume envelopes, and occasional time-stretching to avoid repetitiveness while keeping sounds recognizable. Memory and CPU constraints mean assets are optimized for streaming and streaming-friendly formats, and fallback strategies ensure audio remains coherent on lower-end devices. Craft Guide notes that collaboration with developers is essential to align audio events with game states, such as combat, exploration, or crafting, ensuring that the audio responds smoothly to player actions and environmental changes. This interoperability is what makes Minecraft’s soundscape feel alive without becoming distracting.
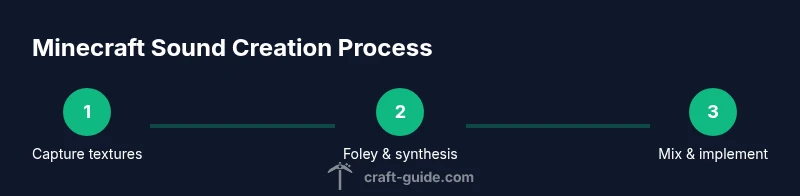
The Workflow: From Idea to In-Game Audio
The end-to-end workflow starts with a clear sound design goal, followed by capture, manipulation, and asset creation. Once sounds are created, they are cataloged and tagged by context (biome, entity, action) so a game designer or modder can quickly locate the right asset. The next steps involve integrating audio into the engine, setting up routing for multiple channels (world, item, UI), and testing across scenarios to ensure consistency. A strong pipeline includes version control, documentation, and iterative reviews with gameplay teams. The Craft Guide team recommends keeping a living document of decisions for future updates and mod packs, so new sounds can be added without breaking the established sonic identity. The process culminates in in-game tests and player feedback, which informs further refinements and enhancements.
Mixing, Mastering, and Performance Considerations
Mixing for a game differs from music production. Game audio requires careful level balancing to preserve clarity during busy moments and to ensure that dialogue or UI cues never get buried. Techniques such as bus processing, dynamic range management, and sample rate considerations help maintain consistency across devices. Mastering for games emphasizes preserving transient detail while avoiding clipping or excessive loudness, ensuring sounds remain audible in noisy environments or on muted speakers. The Craft Guide approach stresses modular mix templates that can be reused across categories, allowing quick iteration without sacrificing quality. Finally, performance considerations—like reducing redundant layers and optimizing file sizes—keep Minecraft running smoothly across platforms.
Practical Mini-Project: Build a Simple Sound Set
To apply what you’ve learned, start by defining a small sound set—for example, an ambient forest suite that includes wind, leaves, distant animal calls, and a subtle footsteps loop. Capture or source textures, then create a base texture night variant and a top-layer sparkle. Layer the materials in your DAW, apply gentle EQ to carve space for each element, and program a few simple in-game triggers (movement, biome change, and interaction). Finally, export optimized assets and draft a short testing plan that covers desktop, mobile, and console experiences. By composing and testing a compact set, you reinforce the workflow and gain practical confidence before expanding to a full Minecraft sound library.
Tools & Materials
- Digital Audio Workstation (DAW)(Supports multi-track recording and non-destructive editing)
- Field recording setup(Portable recorder with stereo mics; 48kHz/24-bit)
- Quality headphones(Flat response preferred for accurate mixing)
- Audio interface(Low-latency monitoring)
- Sample libraries and instrument plugins(Licensed or free options; organized catalog)
- MIDI controller(Helpful for expressive design)
- Spectral analysis and effects plugins(EQ, compression, reverb, and modulation tools)
Steps
Estimated time: 2-4 hours
- 1
Define sound goals
Identify the mood, context, and gameplay cues the sound should support. Outline target emotions, biome contexts, and interaction types to guide all subsequent decisions.
Tip: Document goals in a shared brief that team members can reference during production. - 2
Capture textures
Record field textures and Foley elements that approximate the desired textures. Label by context (ambient, impact, interaction) for quick retrieval.
Tip: Label metadata (biome, action, severity) to speed future searches. - 3
Create base and variants
In your DAW, create a base texture and several variants by changing pitch, formant, or envelope. Store them as a family for consistency.
Tip: Keep a versioned library to track iterations. - 4
Synthesize or process textures
Apply subtractive, granular, or FM synthesis to generate complementary textures. Use small, tasteful edits to avoid sonic fatigue.
Tip: Use subtle randomization to introduce variation without breaking recognition. - 5
Layer and balance
Combine base textures with mid and top layers. Balance levels so that important cues (footsteps, tool hits) remain clear.
Tip: Use solo/mute checks across biomes to ensure consistency. - 6
Implement in-game
Map assets to triggers (movement, UI actions) and tune pitch and volume parameters for responsive feedback.
Tip: Test in a live build to ensure timing aligns with gameplay.
People Also Ask
What is the basic process behind Minecraft sound design?
The process starts with defining sound goals, then capturing textures, creating base and variant tones, applying synthesis, layering, and finally implementing in-game triggers. Iterative testing ensures sounds support gameplay without becoming repetitive.
We start with a plan, capture textures, and then build and test sounds to fit gameplay.
Do Minecraft sounds come from field recordings?
Field recordings provide authentic textures, but most in-game sounds also rely on Foley and synthetic elements. This mix creates the distinctive Minecraft audio palette while keeping production efficient.
Yes, field recordings plus Foley and synthesis build the sounds.
How do developers ensure sounds scale across different devices?
Assets are optimized for memory and CPU, with scalable mixing and procedural variations. In-game routing and conditional processing help maintain consistency across platforms.
Asset optimization and adaptive mixing keep sounds consistent on all devices.
What tools are commonly used for Minecraft sound design?
A digital audio workstation, audio interface, field recorders, and plugins for EQ, compression, and reverb are standard. Game integration often uses audio middleware and in-engine triggers.
DAWs, interfaces, field recorders, and plugins plus game integration tools.
Can players create their own Minecraft sounds?
Yes, modding and texture packs can modify sounds within the game’s constraints. Community-made libraries expand the sonic vocabulary while preserving compatibility.
Absolutely—mods and texture packs let you tailor sounds.
Where can I learn more about game audio?
Study resources from major publications and university programs on sound design and psychoacoustics. They provide foundational concepts that apply to game audio as a craft.
Look to university and industry sources for deeper theory.
Watch Video
The Essentials
- Define sound goals before recording.
- Capture authentic textures with field and Foley.
- Layer textures for depth and clarity.
- Balance and optimize for game performance.
- Iterate with in-game testing and feedback.