Minecraft To Do List: A Practical Step-by-Step Guide
Learn how to build an effective Minecraft to-do list to stay organized across builds, exploration, and survival goals. This guide provides templates, examples, and tips for all playstyles, helping you plan, track, and optimize your sessions.

Goal: Create a practical Minecraft to-do list to manage builds, mining runs, and survival goals. Decide on a format, set categories, assign priorities, and estimate time for each task. This quick guide shows the steps and ready-to-use templates you can copy into your notes or a digital tool.
Why a Minecraft to-do list boosts your world-building
According to Craft Guide, a well-structured to-do list can transform how you plan and execute complex projects in Minecraft. By outlining goals, breaking them into actionable tasks, and assigning time estimates, players gain clarity and momentum. A list helps both new players learning mechanics and seasoned builders coordinating large projects across creative or survival modes. You’ll reduce decision fatigue, maintain a steady build pace, and balance resource gathering with exploration. Beyond mere tasks, a good to-do system becomes a communication tool for teams on shared servers and map projects. In short, a thoughtful Minecraft to-do list turns scattered ideas into organized steps, increasing your creative throughput and satisfaction with each session.
How to structure your list: categories and priorities
Start with broad categories that reflect your play style: Build, Explore, Survive, Redstone, and Resource Management. Under each category, create concrete tasks like 'Gather oak logs for a cabin,' 'Chart a cave system,' or 'Test a piston door.' Prioritize tasks by impact and urgency using simple labels like High, Medium, and Low. Time-box tasks to prevent perfectionist drift; a 20-minute limit can help you avoid endless tweaking. Include sub-tasks for complex projects (e.g., a small village requires housing, farms, and lighting). A well-structured category system reduces cognitive load and keeps you focused on meaningful outcomes rather than wandering aimlessly through the world.
Step-by-step guide to create your list
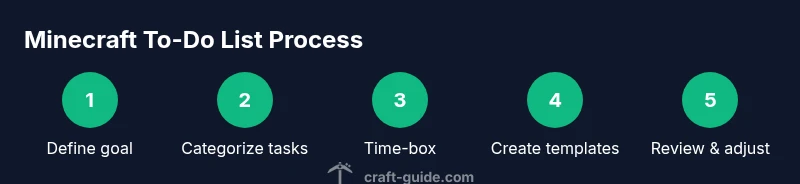
- Define your goals for the current session or project, specifying a clear end-state (e.g., 'complete a compact redstone door'). 2) Choose your preferred format (notebook, digital doc, or project board) and keep it accessible. 3) Create task categories that reflect your playstyle. 4) Draft actionable tasks with verbs and measurable outcomes. 5) Prioritize tasks by impact and urgency, using a simple scale. 6) Time-box each task and add rough estimates (e.g., 15-30 minutes). 7) Create reusable templates for different projects or worlds. 8) Review and adjust the list after each session. 9) Save, back up, and, if possible, share with teammates for collaboration.
Templates and examples for different playstyles
Daily build sprint template:
- Goal: Build a 5x5 stone brick storage hall
- High: Gather materials (stone bricks, chiseled accents)
- Medium: Design login and lighting plan
- Low: Decorative touches (plants, banners)
Weekly exploration template:
- Goal: Map a 1k x 1k area with terrain features
- High: Find water sources and ores
- Medium: Mark biomes with signs
- Low: Create a travel log in your journal
Long-term survival template:
- Goal: Establish a self-sufficient base
- High: Set up farms and renewable energy sources
- Medium: Build storage network
- Low: Expand to a secure perimeter
Templates for modular planning: daily, weekly, and long-term
Develop a foldable template you can copy for any world:
- Section A: Objective for the session
- Section B: Categories with 3-5 tasks each
- Section C: Priority tags and time estimates
- Section D: Notes and resource gaps
For servers or modded worlds, add a section for mod interactions, plugin goals, or map seeds to ensure compatibility and progress tracking across multiple players.
Integrating your list with builds, maps, and seeds
Link tasks to concrete in-game signals. For example, tie 'construct a staircase' to a seed’s terrain constraints. Record coordinates and biome data in your task notes for quick navigation. When working with maps or seeds, create seed-specific tasks like 'scan for ravines near spawn' and attach it to that world’s entry. This tight coupling between tasks and the world context keeps your to-do list relevant as you explore, mine, and build.
Tools and templates you can use (digital and printable)
Digital options: Notion, Trello, Google Docs, or simple Markdown files—these let you copy templates and update progress on the fly. Printable templates work well for desk planning and group sessions; print a one-page checklist and mark completed items with a checkmark or stamp. Whichever format you choose, keep a single source of truth to avoid conflicting lists across devices or teammates.
Common pitfalls and how to avoid them
Avoid scope creep by defining a fixed project horizon and limiting active tasks to a manageable number (e.g., 8-12). Don’t rely on vague goals like 'do more in Minecraft'—make them concrete and measurable. Regularly prune completed tasks and reassess priorities after each session to prevent stagnation. Finally, back up your list to prevent data loss and maintain continuity across play sessions.
Tools & Materials
- Notebook or digital note app(Use a system you naturally trust (physical notebook or digital tool like Notion, Evernote, or a simple text document).)
- Pen or stylus(Essential for quick in-session updates; opt for a erasable notebook or a tablet with a stylus.)
- Template sheets or digital templates(Have a ready-to-copy template for daily, weekly, and long-term lists.)
- Timer or clock(Helpful for time-boxing sessions and keeping you on track.)
Steps
Estimated time: 45-60 minutes
- 1
Define your goals
Identify what you want to accomplish in the current session or project and state a clear end-state. This anchors all tasks to a real outcome rather than wandering aimlessly.
Tip: Write a specific outcome, e.g., 'Finish a compact redstone door.' - 2
Choose your format
Decide whether you’ll use a notebook, a digital list, or a project board. Pick something you’ll consistently check and update after each session.
Tip: Keep the format simple and accessible during play. - 3
Create task categories
Group tasks under Build, Explore, Survival, Redstone, and Resource Management. Categories help you scan quickly and pick tasks that fit your current plan.
Tip: Limit categories to avoid fragmentation. - 4
Draft actionable tasks
Write tasks as concrete, observable actions with verbs and outcomes (e.g., 'craft 20 oak planks' or 'chart nearby caves').
Tip: Use verbs and measurable outcomes to enable progress tracking. - 5
Prioritize by impact and urgency
Label tasks as High, Medium, or Low to reflect importance and timing. Focus on High-impact work first.
Tip: A MoSCoW-like approach helps you stay focused. - 6
Time-box tasks
Assign rough time estimates for each task, and use a timer to stay within those bounds during sessions.
Tip: Time-boxing prevents endless tweaking and helps you finish tasks. - 7
Create reusable templates
Develop templates you can reuse for different projects or maps. This saves setup time and standardizes progress-tracking.
Tip: Copy and adapt templates rather than reinventing from scratch. - 8
Review and adjust
After each session, review what was done, adjust priorities, and capture lessons learned for future sessions.
Tip: Regular reviews keep the list aligned with your evolving goals. - 9
Save and share
Back up the list and share with teammates if you’re on a server or map project to coordinate actions.
Tip: Clear ownership and visibility reduce miscommunication.
People Also Ask
What is a Minecraft to-do list?
A Minecraft to-do list is a structured plan that outlines specific tasks organized by category, priority, and time. It helps players stay focused on meaningful goals during builds, exploration, and survival, turning ideas into actionable steps.
A Minecraft to-do list is a structured plan with tasks grouped by category and priority to keep sessions focused.
How do I start if I have no templates?
Begin with a simple template: three categories (Build, Explore, Survival), three priority levels (High, Medium, Low), and a few starter tasks. Copy this template each time you begin a new world or project and adapt as needed.
Start with a simple Build, Explore, and Survival template with three priority levels and adapt as you go.
Should I use physical or digital lists?
Both work well; choose what you’ll update consistently. Physical lists are great for in-person sessions, while digital tools offer easy templates, searchability, and sharing with teammates.
Use whichever format you’ll update regularly—physical for in-person sessions, digital for easy editing and sharing.
How do I migrate tasks between sessions?
Move or copy unfinished tasks to the next session’s list. Re-evaluate priorities and adjust time estimates to reflect progress and new in-game goals.
When a task isn’t finished, move it to the next session and re-prioritize.
Can I share my list with others on a server?
Yes. Share a collaborative list via a shared document or project board, assign owners for tasks, and keep notes for cross-player coordination.
Absolutely—use a shared list to coordinate tasks with teammates on a server.
How often should I update the list?
Update after each play session or at least once per day if you’re heavily engaged. Regular updates keep tasks relevant and prevent drift.
Update after every session to keep things current.
Watch Video
The Essentials
- Define clear goals for each session.
- Prioritize tasks by impact and urgency.
- Time-box tasks to stay on schedule.
- Review and adjust regularly for continuous improvement.