Minecraft to 3D Model: Practical Conversion Guide
Convert Minecraft models into export-ready 3D assets for Blender, Unity, and more. Learn source selection, import, UV mapping, texturing, and final export formats with this practical Craft Guide tutorial.

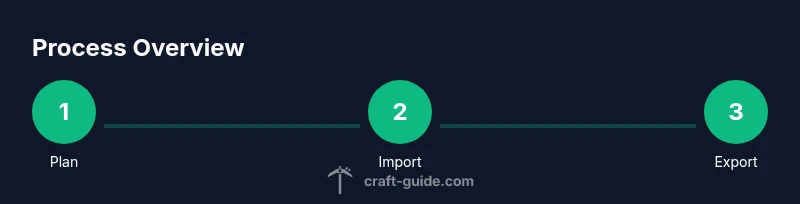
You will learn how to convert a Minecraft model into a clean, export-ready 3D model for use in Blender, Maya, Unity, or other engines. The process covers choosing a source model, importing it into a 3D package, creating a proper UV map, retopology or smoothing, texturing, and exporting to OBJ, FBX, or GLTF. Planning and consistency are key.
Overview: From Minecraft blocks to a flexible 3D asset
In this workflow, you start with a Minecraft model source and end with a fully textured 3D asset that can be used in Blender, Maya, Unity, or other engines. Minecraft models are largely voxel-based, with block textures mapped to a discrete grid. Translating that look into smooth 3D geometry requires decisions about scale, topology, and texture handling. According to Craft Guide, a thoughtful approach helps you avoid common texture seams and scale mismatches by planning early and keeping models modular. This section explores the essence of the conversion: you’ll preserve recognizable block silhouettes while enabling smoother shading and flexible texturing in a modern 3D pipeline.
- Understand the difference between voxel aesthetics and polygonal surfaces.
- Plan a consistent unit system so models align in your target engine.
- Decide on a target format (OBJ, FBX, or GLTF) before you start.
By the end of this section you should have a mental map of the typical workflow and the tradeoffs involved in translating Minecraft’s iconic blocks into a full 3D model.
Planning your conversion: scale, format, and goals
A successful minecraft to 3d model project starts with a clear plan. Decide which blocks you will convert, what level of detail is appropriate for your engine, and how textures will transfer. If you are targeting a game engine with PBR shading, plan texture sets (albedo, normal, roughness) and how they will map to the block textures. Craft Guide analysis suggests documenting your pipeline early: list each stage, the tools you’ll use, and the export formats you’ll support. When in doubt, build a small test scene first to validate scale and texture fidelity.
- Define a minimal viable model: a single block or a small build.
- Choose a single export target to test compatibility first.
- Prepare a simple texture atlas to streamline UVs later.
Tools you might use: software and file types
Choosing the right software is crucial for a smooth workflow. Blender is a popular free option, while Maya or 3ds Max are common in professional studios. For file formats, OBJ, FBX, and GLTF are widely supported by engines like Unity and Unreal. Some pipelines also rely on GLB for compact textures. The Craft Guide team recommends starting with Blender for beginners due to its robust UV tools and active community. Keep a consistent file naming scheme and organize your project folders to avoid confusion as scenes grow.
- Blender, Maya, or 3ds Max as your 3D app
- OBJ, FBX, or GLTF for export
- A texture atlas or separate texture files
- A naming convention that reflects block type and texture set
The anatomy of a Minecraft model: blocks, textures, and sprites
Minecraft models rely on blocks with flat textures laid over box-like geometry. When moving to a 3D studio, you must approximate the block shapes while enabling smooth shading. Textures from Minecraft’s atlas often need adjustments to avoid seams in UVs. This section helps you map voxel textures to UV coordinates effectively, ensuring that each block reads correctly in your target engine. You’ll also learn how to separate material IDs for easier texture management and how to keep texture resolution balanced across the entire model.
- Keep texture resolution consistent across blocks.
- Use a shared UV space for related textures when possible.
- Prepare separate material slots for different texture sets.
The goal is to retain the charm of Minecraft while giving your model enough fidelity to look great in modern renderers.
Importing into a 3D package: setup and initial alignment
Importing a Minecraft-like structure into Blender or Maya requires careful attention to units and scale. Set your scene units to match your engine’s expectations (meters or units), then align the model to a clean origin. If the source uses a voxel grid, you may want to enable snapping to maintain block alignment. After import, perform a quick check for overlapping faces, inverted normals, and duplicate vertices. A clean starting mesh makes UV mapping and texturing much easier later on.
- Set the correct unit scale at import.
- Apply a basic material to verify UVs visually.
- Enable snapping to a voxel grid to preserve alignment.
UV mapping and texture projection: getting clean textures
UV mapping is where Minecraft textures come to life in a 3D package. Start with a consistent UV layout, ensuring each block type maps to its corresponding texture region. If you’re using a texture atlas, consider automatic packing tools in your software to minimize wasted space. For pixel-art textures, you may want to reduce texture bleed by padding in the atlas. Texture projection can be used for larger builds to maintain consistent texture projection across multiple blocks or larger meshes.
- Use a consistent atlas with padding to avoid bleeding.
- Avoid stretching textures by maintaining uniform texels per unit.
- Check seams around edges and correct as needed.
Retopology and mesh optimization: balance detail with performance
Real-time engines benefit from optimized meshes. Retopology helps reduce polygon counts while preserving silhouette and important edges. This is especially important for large Minecraft builds that translate into dense scenes. You can also use baking to project intricate Minecraft textures onto a lighter geometry. The key is to maintain the recognizable block shapes while trimming unnecessary geometry that adds cost without visual gain.
- Target a reasonable polygon budget per block group.
- Bake textures to preserve detail on a simpler mesh.
- Use lods (levels of detail) for very large scenes.
A thoughtful approach keeps your model render-friendly without sacrificing the core Minecraft look.
Materials, textures, and PBR workflows: making it feel cinematic
Modern engines rely on physically based rendering for realistic lighting and materials. While Minecraft textures are pixel-based, you can map them into PBR materials by feeding albedo textures and appropriate normals. For stylized looks, you can stick with non-PBR materials but still apply proper UVs and consistent roughness. The texture workflow should align with the engine’s lighting model, so plan ahead which maps you’ll export and how they will be combined in the shader.
- Align textures with the engine’s PBR workflow if needed.
- Maintain consistent roughness and metallic values across blocks.
- Test lighting in your target engine early to catch issues.
The aim is a believable, cohesive look that honors the Minecraft aesthetic while leveraging modern rendering.
Export targets and engine integration: exporting with intent
Choosing the right export format is critical for a smooth pipeline. OBJ is simple and widely supported, FBX handles animations well, and GLTF/GLB is excellent for web and modern engines. Check your engine’s import guidelines and test a small scene first. Document baked textures, scale, and coordinate orientation so the model behaves predictably when loaded.
- Start with GLTF/GLB for modern engines.
- Use FBX for animation-capable pipelines.
- Verify scale and orientation in the target engine.
A well-chosen export path reduces rework and speeds up your integration process.
A practical end-to-end example: a single block to a full export
Let’s walk through a minimal, concrete example. Start with a single block texture and a basic cube mesh to validate the workflow. Import into Blender, map the texture to a UV layout, and apply a simple normal map. Bake the texture to a lighter mesh and export as GLTF. Import into Unity to verify the look, scale, and shading. Expand this workflow to build larger Minecraft structures, iterating on UVs and textures as needed.
- Validate each stage with a quick render.
- Keep a log of settings used at each export.
- Use a small test scene before committing to a full build.
Troubleshooting and best practices: avoid common pitfalls
Common issues include texture seams, inconsistent scale, and misaligned normals. Regularly run quick validation renders, keep references handy, and maintain a clean naming scheme for blocks and materials. Keep backups, and document any engine-specific quirks you encounter. Craft Guide emphasizes planning, testing, and iteration as the path to reliable results.
Final tips: keeping your workflow flexible and future-proof
Document every decision, from unit scales to texture padding. Use modular blocks so you can swap textures or adjust geometry without breaking the whole build. When possible, keep your textures in a shared folder and reuse material definitions across scenes. This approach minimizes errors and accelerates future projects.
Quick-start checklist for your first minecraft to 3d model project
- Define target engine and export format
- Gather a source model and textures
- Set unit scale and import settings
- Create UVs and apply textures
- Optimize mesh with retopo and baking
- Export and test in engine
- Iterate on texture and lighting tweaks
What to expect and what not to expect
Expect a learning curve as you translate voxel aesthetics to polygonal surfaces. You won’t achieve perfect pixel-for-pixel textures in every case, but you can preserve the charm with careful UVs and texture work. The goal is consistent results rather than photographic accuracy.
Tools & Materials
- 3D modeling software(Blender (free), Maya, or 3ds Max)
- Minecraft model source file(Exported or captured from a Minecraft world or model editor)
- Export formats(OBJ, FBX, or GLTF/GLB depending on target engine)
- Texture atlas or textures(Optional but recommended for unified UVs)
- Reference images(Useful for color accuracy and texture alignment)
Steps
Estimated time: 3-5 hours
- 1
Define target engine and export format
Decide where the model will be used and choose OBJ, FBX, or GLTF as the primary export format. This will influence how you handle textures, units, and materials throughout the workflow.
Tip: Write down the target engine and export format before starting to avoid mid-project changes. - 2
Prepare source model and goals
Gather the Minecraft source blocks you want to convert and determine the level of detail. Create a minor test scene to validate scale and texture mapping before committing to a full build.
Tip: Start small with a 2-3 block segment to validate the pipeline. - 3
Set up units and scale in the 3D app
Configure the scene to match your engine’s unit system (meters or unit space). Ensure consistency across all assets to avoid later misalignment.
Tip: Enable snapping to a grid that matches your voxel size to keep geometry aligned. - 4
Import the Minecraft model
Import the model into Blender or your chosen tool. Check for orientation, duplicate vertices, and normals. Clean up any import artifacts.
Tip: Reset the transform after import to avoid hidden scale issues. - 5
Organize materials and textures
Create material slots corresponding to each texture region. Keep a consistent naming scheme, and link textures to the appropriate materials.
Tip: Group related blocks under a shared material where appropriate to simplify edits. - 6
Unwrap UVs for texture accuracy
Map UVs so that each block texture reads cleanly in the 3D view. If using a texture atlas, optimize for minimal seams and efficient packing.
Tip: Use pixel-perfect UVs for stylized Minecraft textures to maintain crisp edges. - 7
Retopologize for performance
If the voxel-to-mesh results in dense geometry, perform a light retopology to reduce polygons while preserving silhouette. Bake details as textures where needed.
Tip: Target a practical polygon budget per block region for real-time use. - 8
Texture baking and shading
Bake essential textures (normal, ambient occlusion, and emissive maps if needed) to keep shading consistent across the model. Verify textures in the viewport before exporting.
Tip: Bake at the final resolution you plan to use in the engine. - 9
Test export and import in the target engine
Export the model and import it into the target engine to verify scale, textures, and lighting. Adjust as needed based on render results.
Tip: Test with a simple scene with lighting similar to production to spot issues early. - 10
Iterate on feedback and refine
Gather feedback from previews and refine UVs, textures, and lighting. Small iterations often lead to bigger improvements.
Tip: Keep a changelog of adjustments for future projects. - 11
Document settings for future projects
Record your pipeline choices, export settings, and naming conventions. This documentation speeds up repeat projects and helps new team members.
Tip: Create a reusable project template with saved materials and textures. - 12
Final review and backup
Do a final pass on geometry, textures, and imports. Create backups of the final assets and store them in a versioned archive.
Tip: Always keep at least one backup offline in addition to cloud storage.
People Also Ask
Can I convert every Minecraft block to a high-detail 3D model?
You can convert most blocks, but some will require simplification for performance. The goal is to preserve recognizable shapes while keeping the mesh efficient for real-time rendering.
Most blocks can be converted, but expect some optimization to keep performance up in real-time engines.
What software is best for beginners?
Blender is highly recommended for beginners due to its robust tools and active community. It supports OBJ, FBX, and GLTF exports suitable for most engines.
Blender is a great starting point; it handles common exports and has plenty of learning resources.
Do I need to own the Minecraft textures?
Textures used should be owned or licensed for reuse. If you are using texture packs, check their license terms before applying them to your model.
Make sure you have the rights to use textures before using them in your model.
Which export format is best for Unity?
GLTF/GLB is often preferred for Unity due to its efficient runtime loading, good material support, and wide compatibility.
GLTF is a solid choice for Unity projects because of its efficiency and compatibility.
Will this workflow work for Bedrock Edition models?
The workflow is generally applicable, but you may need to adjust textures and scale for Bedrock-specific pipelines.
The workflow usually applies, but check Bedrock-specific settings when exporting.
How detailed should the UVs be for a voxel model?
Aim for clean, non-overlapping UVs with consistent texel density. For stylized voxel textures, avoid excessive detail that isn’t visible at render distance.
Keep UVs clean and consistent to avoid texture blur or seams.
Can I reuse textures across blocks to save time?
Yes, reusing textures across similar blocks helps keep the look cohesive and reduces material count in the engine.
Yes, reuse textures where possible to streamline the workflow.
What is the biggest pitfall for beginners?
Inconsistent scale and misaligned UVs are common issues. Start with a small test and validate results frequently.
The main pitfall is scale and UV misalignment; test early.
Watch Video
The Essentials
- Plan your pipeline before starting
- Choose a single export format aligned with your engine
- Keep textures consistent to prevent seams
- Validate scale and orientation in the target environment
- Iterate and document for future projects