How to Make an Anvil in Minecraft: A Complete Guide
Learn how to craft and use an anvil in Minecraft. This guide covers materials, setup, step-by-step crafting, and advanced tips for repairs, renaming, and combining enchantments.

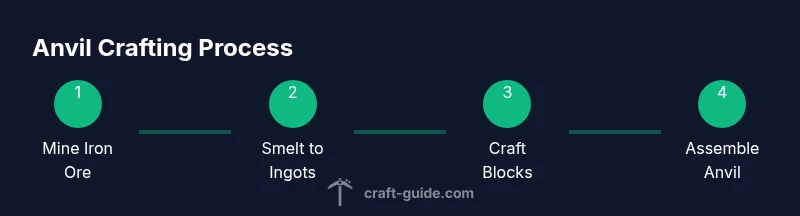
You can craft an anvil in Minecraft by using 31 iron ingots. First smelt iron ore to ingots, then craft 3 iron blocks and 4 more ingots, and finally place these in a 3x3 crafting grid to produce the anvil. You'll need a crafting table and a furnace to complete the process.
What is an Anvil and Why It Matters
In Minecraft, an anvil is a durable, multi-purpose workstation that lets you repair gear, rename items, and combine enchantments. For the task of how to make anvil minecraft, understanding its role helps you plan resource paths and workshop design. According to Craft Guide, anvils save time and extend tool life, making them essential for mid- to late-game play. The Craft Guide team found that strategic use of an anvil reduces material waste when you’re grinding through durability costs. This section establishes the purpose and how anvil use fits into broader gameplay, so you can decide when to build one in your world.
Why you’ll want an anvil early or later
- Repair durability without losing your best gear
- Rename items for clarity and inventory organization
- Combine enchantments to create powerful, customized tools
When you’re planning your craft, keep in mind that anvils are resource-intensive. You’ll want to set a clear goal (e.g., preserving a high-durability sword) before investing to avoid unnecessary material drain. Craft Guide emphasizes balancing early-game needs with mid-game progression to maximize return on your iron investments.
Material and Tools You Need
Before you begin, verify you have the essentials to execute the how to make anvil minecraft plan. The following list outlines minimal requirements and a few optional upgrades that make the process smoother.
- Crafting Table (required): Access a 3x3 crafting grid.
- Furnace (required): Smelt iron ore into ingots; essential for producing the raw material.
- Iron ore (required): Source iron by mining underground.
- Coal or other fuel (required): Power your furnace.
- Iron ingots (required): You’ll accumulate 31 ingots in total (from smelted ore) to complete the recipe.
- Iron blocks (required): Crafted from ingots, used in the top row of the recipe. Optional variations exist in which you can substitute ingots for blocks depending on your plan.
- Anvil (not yet crafted, required as the final product): The goal of this workflow is to create this block device.
Note: You can source all iron through mining and smelting. Crafting blocks is simply a way to use ingots efficiently in the final recipe. Keep a steady fuel source to keep your smelting workflow smooth.
Sourcing Iron: From Ore to Ingots
The iron-forging path starts with mining ore and turning it into ingots. Iron ore is common in underground biomes and can be found between Y-levels 0 and 64, with higher concentrations near certain cave systems. Once mined, ore must be smelted in a furnace with fuel (coal, charcoal, or other burnable items) to produce iron ingots. In modern gameplay, managing your iron economy is a skill worth cultivating: plan mining trips, maintain multiple furnaces for parallel smelting, and keep a small stockpile of coal to avoid slowdowns. Craft Guide Analysis, 2026, shows that players who pre-smelt ore into ingots before crafting blocks tend to complete the anvil build faster and with less inventory churn. Always smelt enough ingots to craft at least three iron blocks plus the four additional ingots needed for the final recipe.
A practical tip is to mine iron in shallow, extended caverns early on, then stockpile ingots in a chest near your workshop. This reduces travel time later when you switch to crafting the blocks and assembling the final recipe. Remember to keep safety in mind: light up tunnels to prevent hostile mob spawns during mining sessions.
Crafting Environment: Setup and Safety
Your crafting environment should be clean, well-lit, and near your mining or resource-processing area. A dedicated crafting station reduces travel time between steps and helps you maintain a steady iron ingot flow. Place your crafting table and a furnace in a flat, sheltered space to minimize risk and accidental item losses. If you’re building in a survival world, consider using a protected area with a door or wall to keep curious mobs away while you work. Crafting the three iron blocks and gathering four additional ingots goes faster when you have a stable, organized workspace.
To optimize safety and efficiency, set up a small, dedicated fuel supply (a chest with coal or charcoal). This allows you to keep the furnace running while you craft blocks and ingots. If you play on a speed-run server or a seed with abundant ore, you can scale your setup to produce ingots more quickly, but always keep a safety buffer for unplanned fights or mining detours.
Step-by-Step Crafting Process (High-Level Overview)
The detailed, step-by-step instructions are provided in the dedicated STEP-BY-STEP section below, but here’s a high-level overview to help you plan. First, collect and smelt enough iron ore to obtain at least 31 iron ingots. Next, craft 3 iron blocks from ingots. Finally, arrange the 3 blocks and the 4 ingots in the exact 3x3 crafting grid pattern to produce the anvil. The shape and exact placement matter, so follow the steps closely in the next section. This overview emphasizes planning and forethought—avoid starting only with ingots and no blocks, as the final recipe relies on using blocks in the top row and ingots for the remaining slots.
Using Your Anvil: Repairs, Renaming, and Merges
Once your anvil is in place, you can use it to repair damaged items, rename you equipment, and merge enchantments from different items. Repairs cost experience levels, so bring a steady supply as you work on gear. Renaming adds personality and helps you keep track of tools and weapons in your base. Merging enchantments can create powerful combinations, but be mindful of the anvil’s increasing cost with each subsequent operation on the same item. Craft Guide notes that planning ahead—deciding which items to repair and which to enchant—helps you avoid unnecessary level drain and resource waste.
To begin, place the item to repair or enchant in the anvil’s input slot, then add the second item or enchantment in the second slot. Confirm the cost in levels and take only what you need. If you want to rename an item, use the rename box; this does not affect gameplay, but it helps you manage your gear. Finally, remember that expensive repairs may be worth delaying until you gather more experience levels or find more efficient enchantments.
Efficiency and Best Practices for Iron Farming
Efficiency matters when you’re planning multiple anvils or a long-term iron workflow. A few best practices include: building a compact smelting setup with multiple furnaces to process ore in parallel, using hoppers and item sorters to keep ingots organized, and capping your iron production with a centralized storage system. If your world supports automation, you can set up a simple, safe mining rail or cave base to accelerate ore collection. Craft Guide suggests balancing resource investment with tool durability benefits; the goal is consistent, sustainable iron production rather than short-term rushes.
In practice, keep a dedicated iron flow: ore ➜ smelt ➜ ingot ➜ blocks ➜ final recipe. Document your resource counts and adjust as you gain experience; note that the cost of repairs or renaming increases over time, so plan ahead for future needs. A well-run workshop reduces wasted time and ensures you pay attention to durability versus enchantment optimization.
Common Pitfalls and How to Avoid Them
Many players stumble on the final pattern or underestimate ore requirements. Common pitfalls include miscounting the ingots, misplacing items in the crafting grid, or attempting to craft without enough fuel or a stable workspace. Another pitfall is rushing the process in the early game, which leads to inefficient use of enchantments and materials. To avoid these issues: plan your ore collection in advance, confirm the top-row pattern with every attempt, and keep a dedicated fuel stock near the furnace. Craft Guide recommends testing your pattern with a spare set of ingots and blocks before committing the full 31 ingots in a single attempt. This minimizes waste and ensures you refine your process.
Creative Uses and End-Game Builds with Anvils
Anvils aren’t just for repairs. They also enable advanced crafting workflows in builds and redstone projects. You can use anvils to rename tools for organization in large bases, merge enchantments to maximize tool efficiency, and create meaningful progression milestones within your world. In aesthetics builds, anvil placement can emphasize a medieval workshop or blacksmith’s shop, adding realism and function to your design. As you explore, consider pairing an anvial with other crafting furniture—workbenches, grindstones, and smithy areas—to complete your base’s vibe. Craft Guide’s perspective is to blend practical utility with creative expansion, so think about how you’ll incorporate anvil-based workflows into your broader Minecraft goals.
Tools & Materials
- Iron ore(Mine and smelt to iron ingots)
- Furnace(Smelt ore into ingots)
- Coal or other fuel(Power your furnace)
- Crafting Table(Access a 3x3 crafting grid)
- Iron ingots (31 total)(From smelted ore; used for blocks and ingots in the recipe)
- Iron blocks (3)</name>(Crafted from ingots; used in the final recipe)
Steps
Estimated time: Total: 15-30 minutes (variable by mining speed and player efficiency)
- 1
Mine iron ore
Search underground environments for iron ore veins. Use an iron or better pickaxe to maximize ore drops. Collect enough ore to fuel a full smelting run. Plan a mining trip if your current stock is low.
Tip: Bring a furnace and some fuel so you can start processing ore immediately. - 2
Smelt iron ore into ingots
Place ore in a furnace with coal or charcoal. Wait for the smelting process to yield iron ingots. Collect all ingots and keep a small reserve for future steps.
Tip: Keep extra fuel handy to keep a steady smelting rhythm. - 3
Craft iron blocks
Open a crafting table, place 9 ingots in a 3x3 grid to produce 1 iron block. Repeat to make 3 blocks needed for the top row of the recipe.
Tip: Craft blocks in batches to minimize trips between crafting and inventory. - 4
Gather the remaining ingots
You’ll need 4 additional ingots to reach 31 total. Ensure you have all 31 ingots before starting the final recipe.
Tip: Double-check your count to avoid a mid-caste halt. - 5
Set up the crafting grid (3x3)
Open the crafting table and prepare the grid to match the anvil pattern. Place the three iron blocks on the top row and arrange the four ingots in the remaining slots.
Tip: The pattern requires precise placement; misalignments will waste resources. - 6
Craft the anvil
Retrieve the finished anvil from the result slot. Inspect for any crafting errors and place the new tool in your base near your workshop.
Tip: If the grid isn’t producing, re-check the pattern for accuracy. - 7
Place the anvil
Choose a sturdy block in your base to place the anvil. A solid floor or wall mount helps stabilize use and survival in combat situations.
Tip: Avoid placing on unstable blocks or near water to prevent accidental falls. - 8
Use the anvil for repairs and renaming
To repair, rename, or combine enchantments, place items in the input slots and confirm the level cost. Plan edits to avoid excessive experience loss.
Tip: Renaming can help organization, especially in large bases. - 9
Maintain and upgrade your setup
Keep your iron production steady, store ingots in a secure chest, and upgrade your workshop with additional furnaces or hoppers to automate parts of the process.
Tip: Automation reduces repetitive tasks and frees you for exploration.
People Also Ask
What is the purpose of an anvil in Minecraft?
Anvils are used to repair items, rename tools, and merge enchantments. They centralize durability management and allow you to optimize equipment for long adventures.
Anvils repair, rename, and combine enchantments for better gear.
How many ingots are needed to craft an anvil?
Crafting an anvil requires 31 iron ingots, typically organized as 3 iron blocks and 4 additional ingots in the final recipe.
You need 31 iron ingots in total to craft an anvil.
Can I use iron ingots directly in the recipe instead of blocks?
Yes, you can use ingots in the recipe, but the official pattern uses three blocks plus four ingots. You’ll need to prepare both forms to complete the craft.
The recipe uses blocks plus ingots; plan to make blocks from ingots.
Is it more efficient to repair tools or replace them?
Repairing saves resources but increases experience costs. Consider enchantments and durability before committing to frequent repairs.
Repair when durable gear is worth saving; otherwise replace with smarter upgrades.
Where should I place the anvil in my base?
Place the anvil on solid ground, near your work area, to minimize effort when repairing or renaming items.
Put it on a solid surface near your crafting station for easy access.
Watch Video
The Essentials
- Plan iron flow: ore → ingots → blocks → final recipe
- Three main steps: gather, craft blocks, assemble pattern
- Anvils enable repairs, renaming, and enchantment merging
- Match the exact grid pattern to craft the final anvil
- Organize your workshop for efficiency and safety