How to Know When Wheat is Ready in Minecraft
Learn to identify fully grown wheat in Minecraft, and master efficient farming with hydration, lighting, bone meal, harvesting, and replanting strategies for sustainable survival farming.

Wheat is ready to harvest when the crop is fully grown and turns golden. Mature stalks drop wheat and seeds when broken by hand or with tools. Keep farmland hydrated and well-lit to support ongoing growth, and harvest promptly to maximize drops.
Understanding Wheat Growth in Minecraft
Knowing how wheat grows is the first step toward reliable farming in Minecraft. Wheat starts from a seed and progresses through several growth stages as it consumes light, water, and a stable farmland surface. When you search for how to know if wheat is ready minecraft, you’ll find that the quickest visual cue is color: healthy, mature heads shift from green to a pale golden hue. In practical terms, a fully grown head indicates you can harvest for wheat and seeds. Craft Guide’s approach emphasizes aligning your farming setup with the crop’s natural rhythm: tilled soil, nearby water, and consistent light all work together to keep crops progressing through growth stages.
Growth Stages and Visual Cues
Wheat progresses through multiple growth stages, and the final stage is the one that signals readiness. Dark green stalks transition to lighter shades of gold as the crop matures, and the heads become fuller and more pronounced. Unlike some crops, Minecraft wheat doesn’t require precise scripting to indicate maturity; the visual change is reliable when you’ve provided adequate light and hydration. For players asking how to know if wheat is ready minecraft, the telltale sign is golden heads standing on tilled farmland. Harvesting at this point yields wheat and seeds, which can be replanted to start another cycle.
Setting Up a Wheat Farm: Ground Rules
A well-designed wheat farm begins with good soil and proper hydration. Till dirt blocks to create farmland, and ensure there is a water source within four blocks to keep the soil hydrated so crops can grow. This setup is essential because dry soil slows growth and can halt progress, especially in larger farms. In addition to hydration, arranging the tiles so you have easy access for planting and harvesting saves time during multiple cycles. Craft Guide stresses that a tidy layout reduces mistakes and improves overall yield efficiency.
Lighting and Hydration: The Growth Environment
Crops need light to grow, and wheat responds best when exposed to consistent illumination. Place torches or other light sources around your farm to prevent growth from stalling during night cycles or enclosed spaces. Hydration, provided by a nearby water source, helps prevent soil from drying out and ensures steady growth across the entire field. A well-lit, hydrated farm supports ongoing cycles, making it easier to know when wheat is ready minecraft and to harvest with confidence.
Bone Meal: Speeding Up Growth
Bone meal is a handy tool for accelerating crop growth when you need a quicker harvest. Apply bone meal directly to the wheat plant to advance its growth stage, though outcomes may vary and you’ll still rely on light and hydration to complete the cycle. Use bone meal strategically in situations where you’re impatient or trying to fill a growing area quickly. Craft Guide recommends keeping a small stock of bone meal for peak growth windows while maintaining the fundamentals of soil health and watering.
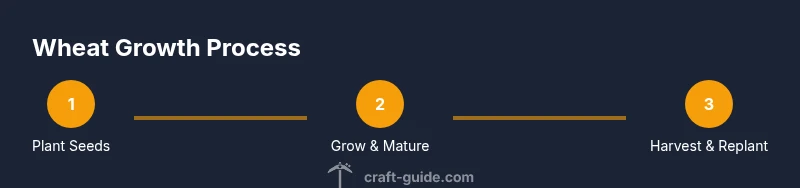
Harvesting and Replanting: The Cycle
Harvesting fully grown wheat is straightforward: break the mature heads and collect wheat and seeds. Replant seeds immediately on hydrated farmland to sustain a steady supply. This cycle—grow, harvest, replant—forms the backbone of a reliable wheat farm. If you’re organizing your operation, consider marking fields so you can quickly identify which rows are ready for harvest and which rows need more growth time. Keeping up with replanting is the key to long-term success.
Farm Layouts for Efficiency
Efficient layouts minimize travel time and maximize yields. A simple approach is long, straight rows with regular watering and accessible harvest paths. Using water channels to hydrate multiple tiles at once reduces repetitive work. For beginners, starting with a compact 5x5 or 7x7 grid helps you learn spacing, hydration range, and how light placement affects growth. As your confidence grows, expand to larger, modular blocks that mirror your world’s terrain and resources.
Common Pitfalls and Fixes
Common mistakes include planting on soil that isn’t hydrated, neglecting light, and forgetting to replant after harvest. Always check hydration before planting, ensure light sources are sufficient, and replant seeds as soon as you harvest. If crops stall, verify there’s a water source within four blocks and that no blocks are shading your plants. It’s worth inspecting for any accidental trampling—stepping on farmland can revert it back to dirt, interrupting growth.
Maintenance and Scaling Your Farm
As you expand your wheat operation, maintain consistent management routines: regularly check water sources, rotate your layout to balance sunlight, and keep spare seeds for replanting. A larger farm benefits from standardized paths, clearly separated harvest zones, and efficient compact designs to minimize walking distances. With a steady cadence of planting, tending, and replanting, you’ll build a sustainable wheat supply that supports your survival builds and various crafting needs.
Tools & Materials
- Wheat Seeds(Harvest seeds from previous crops or acquire from villages.)
- Hoe (any tier)(Till dirt blocks to create fertilized farmland.)
- Dirt or Farmland Blocks(Prepare a grid of tilled soil for planting.)
- Water Source (Bucket or Water Block)(Hydrates farmland within four blocks.)
- Light Source (Torches, Lamps)(Ensure consistent light to promote growth.)
- Bone Meal (optional)(Speeds up growth on demand.)
- Scythe or Sword (optional for quick breaking)(Not required, but can help with haste.)
Steps
Estimated time: 30-60 minutes
- 1
Till soil to create farmland
Select a patch of dirt and use your hoe to till it into farmland. Ensure the surface is flat and free of obstructions. Empty nearby blocks that could shade or crowd the area to maintain airflow and light exposure.
Tip: Be careful not to stand on farmland while it’s tilled, as it can revert back to dirt. - 2
Create a water source within reach
Place or position a water source so that every farmland tile is hydrated within four blocks. If you’re expanding, space water blocks strategically to cover more rows without creating bottlenecks.
Tip: Even a small water pool can hydrate a long row of crops efficiently. - 3
Plant wheat seeds on every tile
Hold seeds and right-click each farmland tile to plant. Make sure you have a seed for each tile to maximize yield potential from the first harvest.
Tip: Plant one seed per tile for uniform growth across the field. - 4
Light the area for growth
Place torches or other light sources around the farm so crops receive enough light even during night cycles. Avoid shading from tall structures or overhanging blocks.
Tip: Uniform lighting helps prevent slow growth or stalling at night. - 5
Wait and observe growth progression
Crops go through growth stages as time passes and conditions are met. Be patient and check periodically for signs of maturation, especially after patches of rain or night cycles that can affect timing.
Tip: Use bone meal strategically if you need to reach maturity quickly in a pinch. - 6
Harvest mature wheat
When the heads turn golden and look mature, break the full head to harvest. Collect both wheat and any seeds dropped by the crop.
Tip: Harvest promptly to maximize drop yield and enable immediate replanting. - 7
Replant harvested seeds
Plant the harvested seeds back on hydrated farmland to restart the growth cycle. Keep a seed stash so you can quickly replant as soon as you harvest.
Tip: Replanting right away keeps your production continuous. - 8
Scale your farm for larger needs
If you need more wheat, expand your farm using the same hydration and lighting principles. Regularly assess hydration coverage and fresh seeds to maintain efficiency.
Tip: Modular designs let you grow your operation gradually without sacrificing usability.
People Also Ask
What does mature wheat look like in Minecraft?
Mature wheat shows golden heads on top of the stalks, indicating it's ready to harvest. Harvesting at this stage yields wheat and seeds.
Mature wheat has golden heads and is ready to harvest.
Can bone meal speed up wheat growth?
Yes, bone meal can speed growth, but you still need adequate light and hydration to reach maturity.
Bone meal speeds growth, but light and water still matter.
Why isn't my wheat growing despite light?
Check hydration and soil status first. If the soil isn’t hydrated or torches are too far away, growth can stall.
Make sure your soil is hydrated and there’s enough light.
How do I harvest and replant quickly?
Harvest mature heads, collect seeds, and immediately replant on hydrated farmland for a continuous cycle.
Harvest mature heads and replant right away.
What are efficient designs for wheat farms?
Use orderly rows with shared water and accessible harvest paths; modular layouts scale well as you expand.
Organize rows with shared water for efficiency.
Watch Video
The Essentials
- Hydrate farmland within four blocks for steady growth.
- Harvest only when the wheat turns golden to maximize drops.
- Replant seeds immediately after harvest for continuous production.
- Maintain consistent lighting to avoid slow growth or stalls.