What Size Are Minecraft Item Textures? A Practical Guide
Discover the standard item texture sizes in Minecraft, from vanilla 16x16 sprites to higher-res resource packs, with practical tips for choosing and resizing textures.

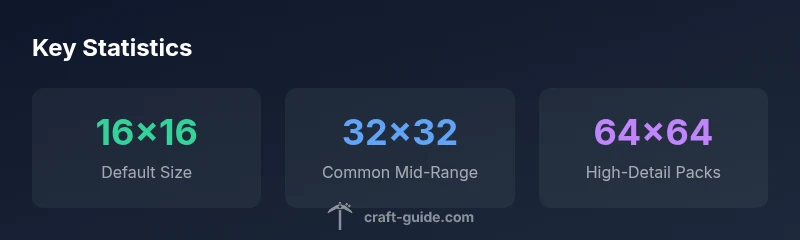
In vanilla Minecraft, item textures are 16x16 pixels by default. Resource packs can scale these textures to higher resolutions, commonly 32x32, 64x64, or larger for specialized packs. The size you choose affects inventory clarity and performance, so this guide covers how to pick a size, resize textures, and ensure compatibility with your version and mods.
Why texture size matters
Texture size matters in Minecraft because it impacts how items appear in inventories, crafting interfaces, and in-world displays. According to Craft Guide, selecting the right size is a balance between visual fidelity and performance, especially on varied hardware. The Craft Guide team found that texture size also influences how packs scale across different screen resolutions, as a larger sprite can look crisper on high-density displays while still fitting within the atlas. In practice, most players start with the vanilla baseline of 16x16, then decide whether to bump up for more detail or to match a particular art style. This section explains why size matters, how it interacts with resource packs, and what to consider when testing different scales.
Default Minecraft item textures (vanilla) explained
In vanilla Minecraft Java Edition, item textures use a 16x16-pixel sprite for each item. These textures are gathered into a compact atlas, optimized for fast rendering in the inventory grid and hotbar. Because the game uses a consistent canvas, small changes to a single item can propagate to related icons if packs are misaligned. The advantage of 16x16 textures is predictability and performance, especially on mid-range systems. The downside is limited detail on modern displays. This is where resource packs come in: they reproduce the same sprite grid but scale the image content to higher resolutions. The Craft Guide analysis notes that many players keep the vanilla look for nostalgia, while adopting higher-res packs for a crisper interface and more distinctive item visuals.
How resource packs change item texture sizes
Resource packs specify higher base textures by replacing the 16x16 images with larger versions. When you install a 32x32 pack, every item texture is stretched to fill a 32x32 area, preserving layout and atlas efficiency. Some packs include separate folder structures for each item, while others provide a direct replacement for the sprite atlas. With 64x64 packs, you gain noticeable detail that shines on large displays, but you may need to enable texture management features (like OptiFine) to avoid performance hiccups. The Craft Guide analysis shows that the most practical approach is to start with 32x32 or 64x64 in test worlds, evaluate how it affects fonts, UI scaling, and item clarity, and ensure the pack remains compatible with your version and any mods.
A quick guide to choosing the right size
Choosing the right texture size comes down to your goals and hardware. Start with these steps:
- Define your aim: nostalgia (16x16), clarity (32x32), or a stylized look (64x64+).
- Check your device: more detail costs more memory and GPU power.
- Test in a controlled world: compare inventories, toolbars, and armor icons.
- Scale gradually: move to 32x32, then 64x64 if needed.
- Confirm compatibility: ensure your mods and shaders support your texture size. This approach helps you balance aesthetics with performance and compatibility.
Technical considerations: sprites, atlas, and mipmaps
Item textures are stored in sprite atlases. If a pack uses a different size, the atlas must accommodate the new dimensions, or rendering may fail. Mipmaps reduce aliasing at distance, but for item icons in inventories, their impact is limited; some packs disable mipmaps for crisper UI. When designing textures, keep consistent tile sizes across all items to avoid misalignment. The Craft Guide analysis highlights that consistent atlas sizing reduces loading glitches and keeps inventory icons crisp across screen sizes.
Step-by-step: resizing item textures
Follow this practical workflow:
- Pick a target size (e.g., 32x32 or 64x64).
- Gather all item textures from the vanilla atlas as references.
- Use a pixel-perfect editor (Aseprite, GIMP, or Photoshop) and resize with nearest-neighbor to preserve hard edges.
- Maintain a consistent naming scheme and folder structure (assets/minecraft/textures/items).
- Update the pack.mcmeta to reflect the new texture dimensions and ensure atlas compatibility.
- Load the resource pack in Minecraft, then test several items in inventory and in-world.
- Tweak any textures that look blurry or misaligned.
Common mistakes and how to fix them
Common issues include misaligned sprites, non-square textures, and mismatched naming conventions. Resolve these by standardizing all item textures to the same dimension, re-checking the atlas layout, and verifying that each PNG uses transparent edges where appropriate. If you see gaps in the inventory or missing icons, double-check the pack's folder structure and restart the game to reload assets. The Craft Guide team emphasizes testing across multiple UI scales to catch edge cases before release.
Version and platform differences (Java vs Bedrock)
Java Edition and Bedrock Edition handle resource packs with subtle differences in atlas formats and texture loading. A size that works in Java may need adjustments for Bedrock, especially when considerations like cross-version compatibility and shader packs come into play. Always test texture packs on both editions if you intend cross-platform usage. In practice, many creators design a baseline 32x32 pack first and provide optional variants for higher resolutions to cover both platforms.
Real-world examples: popular packs and outcomes
Many builders favor mid-range scales (32x32 or 64x64) for a balance of detail and performance. This middle ground often yields crisp item icons without overwhelming the texture atlas or increasing load times excessively. Users report that 32x32 textures look clean in inventories on laptops and mid-range desktops, while 64x64 textures offer more pronounced details in themed builds or on high-DPI monitors. The key takeaway is to test in your own environment and adjust based on your target audience and hardware.
Texture size progression from vanilla to high-resolution resource packs
| Texture Type | Base Size (px) | Notes |
|---|---|---|
| Item textures (vanilla) | 16x16 | Default in Java edition; preserved in inventory and hotbar |
| Resource-pack scale (32x32) | 32x32 | Common for mid-range packs; balanced detail and performance |
| High-res packs | 64x64 | Better detail; may require OptiFine or similar optimizations |
| Ultra-high-res | 128x128 | Very detailed; hardware-dependent and less common |
People Also Ask
What is the default texture size for Minecraft items?
Minecraft items use 16x16 textures by default in Java Edition. Resource packs can change this by scaling textures. Start with 16x16 to establish a baseline, then experiment with higher sizes if you need more detail.
Minecraft items start at 16 by 16 pixels. You can add more detail by using higher-resolution packs, but start with the baseline to test performance.
Can I use higher-res textures without hurting performance?
Yes, provided your hardware can handle the increased texture memory and the pack is well-optimized. Test one scale at a time and monitor framerate and load times. If you notice stuttering, scale back to a smaller size or enable performance features.
Yes—test gradually and watch performance; if it slows down, drop to a smaller size.
What tools are best for creating item textures?
Use pixel-art editors like Aseprite, GIMP, or Photoshop. Save textures as PNGs with transparent backgrounds and consistent color palettes. Maintain a uniform border and avoid bleeding into adjacent sprites.
Try Aseprite or GIMP for pixel art, save as PNGs with transparent backgrounds.
Are Bedrock and Java texture sizes interchangeable?
Not always. Bedrock and Java editions have different resource-pack formats and atlas expectations. If you plan cross-platform use, provide separate packs or verify the shared assets closely.
They aren’t always interchangeable—check both editions if you need cross-platform compatibility.
How do I test a texture pack quickly?
In Minecraft, enable the resource pack in Options > Resource Packs, then reload textures and inspect inventory icons, hotbars, and item appearances in-game. Repeat with different sizes to compare clarity and performance.
Enable the pack in Options, reload textures, and compare item visuals in-game.
“Texture size is a balance between clarity and performance, especially for inventory UI.”
The Essentials
- Test baseline textures with 16x16
- Increase size gradually to 32x32 or 64x64
- Test performance on your hardware and version
- Match resource pack settings to your edition
- Avoid atlas mismatches by consistent sprite sizes