Minecraft Kitchen Builds: A Practical Builder's Guide
Learn to design and build a functional kitchen for Minecraft, with stove setups, storage, lighting, and dining areas. This step-by-step guide covers materials, layout, and realism to elevate your kitchen builds in any world.

In this guide you will learn how to create a functional kitchen for minecraft, including stove setups, storage, and a dining nook. You’ll need common materials like wood, stone, and iron, plus furnaces, chests, cauldrons, and a water source. The result is a practical, visually appealing kitchen you can replicate in any world.
Planning the Kitchen Layout
Designing a kitchen for minecraft begins with layout. Visualize three core zones: prep, cooking, and clean-up/storage. In a compact space you might allocate a 5x7 block footprint for a cozy, functional kitchen, while a larger world allows an expansive, multi-zone setup. Consider traffic flow: keep doors and pathways clear, and place the dining area adjacent to the prep zone for easy service. For a cohesive look, pick a color palette and texture set that matches your base build. The phrase kitchen for minecraft can guide your choices, helping you balance practicality with aesthetics. Keeping scale consistent across materials (stone, wood, and metal accents) makes the kitchen feel intentional rather than improvised. Craft Guide suggests planning in advance and testing spacing in Creative mode before you commit to survival resource collection.
Core Cooking Stations: Stove, Oven, and Smoker
The heart of any kitchen is the cooking station. In Minecraft you simulate a stove with furnaces or smokers, paired with countertops made from slabs or stone bricks. A single furnace can function as a burner when placed with a compact exhaust area using grilled iron bars or trapdoors for a vented look. For a more advanced setup, add a smoker to imply faster cooking. Use a consistent arrangement—one row for burners, one row for prep, and a back wall of shelving—to keep the space readable at a glance. This section of a kitchen for minecraft emphasizes function first, then style; the goal is believable, repeatable setups that players can replicate in their worlds. Craft Guide notes that modular cooking stations scale well for larger builds and easier future updates.
Storage and Pantry Design
Storage is the backbone of a realistic kitchen. Use a combination of chests, barrels, and slabs to create open-shelving and hidden pantry compartments. Label shelves with item frames and dyes for color accents, which adds character while keeping pickups organized. For a modern look, stack chests with slabs as a faux “cupper” or countertop edge. When possible, align storage with the cooking zone to minimize walking distance during gameplay. A well-planned pantry reduces clutter and improves in-world efficiency, making your kitchen for minecraft feel like a lived-in space rather than a decorative set. Craft Guide recommends grouping similar items together and reserving a dedicated dump zone for items you frequently use in redstone-enabled builds.
Countertops, Sinks, and Water Features
Countertop materials influence the kitchen’s tone. Stone bricks, polished diorite, or quartz give clean lines, while dark oak or spruce planks add warmth. Since Minecraft lacks real plumbing, simulate a sink with a cauldron filled with water and a small faux drain created from a fence gate and iron bars. Place a water source next to the sink area so you can “wash” items as you play. A raised countertop edge using slabs helps define working space and prevents accidental item drops. Lighting around the counter area should be bright enough to show every detail, but soft enough to feel inviting during long play sessions. This combination of countertop material and water features reinforces the kitchen for minecraft aesthetic Craft Guide champions—the balance of form and function.
Lighting, Color, and Atmosphere
Lighting sets the mood and usability of your kitchen. Use a mix of warm torches or lanterns with under-shelf lighting (glowstone or sea lanterns) to highlight work zones. Color blocking—matching the cabinet tones to the floor and wall blocks—gives a cohesive appearance. Consider higher ceilings and a central chandelier made from fence posts, glass panes, and lanterns for a showpiece element. Don’t forget practical lighting for the cooking station and prep area; bright, even lighting helps you see clearly while crafting or cooking. The kitchen’s atmosphere should invite players to cook and decorate, reinforcing kitchen for minecraft as a social and creative space.
Dining Area and Accessibility
A compact dining nook adjacent to the kitchen boosts usability in survival or creative worlds. Use a table built from slabs and trapdoors, with chairs fashioned from stairs or small blocks. Ensure there’s a clear pathway from the cooking station to the dining area and back to storage. Accessibility matters: avoid overhangs that block movement and consider placing a double door near the entry for easy access. In larger builds, create a separate dining hall that mirrors the kitchen’s materials for a cohesive, well-proportioned space. Craft Guide highlights that accessibility and flow fuel enjoyment in any kitchen for minecraft project.
Decorative Details: Materials and Textures
Texture and material choices drive realism. Alternate between warm woods and cool stones to create contrast. Add open shelving with carpeted backs or item frames to display cookware, dried herbs (dyed items), and glassware. Incorporate small decorative touches like a fruit bowl (carved pumpkins or melons) and a rug made from wool blocks near the dining area. Keep a consistent grain direction for wood blocks to avoid a choppy look. These details turn a functional space into a believable kitchen that players love to build and show off in their worlds.
Practical Build Variations for Different Worlds
Not every build needs the same footprint. In tight spaces, create a compact L-shaped kitchen with a single cooking station and vertical storage. For larger worlds, implement a full kitchen suite with multiple cooking bays, an enhanced pantry, and a dining hall. In creative servers, you can experiment with glass walls and bright colors; in survival, prioritize resource-efficient blocks and compact wiring for lighting. The kitchen for minecraft concept scales with your world size, allowing you to replicate a rustic cabin, modern loft, or medieval tavern using the same core principles.
Functionality and Playability: Tips for Realistic Use
The true test of a kitchen is how it performs in play. Place frequently used items within arm’s reach, set up quick-dump zones for raw materials, and keep your pathways clear. Use carpets to simulate floor mats and ease mob navigation with adequate lighting. If you’re integrating redstone, automate simple tasks like lighting or item transport between a pantry and cooking station. Finally, test your layout by walking through the space as a player would, making sure all actions feel natural and efficient. A well-designed kitchen for minecraft enhances gameplay as much as aesthetics, and Craft Guide encourages iterative testing to refine every build.
Tools & Materials
- Oak Wood Planks(Base cabinets, countertops, and paneling)
- Stone Bricks(Countertops and wall accents for a clean look)
- Polished Diorite or Quartz(Accent surfaces for modern kitchens)
- Furnaces(Stove burners (use as cooking units))
- Smokers(Faster cooking and a denser look for ovens)
- Chests(Storage and pantry organization)
- Barrels(Additional storage with a rustic feel)
- Cauldrons(Sinks for the kitchen aesthetic)
- Water Source Block(Simulated sink water supply)
- Trapdoors(Vent details and cabinet edges)
- Wooden Slabs(Counter edges and seating surfaces)
- Glass Panes(Shelving or display borders)
- Lanterns or Glowstone(Task lighting and ambience)
- Item Frames(Labeling and display items)
- Crafting Table(Workspace and toolset)
Steps
Estimated time: 50-75 minutes
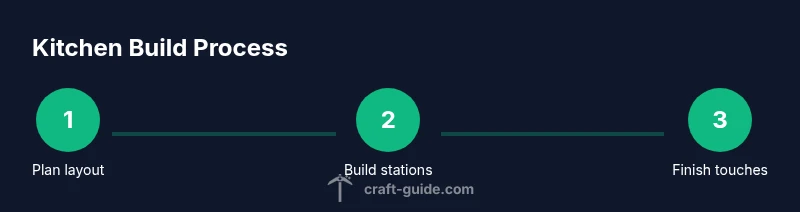
- 1
Plan layout
Decide the kitchen footprint and zones (prep, cook, storage). Sketch a simple grid to ensure all stations are reachable in a few steps. Map doorway locations and dining placement before placing blocks.
Tip: Mark reach distances in your plan; ensure a straight route from stove to pantry to sink for smooth gameplay. - 2
Lay base and countertops
Build a stable floor and install countertops using stone bricks or slabs. Create a defined edge with slabs to prevent items from slipping off work surfaces.
Tip: Keep countertop heights consistent with your character’s eye level for comfortable interactions. - 3
Install cooking stations
Place a furnace as a burner and optionally add a smoker for a second station. Position them with a back wall of cabinets to visually separate cooking from prep.
Tip: Group a single water source near the sink for quick item rinsing in your play loop. - 4
Create storage and pantry
Add stacked chests and shelves near the prep zone. Use item frames to label contents and keep frequently used items within arm’s reach.
Tip: Prioritize vertical storage to maximize small spaces and reduce walk time. - 5
Add sink and water features
Place a cauldron as the sink and connect it to a water source nearby. Use a frame or trapdoors to simulate a bowl or dish area.
Tip: Ensure water blocks don’t flood nearby storage or block pathways. - 6
Lighting and ambiance
Install bright, even lighting around work zones; use lanterns or glowstone to avoid mobs while preserving mood.
Tip: Balance warm and cool light to enhance textures and materials. - 7
Dining area and accessibility
Create a cozy dining nook adjacent to the kitchen. Use benches or chairs made from stairs with a simple table.
Tip: Leave clear paths for movement; avoid obstructing chests or doors. - 8
Finishing touches and testing
Add decorative elements and test the workflow by simulating cooking and cleaning tasks. Adjust spacing if needed.
Tip: Test multiple players walking through the space to ensure smooth interaction.
People Also Ask
What is the best block for countertops in Minecraft?
Stone bricks or smooth stone slabs provide a clean, realistic countertop. They are durable and easy to craft, making them ideal for a kitchen build.
Stone bricks or smooth stone slabs give you a clean countertop look that’s easy to craft and fits most kitchens.
How do you simulate a sink in Minecraft?
Use a cauldron filled with water as a sink, and add a small border with iron bars or trapdoors to imply a drain. It looks convincing without real plumbing.
A cauldron with water acts as a sink, with a border to suggest a drain.
Can I use redstone for kitchen automation?
Yes, you can automate simple tasks like lighting or conveyor-like item transport between pantry and cooking stations. Start with a basic daylight sensor or lever-controlled lights.
Redstone can automate lighting and simple chores in your kitchen, starting with basic sensors.
What materials look best for a modern kitchen?
Stone bricks, quartz, or concrete in neutral tones work well. Pair with warm lighting and glass accents to balance modern and cozy.
Quartz or stone bricks with neutral tones look great in modern kitchens.
Is this suitable for survival mode?
Yes. All proposed blocks are craftable in survival, just plan resource gathering and keep the design compact for efficiency.
You can build this in survival by gathering materials and sticking to a compact layout.
How can I scale a kitchen for a large build?
Use modular blocks: replicate a standardized kitchen module and connect with corridors. This keeps the design consistent and scalable.
Scale by adding modular units that match the original design.
Watch Video
The Essentials
- Plan layout first, then build for efficiency
- Use furnaces as stoves and smokers as ovens for realism
- Keep textures cohesive for a believable Minecraft kitchen
- Design modular units for easy expansion and upgrades